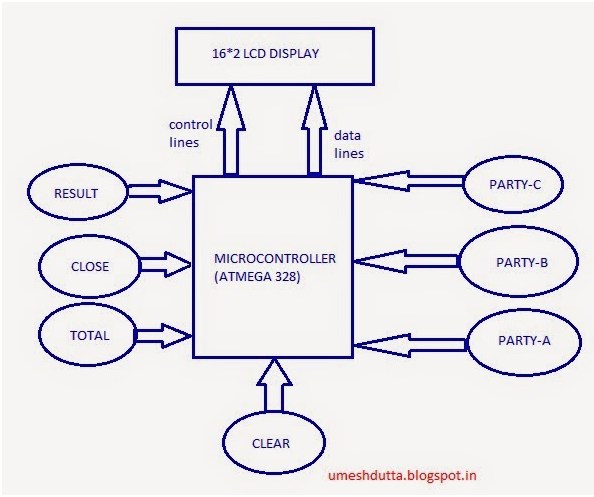
Basically, EVM is divided into two parts namely Control Unit and Ballot Unit. The former stores all the votes in the memory; is battery operated and contains all important buttons like result, close, print, clear. While the latter contains buttons of the contesting parties and both of them are connected using a connecting cable.

In the above diagram, left sided three buttons are for the contesting parties to which voters can use these buttons to cast their vote. These buttons are accessible to the voters but other buttons are not. In the right side, the total button is pressed to count the total number of votes that are polled so far while the close button closes the voting process as the left sided buttons become ineffective. After pressing the close button, one can access the Result button to check the results of the poll, which tells the exact number of votes casted for each contesting parties.
Further, the machine is programmed in a manner that not only informs about the vote differences between the parties but if there is a tie, the machine shows the tie result on the LCD screen. Further, total votes counted is saved in the chip EEPROM of the Arduino, which acts as a savior during power cuts and helps to continue the voting like it was in the previous state.
In the circuit diagram, all the buttons are connected to the digital pins of the Arduino except for Clear button, which is connected to analog pin A0. An LCD display is also interfaced with Arduino for displaying information to the user. The entire software code of the Electronic Voting Machine is provided on the website along with the greater details.
Filed Under: Reviews


Questions related to this article?
👉Ask and discuss on EDAboard.com and Electro-Tech-Online.com forums.
Tell Us What You Think!!
You must be logged in to post a comment.