In this project, we will design a simple application using a 3.5-inch TFT LCD that displays different kinds of graphics and text messages with Arduino.
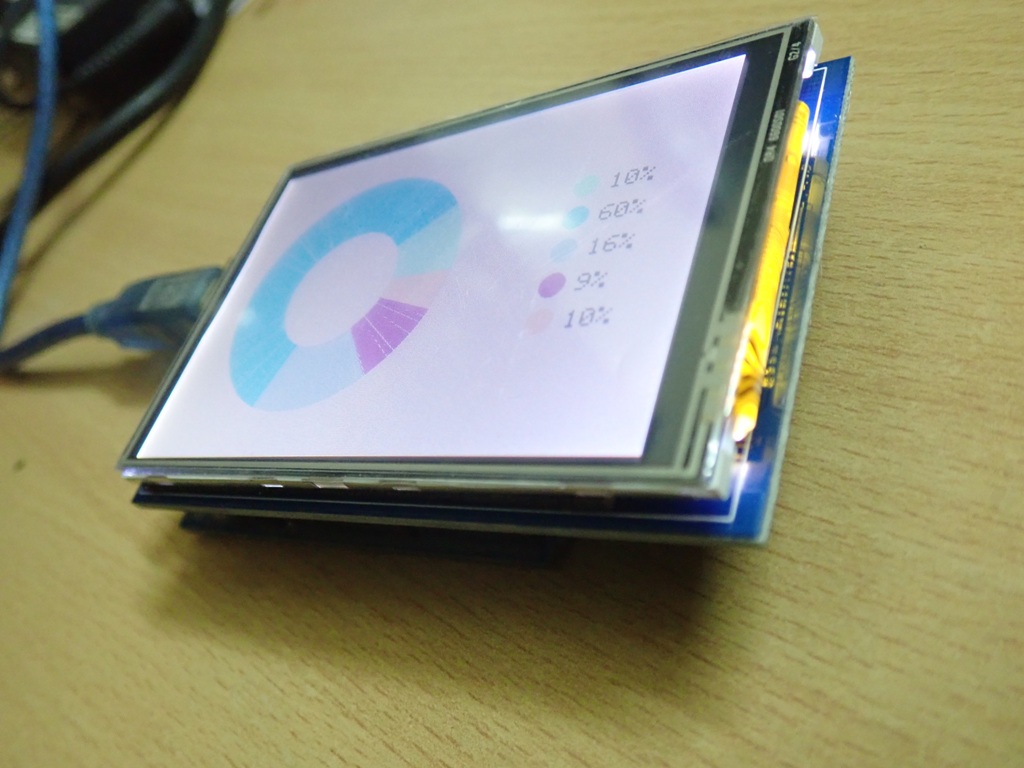
TFT LCDs are the most popular color displays – the displays in smartphones, tablets, and laptops are actually the TFT LCDs only. There are TFT LCD shields available for Arduino in a variety of sizes like 1.44″, 1.8″, 2.0″, 2.4″, and 2.8″. Arduino is quite a humble machine whenever it comes to process or control graphics. After all, it is a microcontroller platform, and graphical applications usually require much greater processing resources. Still, Arduino is capable enough to control small display units. TFT LCDs are colorful display screens that can host beautiful user interfaces.
Most of the smaller TFT LCD shields can be controlled using the Adafruit TFT LCD library. There is also a larger TFT LCD shield of 3.5 inches, with an ILI9486 8-bit driver.
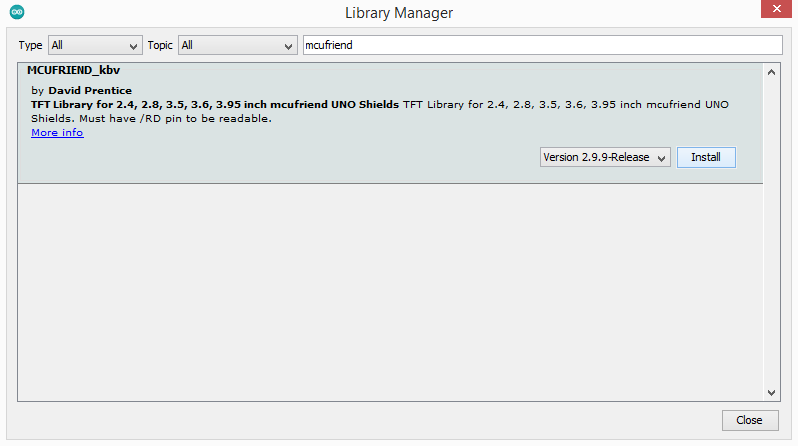
The Adafruit library does not support the ILI9486 driver. Actually, the Adafruit library is written to control only TFT displays smaller than 3.5 inches. To control the 3.5 inch TFT LCD touch screen, we need another library. This is MCUFRIEND_kbv. The MCUFRIEND_kbv library is, in fact, even easier to use in comparison to the Adafruit TFT LCD library. This library only requires instantiating a TFT object and even does not require specifying pin connections.
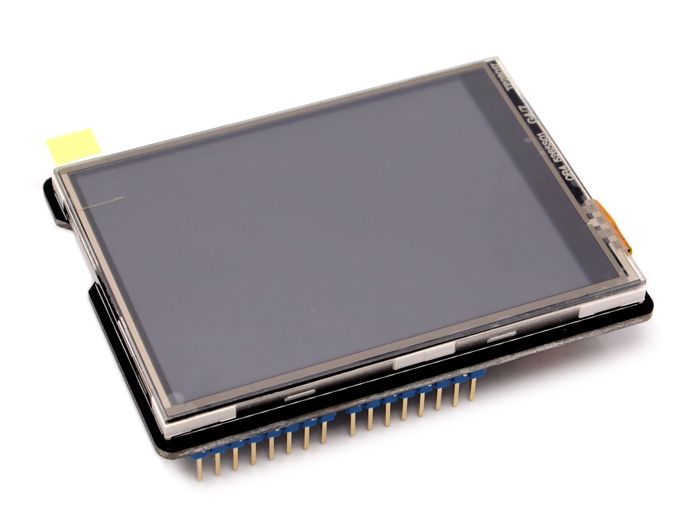
The 3.5 inch TFT LCD touch screen is almost the size of Arduino UNO, and atop the Arduino board, the shield looks really glamorous.
The 3.5 inch TFT LCD can be used for a number of applications like –
- To display text and fonts.
- To display interactive graphics and figures.
- To display bitmap images.
- To display photos and RGB color images.
- To use as a touch screen.
- To host graphical interfaces with touch input.
- To access digital signatures.
- To host video games with touch input.
- To host touch input applications like paint and calculator.
What do you need?
- Arduino UNO/Mega2560/Leonardo/Due/Zero/MO-Pro x1
- 3.5 inch TFT LCD Touch Screen Shield
TFT LCDs for Arduino
User interfaces are an essential part of any embedded application. The user interface enables any interaction with the end-user and makes possible the ultimate use of the device. The user interfaces are hosted using a number of devices like seven-segments, character LCDs, graphical LCDs, and full-color TFT LCDs. Out of all these devices, only full-color TFT displays are capable of hosting sophisticated interfaces. A sophisticated user interface may have many data fields to display or may need to host menus and sub-menus or host interactive graphics. A TFT LCD is an active matrix LCD capable of hosting high-quality images.
Arduino operates at low frequency. That is why it is not possible to render high-definition images or videos with Arduino. However, Arduino can control a small TFT display screen rendering graphically enriched data and commands. By interfacing a TFT LCD touch screen with Arduino, it is possible to render interactive graphics, menus, charts, graphs, and user panels.
Some of the popular full-color TFT LCDs available for Arduino include 3.5″ 480×320 display, 2.8″ 400×200 display, 2.4″ 320×240 display and 1.8″ 220×176 display. A TFT screen of appropriate size and resolution can be selected as per a given application.
If the user interface has only graphical data and commands, Atmega328 Arduino boards can control the display. If the user interface is a large program hosting several menus and/or submenus, Arduino Mega2560 should be preferred to control the TFT display. If the user interface needs to host high-resolution images and motions, ARM core Arduino boards like the DUE should be used to control the TFT display.
MCUFRIEND_kbv library
Adafruit TFT LCD library supports only small TFT displays. For large TFT display shields like 3.5-inch, 3.6-inch, 3.95-inch, including 2.4-inch and 2.8-inch TFT LCDs, MCUFRIEND_kbv library is useful. This library has been designed to control 28-pin TFT LCD shields for Arduino UNO. It also works with Arduino Mega2560. Apart from UNO and Mega2560, the library also supports LEONARDO, DUE, ZERO, and M0-PRO. It also runs on NUCLEO-F103 and TEENSY3.2 with Sparkfun Adapter. The Mcufriend-style shields tend to have a resistive TouchScreen on A1, 7, A2, 6 but are not always in the same direction rotation. The MCUFRIEND_kbv library can be included in an Arduino sketch from the library manager.
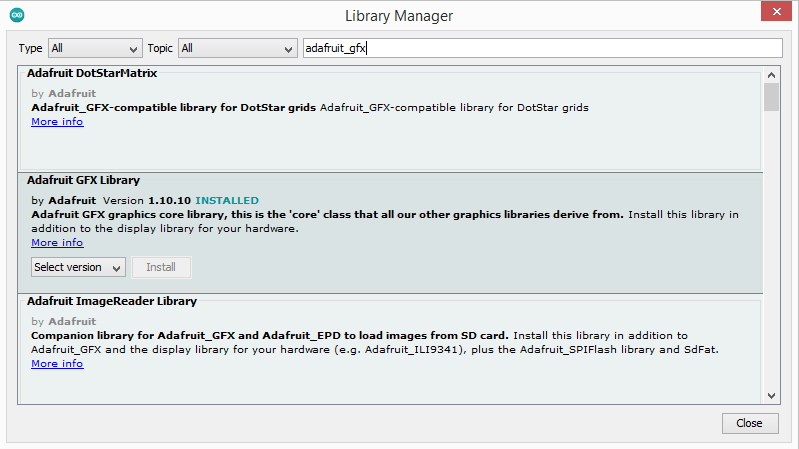
The sketch will also need the Adafruit_GFX library to draw text and graphics on the TFT display.
Circuit connections
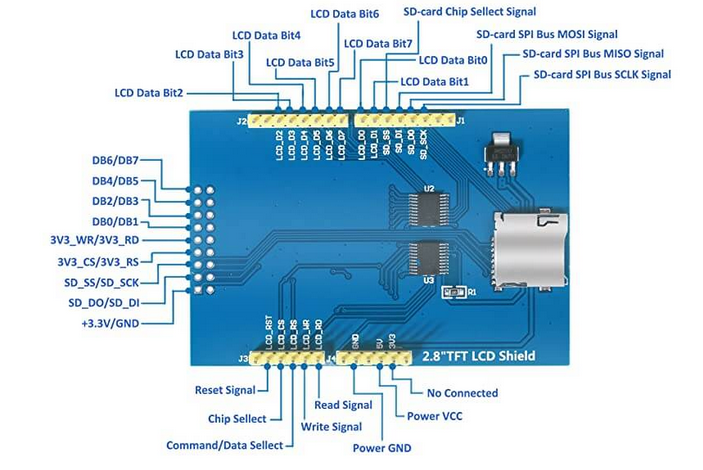
The 3.5-inch TFT LCD shield needs to be plugged atop the Arduino board. The Mcufriend-style shields are designed to fit into all the above-mentioned Arduino boards. The shields have a TFT touch screen that can display colorful images and interfaces and a micro SD card reader to save images and other data. A 3.5-inch TFT LCD touch screen has the following pin diagram.
Programming guide
In the Arduino sketch following libraries need to be essentially included.
#include “Adafruit_GFX.h”#include “MCUFRIEND_kbv.h”
The following libraries can be included depending upon their requirement in the application.
#include “TouchScreen.h” // only when you want to use touch screen
#include “bitmap_mono.h” // when you want to display a bitmap image from library
#include “bitmap_RGB.h” // when you want to display a bitmap image from library
#include “Fonts/FreeSans9pt7b.h” // when you want other fonts
#include “Fonts/FreeSans12pt7b.h” // when you want other fonts
#include “Fonts/FreeSerif12pt7b.h” // when you want other fonts
#include “FreeDefaultFonts.h” // when you want other fonts
#include “SPI.h” // using sdcard for display bitmap image
#include “SD.h”
First of all, an object of the MCUFRIEND_kbv class needs to be instantiated to provide SPI communication between LCD and Arduino.
MCUFRIEND_kbv tft;
To start the TFT LCD, its ID needs to be read and supplied to begin() method.
uint16_t ID = tft.readID();
tft.begin(ID);
The resolution of the TFT screen can be determined using the following code.
screen_width = tft.width(); //int16_t width(void);
Serial.print(“TFT LCD Screen Width: “);
Serial.println(screen_width); screen_height = tft.height(); //int16_t height(void);
Serial.print(“TFT LCD Screen Height: “);
Serial.println(screen_height);
The color of the screen can be set using the following method.
tft.fillScreen(t); //fillScreen(uint16_t t);
This method can be passed any of the following arguments.
#define BLACK 0x0000
#define NAVY 0x000F
#define DARKGREEN 0x03E0
#define DARKCYAN 0x03EF
#define MAROON 0x7800
#define PURPLE 0x780F
#define OLIVE 0x7BE0
#define LIGHTGREY 0xC618
#define DARKGREY 0x7BEF
#define BLUE 0x001F
#define GREEN 0x07E0
#define CYAN 0x07FF
#define RED 0xF800
#define MAGENTA 0xF81F
#define YELLOW 0xFFE0
#define WHITE 0xFFFF
#define ORANGE 0xFD20
#define GREENYELLOW 0xAFE5
#define PINK 0xF81F
The following method is used to set the cursor position on TFT LCD.
tft.setCursor(x,y); //setCursor(int16_t x, int16_t y)
The following methods are used for setting text color.
tft.setTextColor(t); //setTextColor(uint16_t t)
tft.setTextColor(t,b); //setTextColor(uint16_t t, uint16_t b)
The following method is used to set text size.
tft.setTextSize(s); //setTextSize(uint8_t s)
The following methods are used to display text on the TFT LCD.
tft.write(c); //write(uint8_t c)
tft.println(“www.Electropeak.com”);
tft.print(“www.Electropeak.com”);
The drawPixel function fills a pixel in x and y location by t color. The readPixel function read the color of a pixel in x and y location.
tft.drawPixel(x,y,t); //drawPixel(int16_t x, int16_t y, uint16_t t)
tft.readPixel(x,y); //uint16_t readPixel(int16_t x, int16_t y)
The drawFastVLine function draws a vertical line that starts in x, y location, and its length is h pixel and its color is t. The drawFastHLine function draws a horizontal line that starts in x and y location, and the length is w pixel, and the color is t. The drawLine function draws a line that starts in xi and yi locationends is in xj and yj, and the color is t. These methods draw lines with 5-pixel thickness.
tft.drawFastVLine(x,y,h,t);
//drawFastVLine(int16_t x, int16_t y, int16_t h, uint16_t t)tft.drawFastHLine(x,y,w,t);
//drawFastHLine(int16_t x, int16_t y, int16_t w, uint16_t t)tft.drawLine(xi,yi,xj,yj,t);
//drawLine(int16_t x0, int16_t y0, int16_t x1, int16_t y1, uint16_t t)
The fillRect function draws a filled rectangle in x and y locations. w is width, h is height, and t is the color of the rectangle. The drawRect function draws a rectangle in x and y location with w width and h height and t color. The fillRoundRect function draws a filled Rectangle with r radius round corners in x and y location and w width and h height and t color. The drawRoundRect function draws a Rectangle with r radius round corners in x and y location and w width and h height and t color.
tft.fillRect(x,y,w,h,t);
//fillRect(int16_t x, int16_t y, int16_t w, int16_t h, uint16_t t)tft.drawRect(x,y,w,h,t);
//drawRect(int16_t x, int16_t y, int16_t w, int16_t h, uint16_t t)tft.fillRoundRect(x,y,w,h,r,t);
//fillRoundRect (int16_t x, int16_t y, int16_t w, int16_t h, uint8_t R , uint16_t t)tft.drawRoundRect(x,y,w,h,r,t);
//drawRoundRect(int16_t x, int16_t y, int16_t w, int16_t h, uint8_t R , uint16_t t)
The drawCircle function draws a circle in x and y location and r radius and t color. The fillCircle function draws a filled circle in x and y location and r radius and t color.
tft.drawCircle(x,y,r,t);
//drawCircle(int16_t x, int16_t y, int16_t r, uint16_t t)tft.fillCircle(x,y,r,t);
//fillCircle(int16_t x, int16_t y, int16_t r, uint16_t t)
The drawTriangle function draws a triangle with three corner location x, y and z, and t color. The fillTriangle function draws a filled triangle with three corner location x, y and z, and t color.
tft.drawTriangle(x1,y1,x2,y2,x3,y3,t);
//drawTriangle(int16_t x1, int16_t y1, int16_t x2, int16_t y2, int16_t x3, int16_t y3,// uint16_t t)tft.fillTriangle(x1,y1,x2,y2,x3,y3,t);
//fillTriangle(int16_t x1, int16_t y1, int16_t x2, int16_t y2, int16_t x3, int16_t y3,// uint16_t t)
The following function rotates the screen by given angle.
tft.setRotation(r); //setRotation(uint8_t r)
The following function inverts the colors of the screen.
tft.invertDisplay(i); //invertDisplay(boolean i)
The following function give RGB code and get UTFT color code.
tft.color565(r,g,b); //uint16_t color565(uint8_t r, uint8_t g, uint8_t b)
The following function scroll the screen. The Maxroll is the maximum height of your scrolling.
for (uint16_t i = 0; i < maxscroll; i++) {
tft.vertScroll(0, maxscroll, i);
delay(10);}
The following function resets the screen.
tft.reset();
Arduino Sketch
How project works
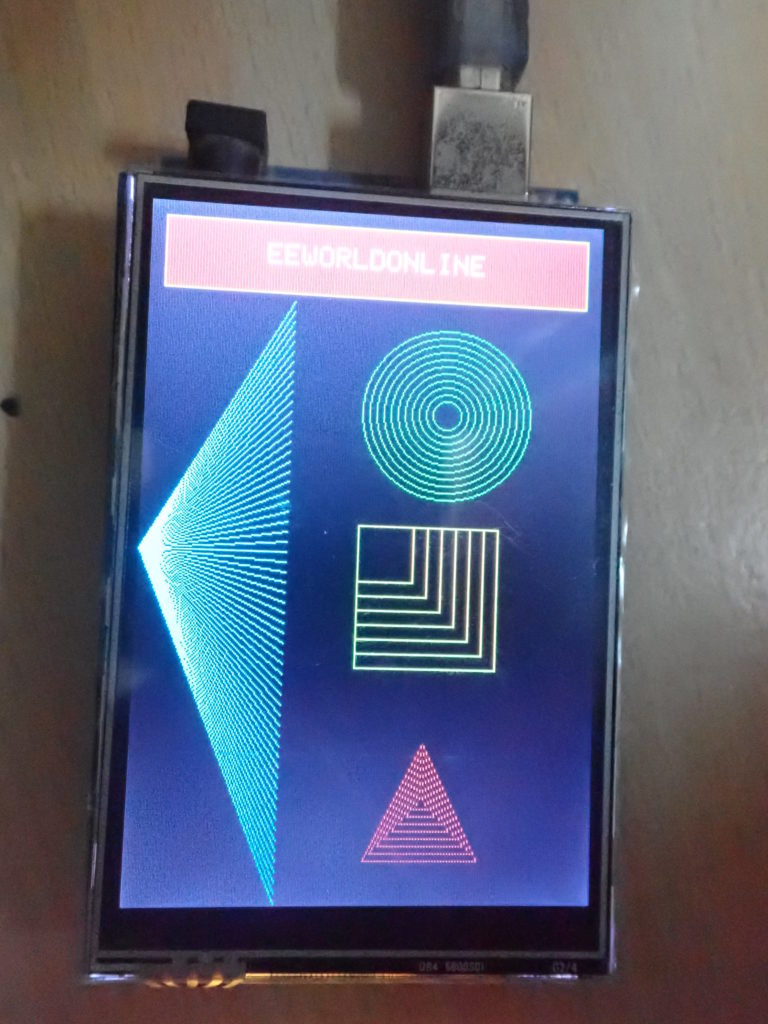
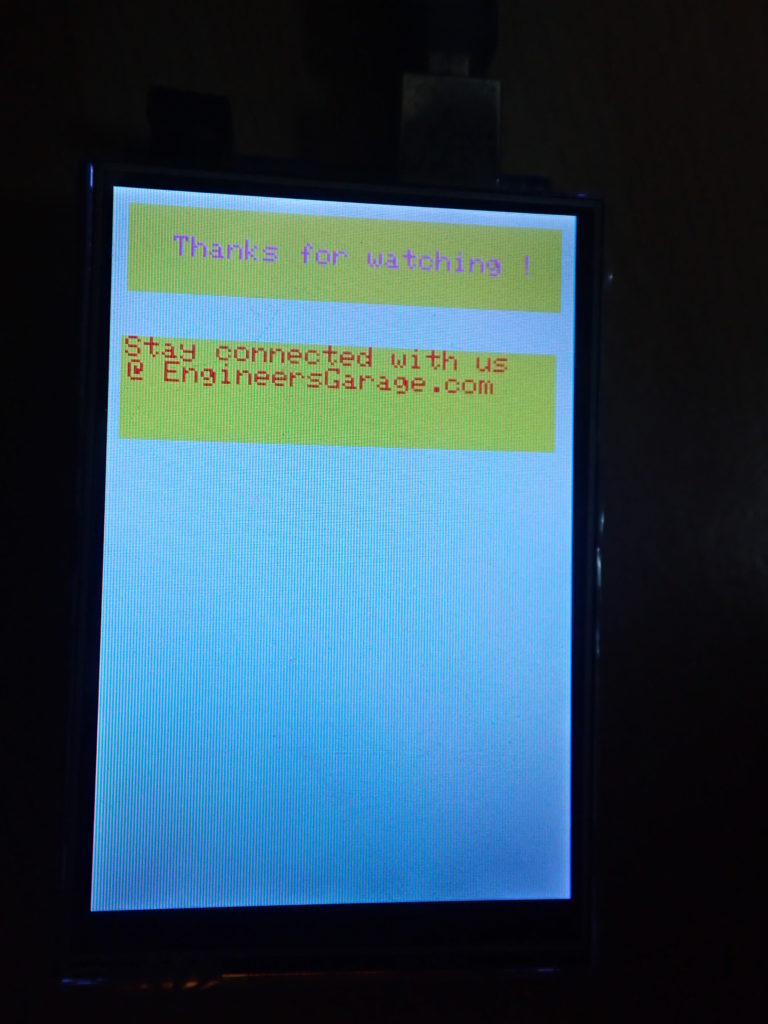
The code fills a rectangle, then draws a rectangle within which text “EEWORLDONLINE” is displayed. Then, lines, circles, rectangles, and squares are drawn on the screen. The project ends with a greeting and a message.
Results
You may also like:
Filed Under: Arduino, Electronic Projects, Sensors, Tutorials, Video





Questions related to this article?
👉Ask and discuss on EDAboard.com and Electro-Tech-Online.com forums.
Tell Us What You Think!!
You must be logged in to post a comment.