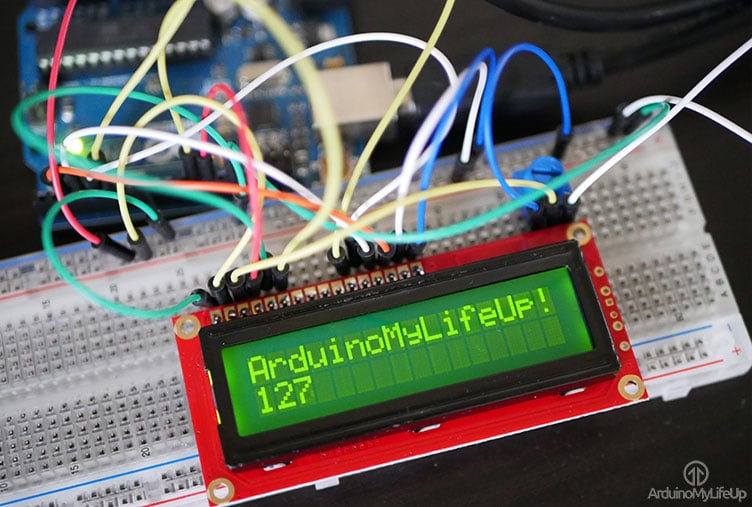
You are aware of various pros of an LCD (liquid crystal display) and its ability to perform and therefore in this Arduino LCD tutorial of arduinomylifeup, we will learn how to connect a simple 16×2 LCD up to the Arduino with this good little device.
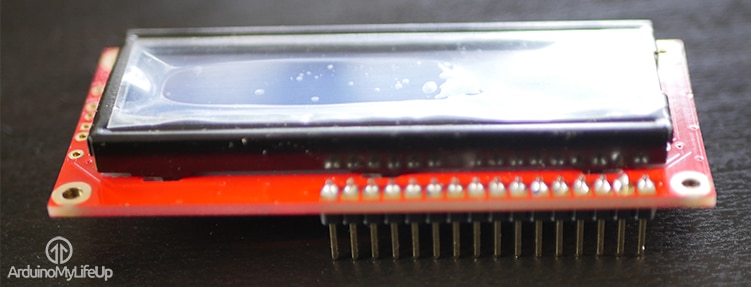
If you had some experience with the LCD boards, you must be aware of the fact that they are not assembled with header pins and hence, will need to be soldered on. With the availability of header pins, you can perhaps skip soldering but getting a worthy connection to the board will be challenging. The potentiometer in the circuit is used to control the brightness of the screen.

The equipment used for this project are Arduino Uno, 16×2 LCD Board, 16x Header pins (if LCD display has no pins), Breadboard, Breadboard wire, 10k ohm Potentiometer and Arduino LCD Circuit. Moreover, the circuit for the Arduino liquid crystal display is amazingly easy.
Solder the header pins one by one so the short side sticks up through the holes on the display and also to ensure that you don’t accidentally connect two up. Once done it’s ready for use.

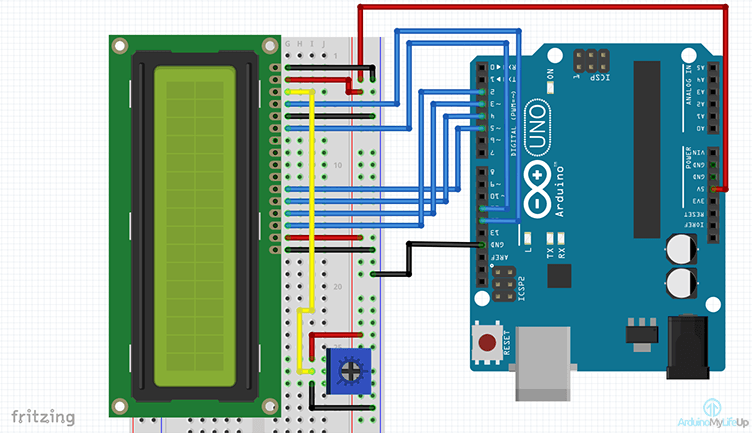
Now to hook up the display, use the full circuit diagram given below or follow the instruction. Start with hooking the 5V pin from the Arduino to the positive line on the breadboard, which is followed by hooking of the ground pin to the ground rail on the breadboard. Next, the potentiometer is connected to the breadboard and wire the positive pin the positive rail. Also, wire the ground pin to the ground rail.
Now, the following wires are placed to the LCD screen with pin 1 being the closest to the edge of the board.
Ground rail to pin 1, pin 5 & pin 16 of the LCD
Positive 5v rail to pin 2 & pin 15 of the LCD
the iddle wire on the potentiometer to pin 3 of the LCD.
In the following step, the following Arduino Digital pins are wired to the LCD pins. If you come across any issues, refer to the diagram below.
Arduino to the LCD
Pin 12 to Pin 4
Pin 11 to pin 6
Pin 5 to pin 11
Pin 4 to pin 12
Pin 3 to pin 13
Pin 2 to pin 1

The code for communicating with the display is actually pretty straight forward. If you want to see how it is all done, then check out the video and other details in the following link.
Filed Under: Reviews


Questions related to this article?
👉Ask and discuss on EDAboard.com and Electro-Tech-Online.com forums.
Tell Us What You Think!!
You must be logged in to post a comment.