Engineers Garage

  • Electronics Projects and Tutorials
    • Electronic Projects
      • Arduino Projects
      • AVR
      • Raspberry pi
      • ESP8266
      • BeagleBone
      • 8051 Microcontroller
      • ARM
      • PIC Microcontroller
      • STM32
    • Tutorials
      • Audio Electronics
      • Battery Management
      • Brainwave
      • Electric Vehicles
      • EMI/EMC/RFI
      • Hardware Filters
      • IoT tutorials
      • Power Tutorials
      • Python
      • Sensors
      • USB
      • VHDL
    • Circuit Design
    • Project Videos
    • Components
  • Articles
    • Tech Articles
    • Insight
    • Invention Stories
    • How to
    • What Is
  • News
    • Electronic Product News
    • Business News
    • Company/Start-up News
    • DIY Reviews
    • Guest Post
  • Forums
    • EDABoard.com
    • Electro-Tech-Online
    • EG Forum Archive
  • DigiKey Store
    • Cables, Wires
    • Connectors, Interconnect
    • Discrete
    • Electromechanical
    • Embedded Computers
    • Enclosures, Hardware, Office
    • Integrated Circuits (ICs)
    • Isolators
    • LED/Optoelectronics
    • Passive
    • Power, Circuit Protection
    • Programmers
    • RF, Wireless
    • Semiconductors
    • Sensors, Transducers
    • Test Products
    • Tools
  • Learn
    • eBooks/Tech Tips
    • Design Guides
    • Learning Center
    • Tech Toolboxes
    • Webinars & Digital Events
  • Resources
    • Digital Issues
    • EE Training Days
    • LEAP Awards
    • Podcasts
    • Webinars / Digital Events
    • White Papers
    • Engineering Diversity & Inclusion
    • DesignFast
  • Guest Post Guidelines
  • Advertise
  • Subscribe

Arduino Time-and-Sensor-Based Android Music Player

By Daniel Belarmino June 23, 2014

Imagine your music player that play for you, a player that sense the ambient LIGHT, TEMPERATURE and TIME that affects the mood of a person, and pick a song categorize as MOODs. Because I don’t have a sensor that can translate human emotion or thinking to numerical data, I assume that an environment surrounding humans can affect our emotion and which is readable as an analog data using sensors,  and because time can easily affect the environment basic traits like light intensity and temperature, I found it as a good solutions for this project. The sensors I used are not enough to consider the exact environment situation; we can still add humidity and sound.It is assumed reader have knowledge about how to start with Arduino.
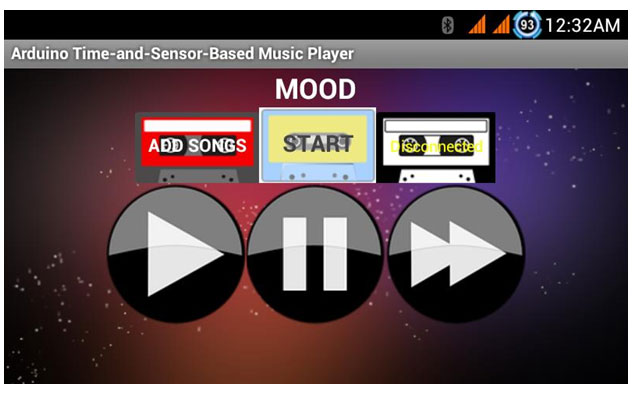
Screenshot of main application of Android Music App

Fig. 1: Screenshot of main application of Android Music App

How it works (Step by Step)

1. Download and open my Android application (ATSA_Music_Player) and set the wake-lock to maximum.
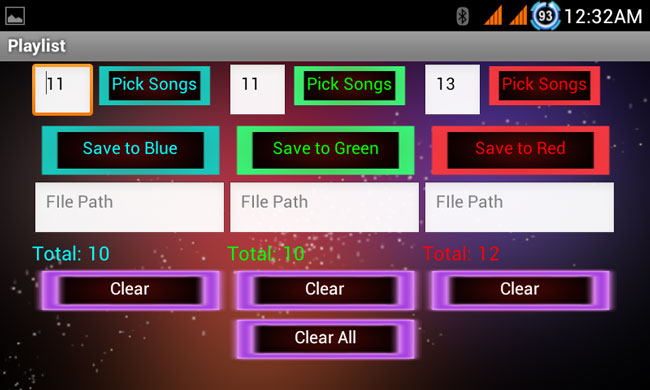
Screenshot-Of-Song-Selection-Application-On-Android-Music-App

Fig. 2: Screenshot of Song Selection application on Android Music App


2.  Pick  songs  according  to  your  choice  as  BLUE,GREEN,RED.This is  how  I categorize  emotion,as  colors.  This  colors  may  categorize  as  genre,  blue  for instrumentals, blues, acoustics etc. green for pop, acoustic rock,electro etc., and for red, you can choose hard rock, metals, rap, etc. Don’t forget to save.
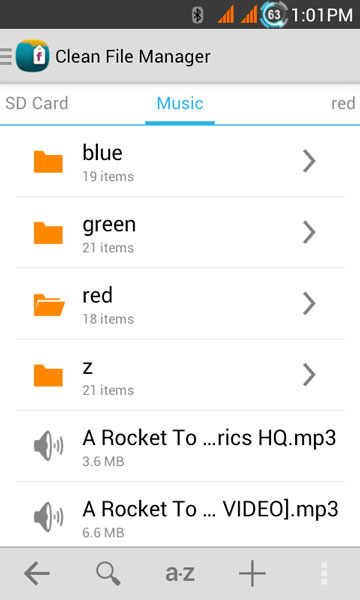
Screenshot of Folders storing songs on Android by mood of the user


Fig. 3: Screenshot of Folders storing songs on Android by mood of the user

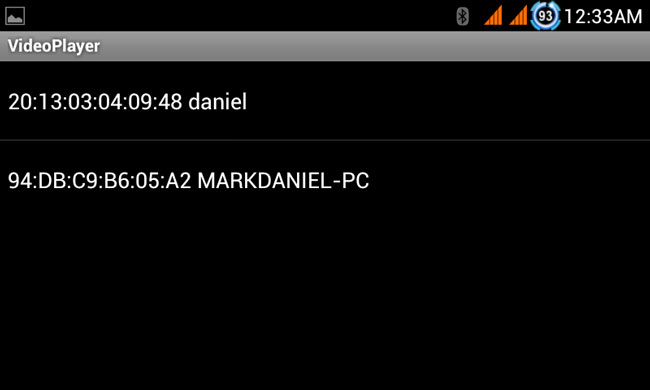
3. Connect your Android phone Bluetooth to your Arduino and tap start button. You can pause, resume and hit next to manually control the songs, but the app can update the data reading and change the MOOD and randomly pick and play a song for YOU.
Screenshot of Bluetooth Connections on Android

Fig. 4: Screenshot of Bluetooth Connections on Android

Required Components & Software

What you will need for this project:

1.  Android Phone (2.3 and above) (I guess you already have one)

2. My APP, Arduino Time-and-Sensor-Based Android Music Player

(not yet available in playstore but can be downloaded here)

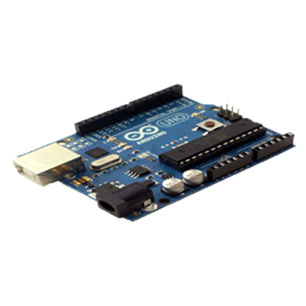
3. Arduino
Typical Image of Arduino Uno

Fig. 5: Typical Image of Arduino Uno

4. Bluetooth Module (HC-05)
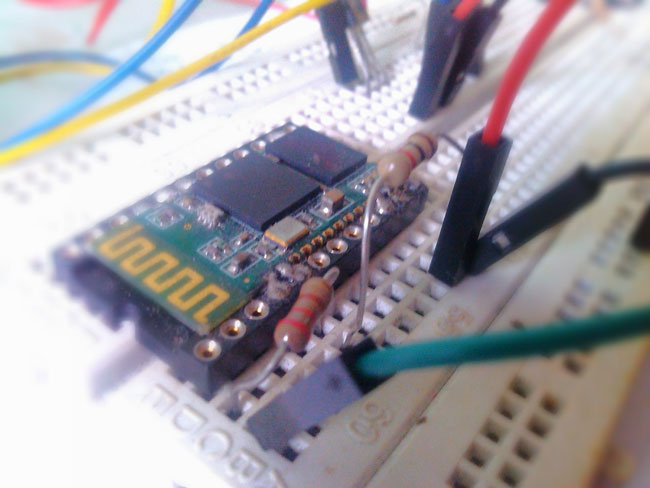
Image of HC-05 Bluetooth Module

Fig. 6: Image of HC-05 Bluetooth Module

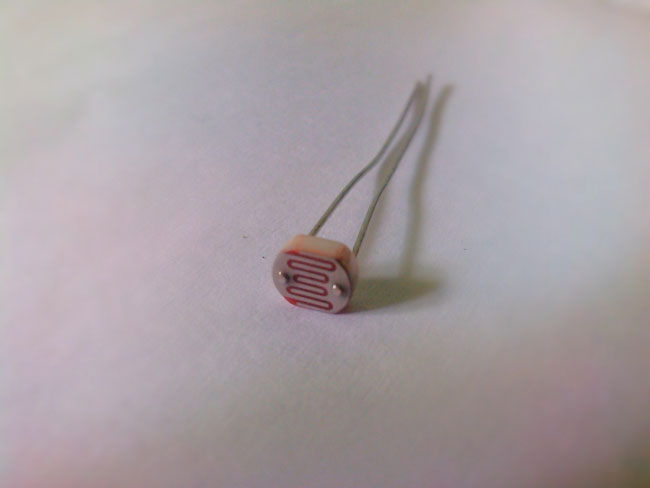
5. LDR (light-dependent resistor) sensor
Typical Image of Light Dependant Resistor (LDR)

Fig. 7: Typical Image of Light Dependant Resistor (LDR)

6. LM35 temperature sensor

7. Breadboard

Image of breadboard used to prototype Arduino based circuit

Fig. 8: Image of breadboard used to prototype Arduino based circuit

8. male-male connecting wires

9. USB cable A-B


For Software:

1.  Arduino IDE

Steps by Step Design Process

STEP 1(HARDWARE)

You will need your Arduino, bluetooth module, sensors, breadboard and wires here

1. First, prepare the materials.

2.  Know  your  pins.  I’m  using  HC-05  bluetooth  module  in  this  prototype,  any bluetooth module is compatible.
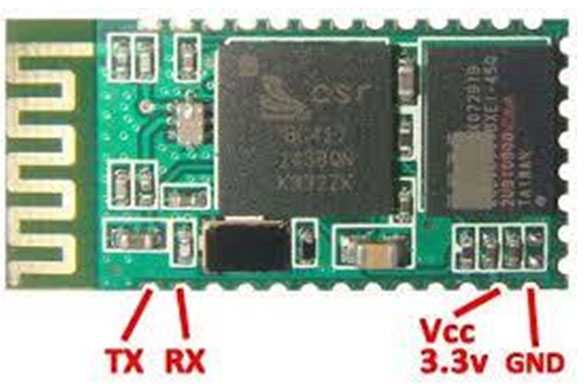
Image showing pin configuration of HC-05 Bluetooth module

Fig. 9: Image showing pin configuration of HC-05 Bluetooth module

3. After getting the right pins, power up the module by connecting 3.3V and ground to module’s Vcc pin and ground pin respectively. Your Android phone only receives data; therefore we only need Tx pin of Arduino to Rx pin of module. Please follow the right voltage divider or you may see the magic white smoke appear ones. I use

220 ohms and 1k ohms.  Resister . Refer to the circuit below.
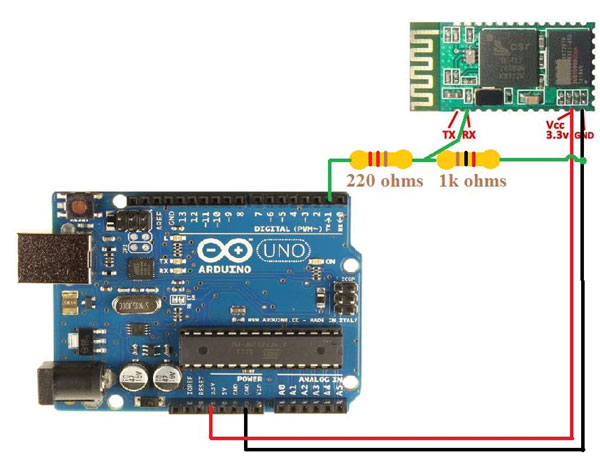
Image showing circuit connections of Arduino Uno and HC-05 Bluetooth Module


Fig. 10: Image showing circuit connections of Arduino Uno and HC-05 Bluetooth Module

4. After setting up the module, let’s start with the sensors. You also need to learn the name of each pin for proper connection for LM35.
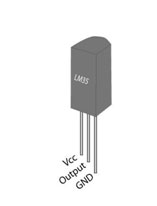
Pin Diagram of LM-35 Temperature Sensor


Fig. 11: Pin Diagram of LM-35 Temperature Sensor

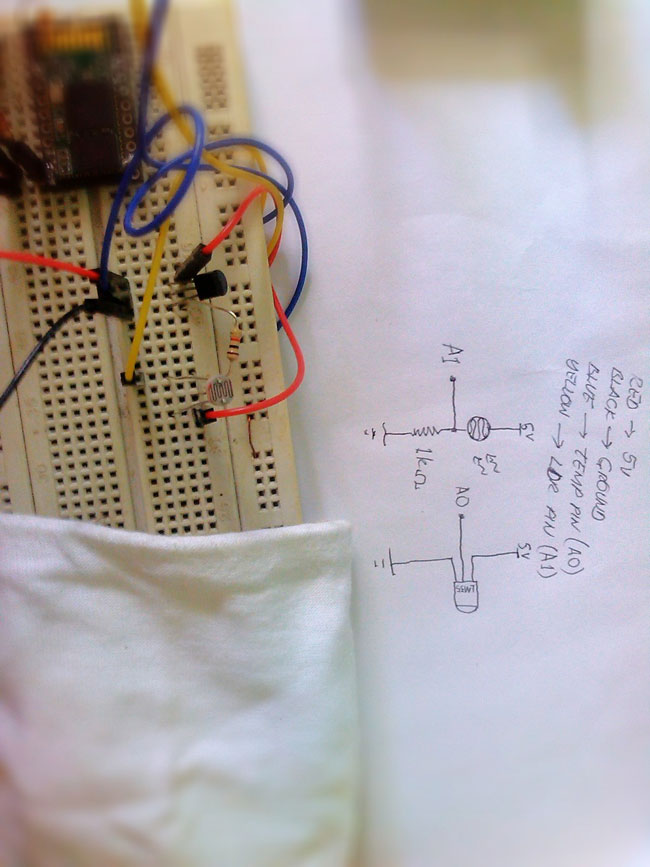
5.  Connect the  signal pin  of  LM35 to  A0  of  Arduino. For  LDR(light-dependent resistor), you don’t need to worry about the pins, Drag 1k ohm resistor(brown black red) to ground and LDR one pin to the 1k ohm resistor, same pin of LDR where 1k ohm resistor connected, connect this node to A1 of Arduino and the other pin of LDR will be 5V. The circuit is on the picture.

6. And now you’re done. Plug the USB cable for programming the Arduino.


STEP 2(SOFTWARE 1)

Here is how I map the data to transmit to Arduino. This will depend where you live, so I should probably show how I made it.

1. For temperature, I use room temperature as base value (24xC), as it go low, the software decides as cold, maybe it is raining or snowing in your country. There is a lot of consideration here; it may vary from where to how you install the sensor.

2. For light, I just map the analog reading to 0-100%. I conduct data gathering with respect to time (morning,mid-day,evening) to know the proper data to use. You can adjust those variables.

Light Scaling Temp Scaling

HIGH: 80%-100% >=31’C

MED: 40%-79% <=30’C & >=24’C (room temperature) LOW: 0%-39% <=23’C

3. Uncomment (remove //) the lines to debug the data gathered by the Arduino. Use

Serial Monitor.

//Serial.print(“TEMPRATURE = “);

//Serial.println(temp);

//Serial.println(“*C”);

//Serial.print(“LIGHT = “);

//Serial.println(light);

//Serial.println(“%”);

4. Upload, after you gather your data, remove the entire line above or comment it again.

NOTE: Arduino send 3 data.1- blue 2-green 3-red in HEX format.


STEP 3(SOFTWARE 2)

For the Android application, this app is made from App Inventor 2 of MIT and Adobe Photoshop CS6 and some Google images. The algorithm is a linearly logical and easy but it took me 3 days to finish. I’ve done a lot of trial and error in picking the right tool like activity starter, sound player and video player. But for picking the

songs, I use activity starter and return file URI to a variable and tag to a database. In the main screen, after the connection process, by tapping the START button, it will randomly play the songs in a category database and by tapping PAUSE, PLAY and NEXT, you can manually control the app. But for our pleasure, like I said, it will play for you, update the MOOD color and playlist after every song completed.

1. Download my App and Install.

2. Tap ADD SONGS button, another screen will appear and serves as playlist editor, tap Pick Songs to pick and Save to Xcolor to save.There is also a local and global clear if you want to clear the data in database. Every pick of song should be saved to increment the number or songs in your playlist.

3. Go back to main screen and connect to your bluetooth module. Make sure you already paired your module to your phone. My module named “daniel”


*TIP

To add songs easily in color playlist, make folders according to color names with your songs inside. 🙂


STEP 4( Additional Notes) Additional Notes

1. You cannot tap START button unless you are connected to a Bluetooth device.

2. The App will hang and cause run-time error if no data is received.

3. I haven’t fix the bug where no songs on playlists and then you start playing the player. The app generates a random operation from 1 to maximum number of songs stored.

4. Set your phone wake lock to maximum or else your music will stop playing. There is no function in app inventor that you can play song even if the screen is off.

6. Enjoy!!!


Circuit Diagrams

Circuit-Diagram-Arduino-Controlled-Android-Music-Player

Project Datasheet

https://www.engineersgarage.com/wp-content/uploads/2019/10/Hex-Files.zip


Filed Under: Electronic Projects
Tagged With: android, Arduino, bluetooth
 

Next Article

← Previous Article
Next Article →

Questions related to this article?
👉Ask and discuss on Electro-Tech-Online.com and EDAboard.com forums.


Tell Us What You Think!! Cancel reply

You must be logged in to post a comment.

EE TECH TOOLBOX

“ee
Tech Toolbox: Internet of Things
Explore practical strategies for minimizing attack surfaces, managing memory efficiently, and securing firmware. Download now to ensure your IoT implementations remain secure, efficient, and future-ready.

EE Learning Center

EE Learning Center
“engineers
EXPAND YOUR KNOWLEDGE AND STAY CONNECTED
Get the latest info on technologies, tools and strategies for EE professionals.

HAVE A QUESTION?

Have a technical question about an article or other engineering questions? Check out our engineering forums EDABoard.com and Electro-Tech-Online.com where you can get those questions asked and answered by your peers!


RSS EDABOARD.com Discussions

  • How can I get the frequency please help!
  • Elektronik devre
  • 12VAC to 12VDC 5A on 250ft 12AWG
  • SPI speed pic18f66j15
  • Antiparallel Schottky Diodes VDI-Load Pull

RSS Electro-Tech-Online.com Discussions

  • compatible eth ports for laptop
  • how to work on pcbs that are thick
  • How to repair this plug in connector where wires came loose
  • Actin group needed for effective PCB software tutorials
  • Kawai KDP 80 Electronic Piano Dead

Featured – Designing of Audio Amplifiers part 9 series

  • Basics of Audio Amplifier – 1/9
  • Designing 250 Milli Watt Audio Power Amplifier – 2/9
  • Designing 1 Watt Audio Power Amplifier – 3/9
  • Designing a Bass Boost Amplifier – 4/9
  • Designing a 6 Watt Car Audio Amplifier – 5/9
  • Design a low power amplifier for headphones- 6/9

Recent Articles

  • ITG Electronics releases gate drive transformers with 200 – 450 V DC capability
  • Stackpole introduces HCJ jumpers with 70.7 amp continuous current capability
  • Infineon releases MCU with 128K flash and multi-sense capabilities
  • ST introduces 600V GaN gate drivers with 300 ns start-up time
  • ABLIC releases S-19116 automotive voltage detector with 6.8μs response time

EE ENGINEERING TRAINING DAYS

engineering

Submit a Guest Post

submit a guest post
Engineers Garage
  • Analog IC TIps
  • Connector Tips
  • Battery Power Tips
  • DesignFast
  • EDABoard Forums
  • EE World Online
  • Electro-Tech-Online Forums
  • EV Engineering
  • Microcontroller Tips
  • Power Electronic Tips
  • Sensor Tips
  • Test and Measurement Tips
  • 5G Technology World
  • Subscribe to our newsletter
  • About Us
  • Contact Us
  • Advertise

Copyright © 2025 WTWH Media LLC. All Rights Reserved. The material on this site may not be reproduced, distributed, transmitted, cached or otherwise used, except with the prior written permission of WTWH Media
Privacy Policy

Search Engineers Garage

  • Electronics Projects and Tutorials
    • Electronic Projects
      • Arduino Projects
      • AVR
      • Raspberry pi
      • ESP8266
      • BeagleBone
      • 8051 Microcontroller
      • ARM
      • PIC Microcontroller
      • STM32
    • Tutorials
      • Audio Electronics
      • Battery Management
      • Brainwave
      • Electric Vehicles
      • EMI/EMC/RFI
      • Hardware Filters
      • IoT tutorials
      • Power Tutorials
      • Python
      • Sensors
      • USB
      • VHDL
    • Circuit Design
    • Project Videos
    • Components
  • Articles
    • Tech Articles
    • Insight
    • Invention Stories
    • How to
    • What Is
  • News
    • Electronic Product News
    • Business News
    • Company/Start-up News
    • DIY Reviews
    • Guest Post
  • Forums
    • EDABoard.com
    • Electro-Tech-Online
    • EG Forum Archive
  • DigiKey Store
    • Cables, Wires
    • Connectors, Interconnect
    • Discrete
    • Electromechanical
    • Embedded Computers
    • Enclosures, Hardware, Office
    • Integrated Circuits (ICs)
    • Isolators
    • LED/Optoelectronics
    • Passive
    • Power, Circuit Protection
    • Programmers
    • RF, Wireless
    • Semiconductors
    • Sensors, Transducers
    • Test Products
    • Tools
  • Learn
    • eBooks/Tech Tips
    • Design Guides
    • Learning Center
    • Tech Toolboxes
    • Webinars & Digital Events
  • Resources
    • Digital Issues
    • EE Training Days
    • LEAP Awards
    • Podcasts
    • Webinars / Digital Events
    • White Papers
    • Engineering Diversity & Inclusion
    • DesignFast
  • Guest Post Guidelines
  • Advertise
  • Subscribe