Engineers Garage

  • Projects and Tutorials
    • Electronic Projects
      • 8051
      • Arduino
      • ARM
      • AVR
      • PIC
      • Raspberry pi
      • STM32
    • Tutorials
    • Circuit Design
    • Project Videos
    • Components
  • Articles
    • Tech Articles
    • Insight
    • Invention Stories
    • How to
    • What Is
  • News
    • Electronic Products News
    • DIY Reviews
    • Guest Post
  • Forums
    • EDABoard.com
    • Electro-Tech-Online
    • EG Forum Archive
  • Digi-Key Store
    • Cables, Wires
    • Connectors, Interconnect
    • Discrete
    • Electromechanical
    • Embedded Computers
    • Enclosures, Hardware, Office
    • Integrated Circuits (ICs)
    • Isolators
    • LED/Optoelectronics
    • Passive
    • Power, Circuit Protection
    • Programmers
    • RF, Wireless
    • Semiconductors
    • Sensors, Transducers
    • Test Products
    • Tools
  • EE Resources
    • DesignFast
    • LEAP Awards
    • Oscilloscope Product Finder
    • White Papers
    • Webinars
  • EE Learning Center
    • Design Guides
      • WiFi & the IOT Design Guide
      • Microcontrollers Design Guide
      • State of the Art Inductors Design Guide
  • Women in Engineering

How to design a touchless bell push using Arduino

By Nikhil Agnihotri

The COVID-19 pandemic has severely affected the lives of millions across the world. It has caused a significant increase in the awareness of health and better hygiene. As a result, the electronics industry has experienced a rapid demand for touchless devices and appliances, such as contactless sanitizer or soap dispensers and automatic doors.

For this project, we’ll design a touchless bell push, which can be useful in homes or offices. The bell uses an ultrasonic sensor that can be easily assembled with little cost.

We’ve prototyped the touchless bell push using Arduino, which means the code can be ported to any Arduino-compatible platform.
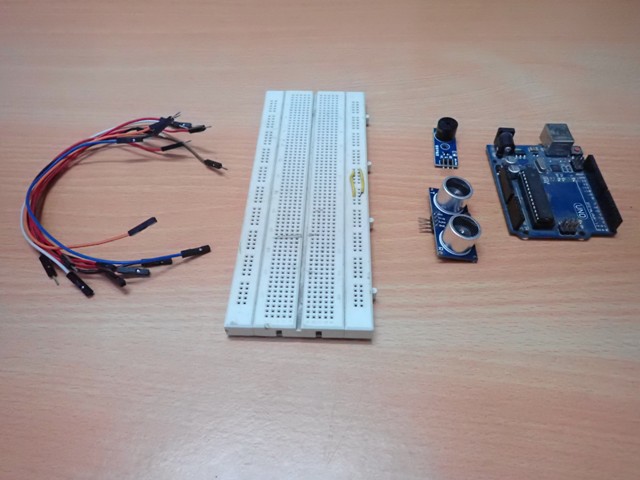
Required components

1. Arduino UNO x1
2. HC-SR04 ultrasonic sensor x1
3. Buzzer x1
4. Breadboard
5. Connecting wires/jumper wires

Circuit connections
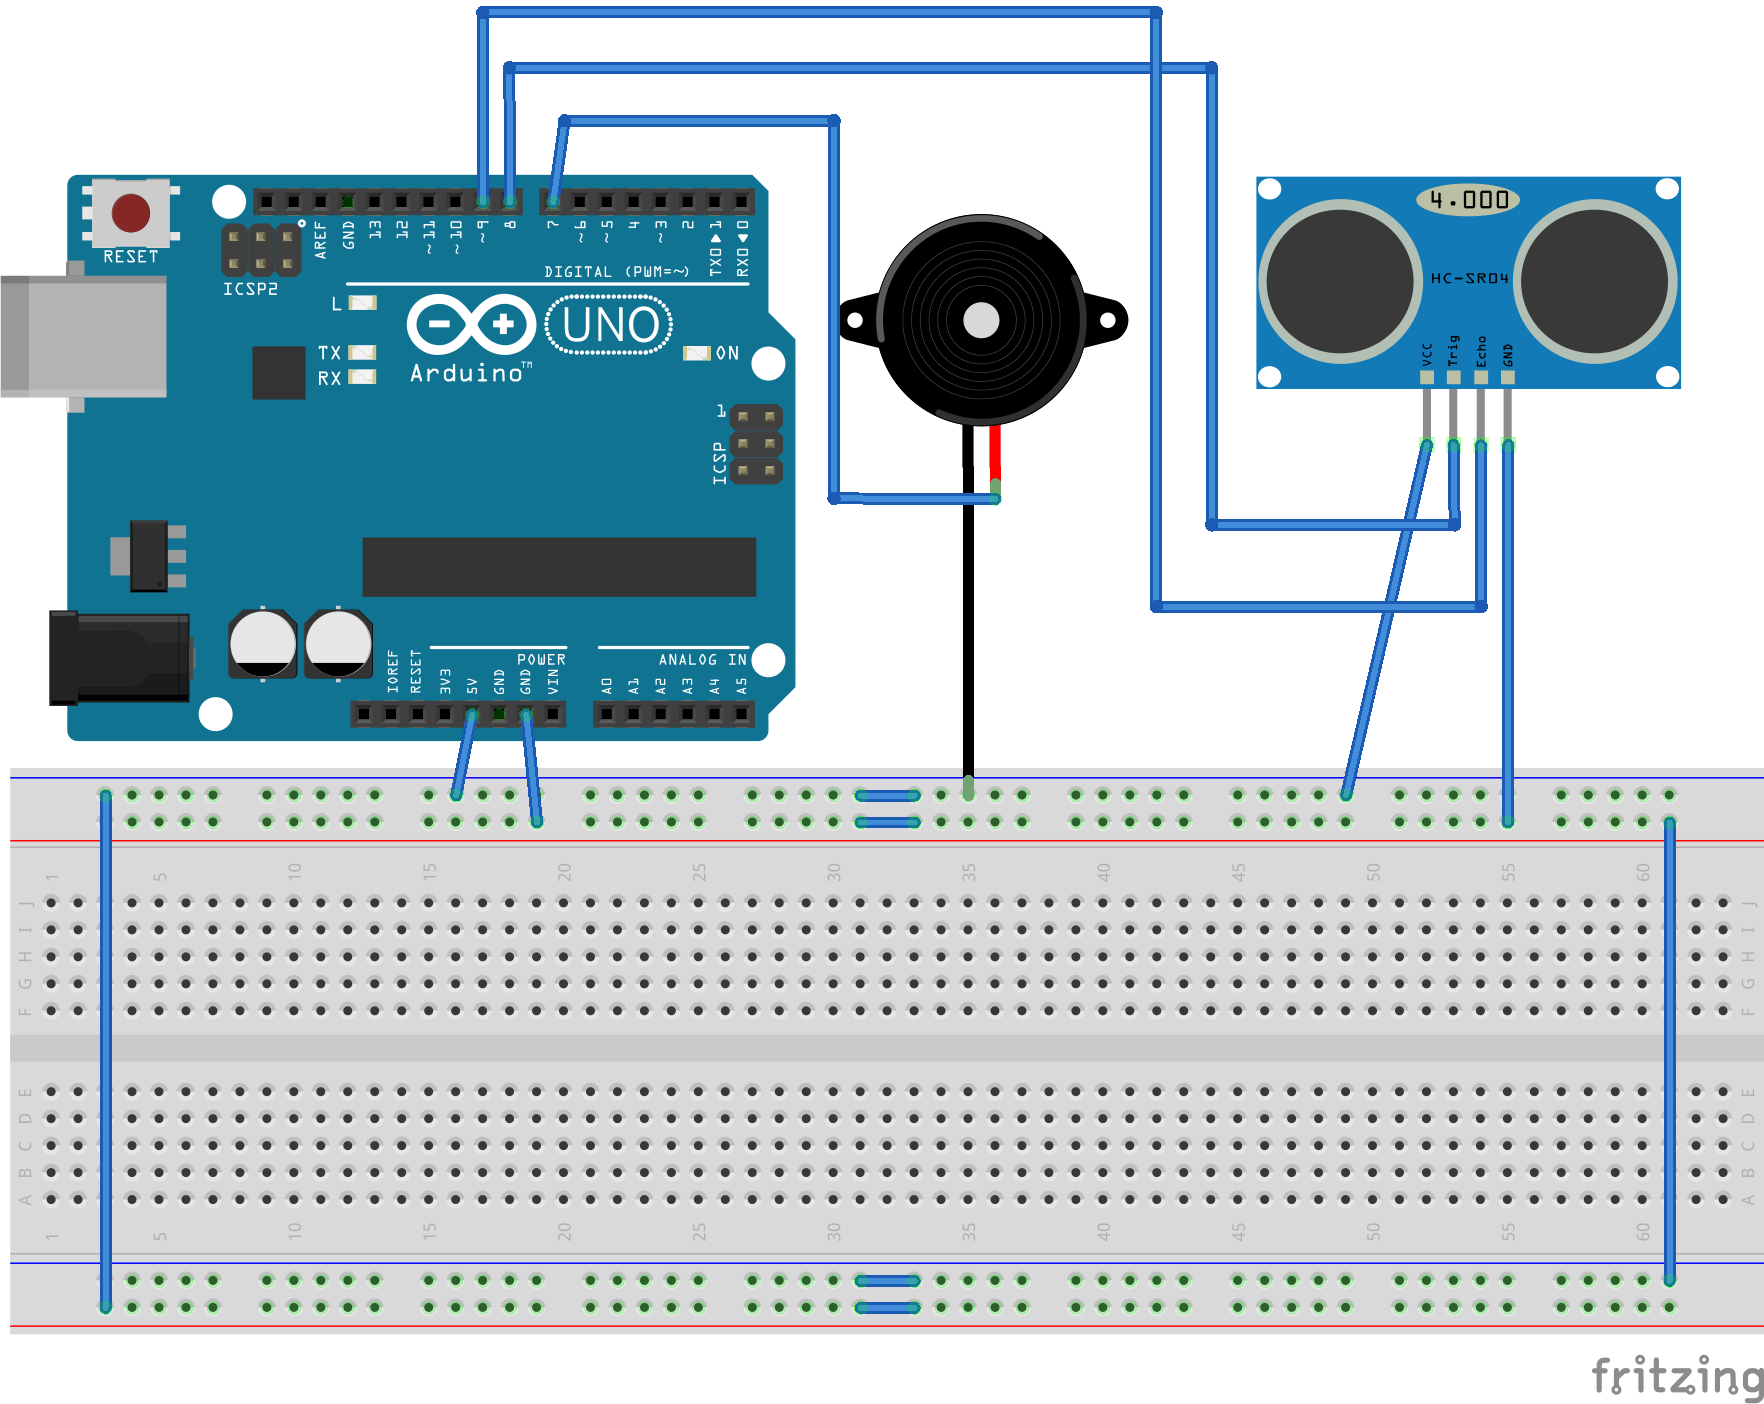
To assemble the touchless bell push, an HC-SR04 ultrasonic sensor and a buzzer are interfaced with an Arduino board. Arduino UNO is used for this project.

The HC-SR04 ultrasonic sensor has four terminals: VCC, trigger, echo, and ground. The sensor’s VCC and ground terminals are connected with a 5V DC supply and ground from Arduino. The sensor’s trigger and echo terminals are connected with Arduino’s pins 8 and 9, respectively. The buzzer is connected to Arduino’s pin 7.

Circuit diagram

Arduino sketch

How the circuit works
The touchless bell push lets a user ring the bell without touching it. The HC-SR04 ultrasonic sensor is interfaced with Arduino to allow for contactless operation. 

The sensor can detect an obstacle or object that’s up to 400 cm away. It consists of two ultrasonic transducers: one that transmits 40 kHz ultrasonic sound pulses and another that “listens” for the pulses that vibrate off of the obstacle or object. By measuring the width of these received pulses, the sensor assesses the distance from the object. 

The HC-SR04 is capable of non-contact detection at a distance ranging between 2 and 400 cm with an accuracy of 3 mm. The sensor requires 5Vs of operating voltage, which is compatible with most microcontrollers and Arduino boards. 

For this project, the HC-SR-04 is only used for non-contact detection up to 10 cm. This distance is adequate for use of the contactless bell as a doorbell or desk bell. 

A piezo buzzer is interfaced with Arduino and it works as the bell. It’s wired to ring when a LOW logical signal is output from Arduino’s interfaced pin. It stays silent when a HIGH logic is applied from the Arduino pin to the buzzer terminal. 

Arduino is programmed to ring the buzzer when the ultrasonic sensor detects interference at a distance of less than 10 cm. The buzzer sounds because of the application of a combination of square-wave frequencies at short intervals. These square waves are generated by Arduino’s GPIO digital output.       

How the code works
Begin the Arduino sketch by importing the NewPing library. This library is useful for interfacing the HC-SR04 ultrasonic sensor with Arduino. The library can be downloaded as a ZIP file from the above link. 

To install the library, simply open the Arduino IDE, go to Sketch > Include Library > Add .ZIP Library, and then select the NewPing ZIP file that you just downloaded. 

Follow this step with the pin assignments, interfacing the sensor’s trigger and echo terminals with the buzzer. 

Then, an object “sonar” (from the NewPing class) must be instantiated. And, a variable “distance” must be declared to store the distance of the non-contact detection and a variable “I,” which runs the counters. 

In the setup() function, the buzzer pin is set to output and raised to HIGH logic by using the digitalWrite() function. In the loop() function, the distance to any interference is detected using the NewPing class’s ping_cm() method. 

If the distance of the non-contact detection is less than 10 cm, the buzzer is rung by generating different square-wave frequencies. These square waves are generated by writing alternative LOW and HIGH logic to the buzzer pin — with different time delays. Finally, the buzzer is set to silent by applying a HIGH logic to the buzzer pin.   
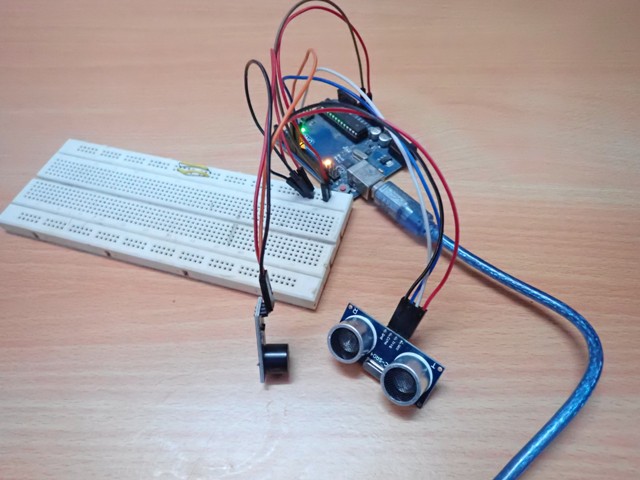
Results


Filed Under: Arduino, Microcontroller Projects
Tagged With: Arduino
 

Questions related to this article?
👉Ask and discuss on Electro-Tech-Online.com and EDAboard.com forums.


Tell Us What You Think!! Cancel reply

You must be logged in to post a comment.

HAVE A QUESTION?

Have a technical question about an article or other engineering questions? Check out our engineering forums EDABoard.com and Electro-Tech-Online.com where you can get those questions asked and answered by your peers!


Featured Tutorials

  • Introduction to Brain Waves & its Types (Part 1/13)
  • Understanding NeuroSky EEG Chip in Detail (Part 2/13)
  • Performing Experiments with Brainwaves (Part 3/13)
  • Amplification of EEG Signal and Interfacing with Arduino (Part 4/13)
  • Controlling Led brightness using Meditation and attention level (Part 5/13)
  • Control Motor’s Speed using Meditation and Attention Level of Brain (Part 6/13)

Stay Up To Date

Newsletter Signup

Sign up and receive our weekly newsletter for latest Tech articles, Electronics Projects, Tutorial series and other insightful tech content.

EE Training Center Classrooms

EE Classrooms

Recent Articles

  • What are the battery-selection criteria for low-power design?
  • Key factors to optimize power consumption in an embedded device
  • EdgeLock A5000 Secure Authenticator
  • How to interface a DS18B20 temperature sensor with MicroPython’s Onewire driver
  • Introduction to Brain Waves & its Types (Part 1/13)

Most Popular

5G 555 timer circuit 8051 ai Arduino atmega16 automotive avr bluetooth dc motor display Electronic Part Electronic Parts Fujitsu ic infineontechnologies integratedcircuit Intel IoT ir lcd led maximintegratedproducts microchip microchiptechnology Microchip Technology microcontroller microcontrollers mosfet motor powermanagement Raspberry Pi remote renesaselectronics renesaselectronicscorporation Research samsung semiconductor sensor software STMicroelectronics switch Technology vishayintertechnology wireless

RSS EDABOARD.com Discussions

  • Vco cadencd
  • Thyristor Gate Drive
  • Variable Phase shift control circuit for PWM circuit
  • Passive Harmonics Filter
  • Constraining a combo path (Synopsys DC)

RSS Electro-Tech-Online.com Discussions

  • HV Diodes
  • Disabled son needs advice please
  • Question about ultrasonic mist maker
  • RF modules which can handle high number of bytes per second
  • DIY bluetooth speaker
Engineers Garage
  • Analog IC TIps
  • Connector Tips
  • DesignFast
  • EDABoard Forums
  • EE World Online
  • Electro-Tech-Online Forums
  • Microcontroller Tips
  • Power Electronic Tips
  • Sensor Tips
  • Test and Measurement Tips
  • 5G Technology World
  • About Us
  • Contact Us
  • Advertise

Copyright © 2022 WTWH Media LLC. All Rights Reserved. The material on this site may not be reproduced, distributed, transmitted, cached or otherwise used, except with the prior written permission of WTWH Media
Privacy Policy | Advertising | About Us

Search Engineers Garage

  • Projects and Tutorials
    • Electronic Projects
      • 8051
      • Arduino
      • ARM
      • AVR
      • PIC
      • Raspberry pi
      • STM32
    • Tutorials
    • Circuit Design
    • Project Videos
    • Components
  • Articles
    • Tech Articles
    • Insight
    • Invention Stories
    • How to
    • What Is
  • News
    • Electronic Products News
    • DIY Reviews
    • Guest Post
  • Forums
    • EDABoard.com
    • Electro-Tech-Online
    • EG Forum Archive
  • Digi-Key Store
    • Cables, Wires
    • Connectors, Interconnect
    • Discrete
    • Electromechanical
    • Embedded Computers
    • Enclosures, Hardware, Office
    • Integrated Circuits (ICs)
    • Isolators
    • LED/Optoelectronics
    • Passive
    • Power, Circuit Protection
    • Programmers
    • RF, Wireless
    • Semiconductors
    • Sensors, Transducers
    • Test Products
    • Tools
  • EE Resources
    • DesignFast
    • LEAP Awards
    • Oscilloscope Product Finder
    • White Papers
    • Webinars
  • EE Learning Center
    • Design Guides
      • WiFi & the IOT Design Guide
      • Microcontrollers Design Guide
      • State of the Art Inductors Design Guide
  • Women in Engineering