Generally, Arduino boards can only serve as USB slaves. They cannot operate as USB hosts. That is why it is impossible to connect USB devices like a USB keyboard or mouse directly to Arduino. These generic USB devices can be a lot useful in many applications. For example, in some applications, a 4X4 keypad might not be sufficient, and you may need a full-fledged keyboard for user input. This can be a situation where the embedded device may receive AT commands directly from the user or require elaborate text inputs or text updates.
Though Arduino inherently cannot operate as a USB host, it can be converted to a USB host with the help of an Arduino USB host shield. The USB host shield allows connecting USB devices to Arduino boards. It is based on MAX3421E IC, a USB peripheral or host controller. It can implement a full-speed peripheral or full/low-speed USB host in compliance with USB 2.0. The shield is also compatible with TinkerKit modules. In this project, we will interface a USB keyboard with Arduino via a USB host shield and detect keys pressed on the keyboard.
Components required
- Arduino UNO/Arduino Mega x1
- Arduino USB Host Shield x1
- USB Keyboard x1
- Micro USB Cable (for connecting Arduino and computer) x1
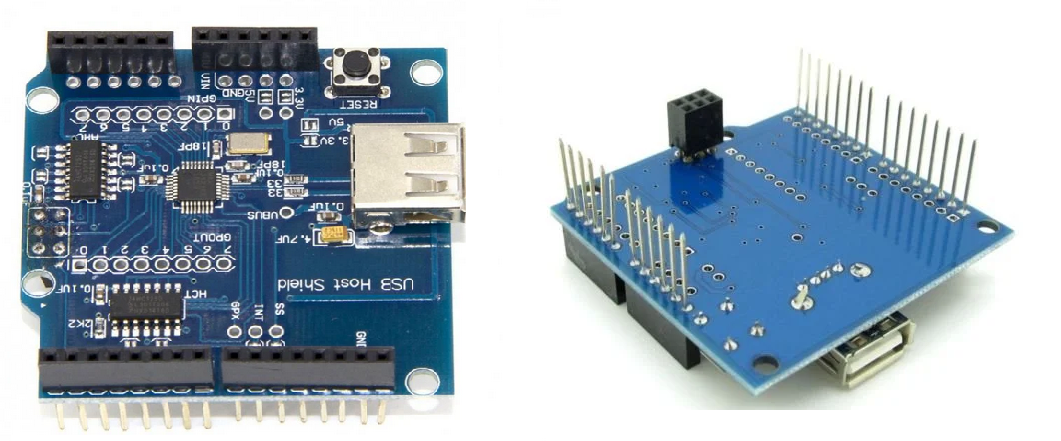
Arduino USB host shield
Arduino USB host shield is open-source hardware that allows the implementation of full-speed USB peripherals or USB hosts on Arduino boards in compliance with USB 2.0. The shield can be used with Arduino UNO and Arduino Mega. The shield is based on MAX3421E IC, a USB peripheral/host controller. Arduino communicates with MAX3421E on the shield via the SPI bus available through the ICSP header. The SPI bus on Arduino UNO is on pins GPIO10, GPIO11, GPIO12, and GPIO13. On Arduino Mega, the SPI bus is on pins GPIO10, GPIO50, GPIO51, and GPIO52. GPIO7, GPIO8, and GPIO9 on both boards are used for GPX, INT, and RES, respectively.
Example of Arduino USB host shield
The shield can connect HID devices to Arduino, like a USB keyboard, USB Mouse and USB Joystick. It can interface game controllers with Arduino like PS4, Xbox360, and Nintendo Wii. It can connect digital cameras and mass storage devices like pen drives, external hard disks, or memory card readers with Arduino. Even Bluetooth dongles can be connected to Arduino via a USB host shield. ADK-capable android smartphones and tablets can be connected to Arduino via the shield. The shield can also connect USB to Serial converters with Arduino. The shield lets you connect, add or utilize many useful devices with your embedded Arduino device.
Arduino library for USB host shield
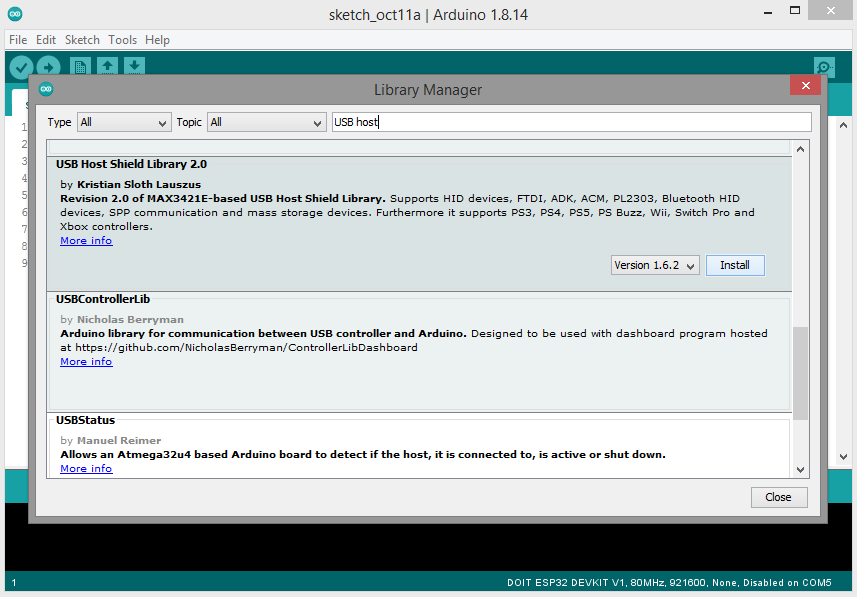
The library required to work with Arduino USB Host Shield is “USB Host Library for Arduino”. The source code for this open-source Arduino library is available on GitHub. To install the library on Arduino IDE, navigate to Tools-> Manage Libraries. Search for “USB host”. Scroll down to “USB Host Shield Library 2.0” and click install. Try installing the latest version of the library.
Installing Arduino library for USB host shield
Circuit connections
Insert the USB host shield on the top of the Arduino UNO or Arduino Mega, as shown in the image below.

Inserting Arduino USB host shield on Arduino UNO
Insert the USB keyboard into the shield and connect Arduino to the computer via a Micro-USB cable. The Arduino setup with USB host shield and keyboard will look as follows.
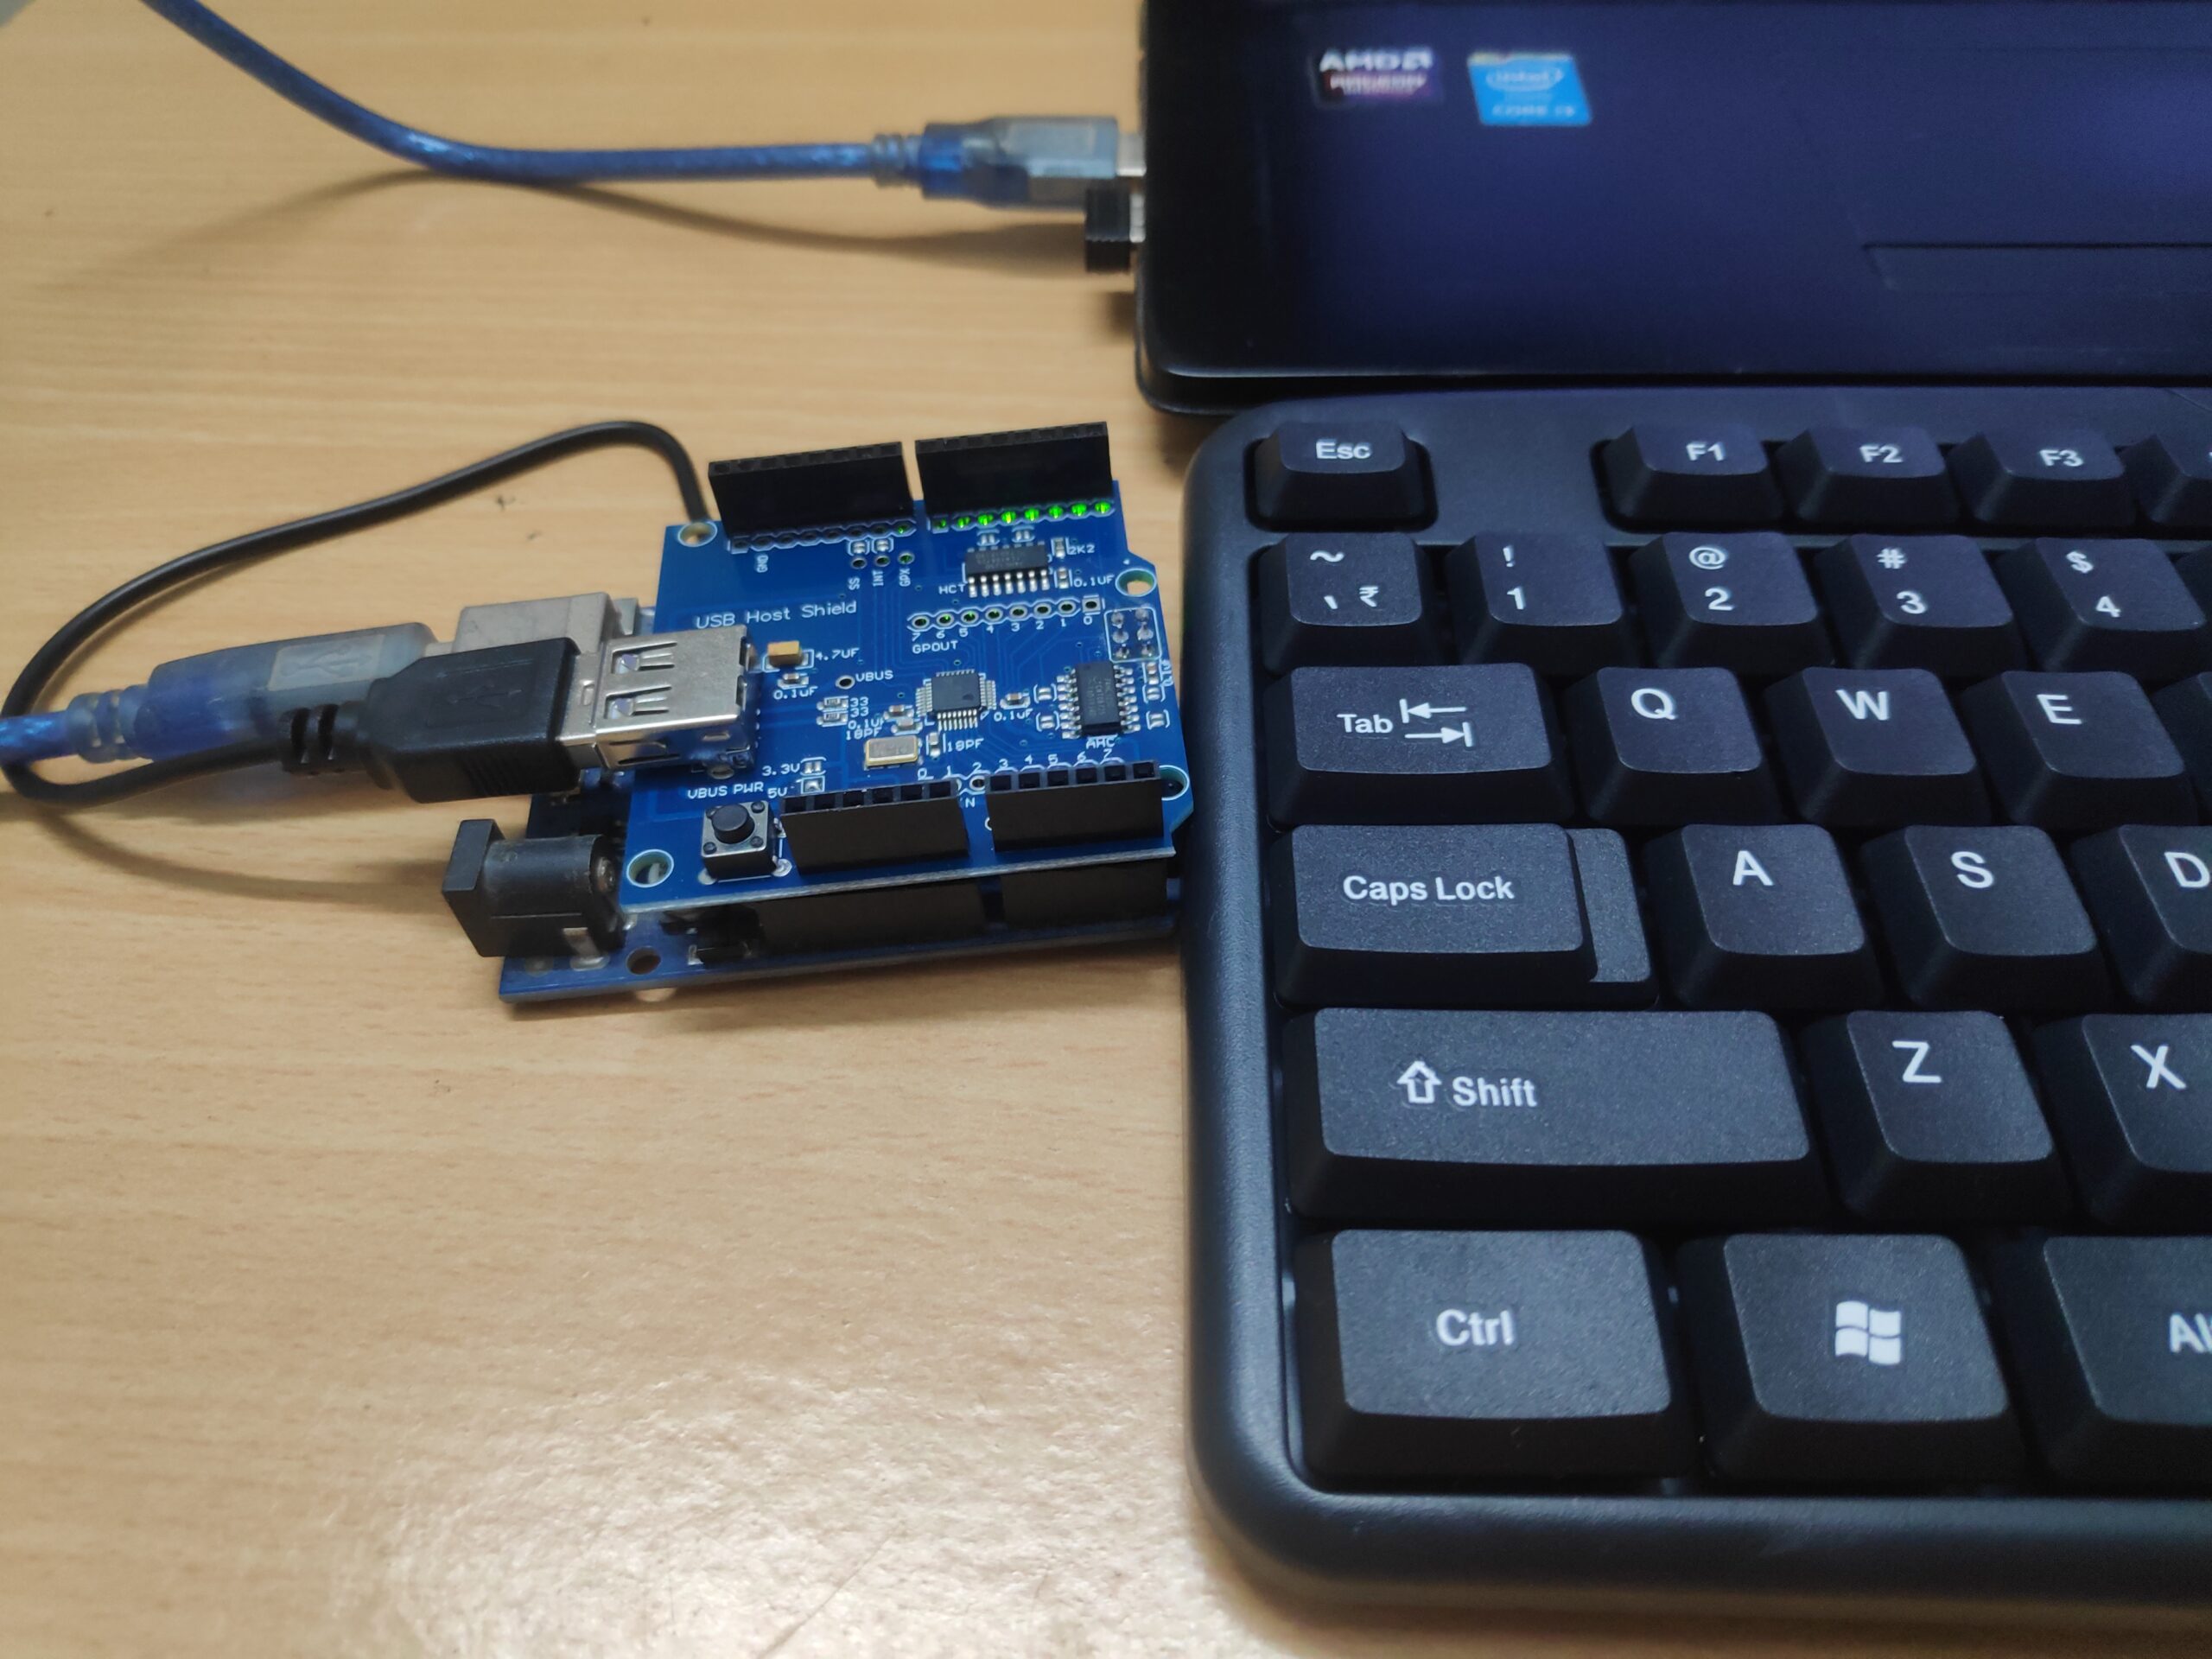
Connecting USB keyboard with Arduino UNO via USB host shield
Arduino sketch
How the project works
Libraries hidboot.h and usbhub.h is required for working with a USB keyboard. The hidboot. h is responsible for parsing USB HID devices like keyboard and mouse. The library is utilized to parse keyboard input and display the keys pressed on Arduino IDE’s Serial Monitor. The ASCII key and its key code are displayed on the Serial Monitor as a key is pressed on the keyboard. The sketch can also detect modified keys, i.e., keystrokes in combination with Alt, Ctrl, Shift, and GPU keys.
The code
The sketch begins with importing libraries hidboot.h and usbhub.h. The library hidboot.h is used for parsing input from USB HID devices like keyboards and mouse. The library usbhub.h is helpful if the keyboard is connected to the shield via some USB hub. Next, the SPI library is imported as the shield communicates with Arduino via the SPI port.
Some global variables are declared keyasc and keycode and are expressed to store the key pressed, the key code of the key, and track the status of the key pressed, respectively. A class KeyboardInput is defined as a child of the class KeyboardReportParser from hidboot.h. The methods OnKeyDown and OnKeyPressed are imported from the superclass KeyboardReportParser. These methods are overridden in the sketch. The method OnKeyDown is overridden to detect a key press on the keyboard. The method OnKeyPressed is overridden to store the key and key code of the pressed key in global variables keyasc and keycode, respectively. The boolean flag is expressed and set to true as a new key, and the key code is registered.
An object of the class USB is defined along with objects of HIDBoot and the user-defined class KeyboardInput. In the setup() function, the baud rate for serial communication with Arduino IDE’s Serial Monitor is set to 115200. A message “start” is printed to the Serial Monitor if serial communication is established between Arduino and the computer.
Next, code checks for the detection of USB devices via USB host shield. If not detected, it prints a message ” OSC did not start. ” to the Serial Monitor. The method SetReportParser() is called on the HidKeyboard object with the object of KeyboardInput class passed as an argument.
In the loop() function, the task() method is called on USB object. If a key is pressed on the keyboard, it is detected by checking the status of the boolean variable expressed. If true, the key and key code updated in global variables keyasc and keycode are printed to the Serial Monitor, and the boolean expressed is again set to false.
Result
In this project, we detected keys pressed on the keyboard. The ASCII keys seen from the keyboard can be used as commands or to update text input in embedded applications.
You may also like:


Filed Under: Arduino, Tech Articles, Tutorials, USB

Questions related to this article?
👉Ask and discuss on EDAboard.com and Electro-Tech-Online.com forums.
Tell Us What You Think!!
You must be logged in to post a comment.