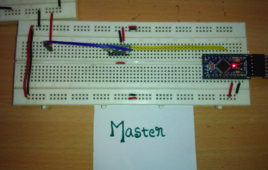
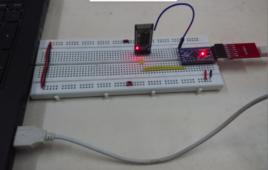
From the previous project, it has been already learnt to configure control parameters of a Bluetooth Module. In this project, it will be demonstrated that how two Bluetooth modules can be paired together and allowed to share data between them. For pairing of two Bluetooth modules, one of them needs to be configured to Master role and other needs to be configured to Slave role. Apart from this, both modules should be in Order Response Work Mode so that AT commands can be passed to them. The baud rate of the two modules also need to be same and SPP and INQ must be initiated in both the modules. In order start sharing data between the modules, both the modules should have communication mode enabled by setting CMODE parameter set to 1.
Configuring Bluetooth module using AT commands
In the previous project, how Bluetooth module can be configured to operate in Order Response Work Mode was discussed. The previous project also detailed the AT commands available for the HC-05 Bluetooth module. The AT commands can only be used in Order Response Work Mode. The AT commands are very useful and can be used to change or set multiple control parameters of the module. In this project, some of the AT commands will be used and tested. The project will demonstrate using AT commands to change device name, password, mode and baud rate of the module. In the end of the demonstration, the default settings will be restored using the AT commands.
Wireless Water level control system
In Domestic and industrial applications we use water tanks to store water. Filling water in tank using water pump is quite common. When water inside the tank is over we have fill it by pumping water using an ac motor and after tank is filled with water we have stop the motor to. This is manual system means turning ON motor when tank is empty and turning it OFF when tank is full is manual. But now it is no more manual. Automatic motor on and off system based on tank water level is already available in market. This system is wired system and connecting circuit and arranging wires and circuit is little bit complex. In this system the biggest drawback is wired connections between control circuit and motor. So we have to use lengthy wires from top of the home to water supply unit and control circuit unit. If we want adapt this system for big building it will become too expensive and too complex.
Analog Data Transmission on RF Module Using Arduino (Part 17/23)
The transmission of digital data over an RF module is quite common. The 434 RF modules are capable of transmitting 4-bit data along with the address byte. The circuits using RF modules for digital data transmission are simple and uses HT12E encoder and HT12D decoder ICs for parallel to serial and serial to parallel data conversion respectively.In real-life situations, the source of digital data are only the computers, microcomputers or digital ICs. The real world isn’t the digital, it is analog. Like, the most sensors actually are analog sensors and they are capable of transmitting the analog data to a digital form only when a microcomputer process it from analog to digital form.
Wireless Distance Measurement using Ultrasonic Sensor (Part 18/23)
Distance measurement has important applications in automotive and industrial applications. The distance measurement through sensors is useful in detecting obstacles and measuring the fluid levels in automotive tanks and containers. It is the distance measurement feature that allowed to imagine of self-driving cars and robots. Without a technology that may have allowed to measure distance from an object or obstacle, self-driving concept would have never been thought.The distance measurement application is also used in industries to check fuel levels in aircrafts and commercial transport vehicles. The application is used in robotics to equip autonomous robots detect obstacles and find an accessible path. This project is also a distance measurement application using ultrasonic sensors.
Wireless communication between PC & Arduino for Message Display (Part 20/23)
It is common to use display screens at railway stations, airports, bus stands and other public places to show messages or alerts. Like at railway station, display boards are installed at the platform to show the alert of train coming to the platform and show the coach numbers at the particular spot of the platform. Similar displays are used at airports and bus stands to display useful information for the travellers. Even in banks and offices, displays are used to show current token number or other customer relevant information. These display boards get the information to be displayed through a computer. Often the computer and the display board are connected through a cable wire for data transmission.
Adaptive Headlights for Cars (Part 21/23)
There have been continuous innovations in the automotive industry whether it be the use of Near Field Communication in the upcoming car models or the futuristic self-driving cars. These innovations are driven by one motive and that is to make the drive more and more comfortable and smart or safer. This project is also a similar attempt to make the car drives safer by modifying the headlights to adaptive headlights.In this project, this innovation has been realized using the Arduino boards and connecting the servo motor circuit to the control circuit installed at steering through 434 RF Module. Instead of modifying a car’s body to the change Headlight’s assembly, the project has demonstrated the application using the LEDs mounted over RC servos.
RF Data Communication between two Personal Computers (Part 22/23)
Personal computers are usually connected to each other through network cables in a LAN based office network. Connecting two computers using USB cable or RS – 232 cable for data communication is feasible option when the two systems are placed nearby. Also, a single network cable connects a PC to only another single PC. If computer systems in an office are made to communicate data wirelessly, the cost to install elaborate network cable wiring can be saved and the entire setup looks more neat and clean. This way any computer can be connected to any other computer without any fuss. A single computer can also be easily connected with any number of other computers at a time.
Wireless Humidity and Temperature Monitoring System (Part 23/23)
Humidity and temperature monitoring systems are quite common in industries. These environment factors need constant supervision to maintain reliability and efficiency of the industrial devices. The monitoring systems used in industries are generally wired where sensor unit and the sensor monitoring system connects through a cable wire.The humidity and temperature monitoring systems can be made wireless using the 434 RF modules. With wireless connectivity, the sensor and the monitoring systems can be installed separately and industrial equipment can be remotely supervised. Plus, the cost for extensive cable installation is also saved.
Wireless Robot Control Using RF Module (11/23)
Robotics has always been captivating. There are many kinds of robots and robotic applications including the one deployed for automation. Though due to common perception, when the term “Robot” is called out, the common masses imagine of the “Moving Robots”. And it is not uncommon that one may imagine of a Line-following robot, Light follower, Waiter Robot or Remote Controlled Car when it means to say “Robot”. While a lot of these “Moving Robots” have an autonomous mode of locomotion like a line following robot follows black strips through IR sensors to find through its path, a waiter robot follows programmatically predefined paths and light following robot chases a light source, a class of robots is remote controlled through a human interface.
LDR Based Wireless Theft Alarm System (Part 12/23)
There are many kinds of anti-theft alarm systems. One such system can be made using Light Dependent Resistors (LDR). An LDR based alarm system can be used to protect lockers or locker rooms. In such a system, the LDR sensor is attached to an alarm mechanism and a light source or laser light source is fixed above the sensor in a closed casing. When a locker or locker room is tried to be accessed unethically, the laser light is activated and it in turns stimulates the LDR sensor to invoke alarm. This project illustrates similar alarm mechanism except that instead of building it on product style casing, the circuit has been made on breadboard for demonstration purpose
Home Automation using RF Module (Part 13/23)
Home automation is the latest craze. Remote controlling every electrical and electronic appliance on a handheld remote is a comfort for sure. Obviously, a home automation application is not feasible without a wireless interface between the handheld remote and appliances..
Home Automation – Automatic Valve for Water Supplies (Part 14/23)
Home automation is the new trend picking up these days in many households. With home automation every electrical and electronics appliance used in home gets remote controlled. Along with remote controlling lights, fans, air conditioners and kitchen appliances, regulation of water supplies is also a part of home automation projects. This project is a demonstration of similar automated water supplies regulation by placing an electronically automated valve to the water tanks. The valves at the opening of the tank’s pipeline restrict the flow of water from it by contracting and closing the pipe’s opening. The typical valves need to be operating manually by opening or closing the valve through rotating the valve handle.
Wireless Water Level Indicator (Part 16/23)
Water is the first necessity of all mankind and humans have been smart enough to keep storage of it. Water tanks have been common in the households since the civilizations started advancing. Almost all the modern households have underground or roof-top water tanks these days and these tanks are filled with water through AC motors. An AC motor does its work but is not smart enough to detect water levels and start or stop on its own accordingly. This project is all about adding the intelligence to the water regulation system of a household.
PCB Designing using Kicad (Part 1/12)
This tutorial will help you to understand the necessity of the PCB. Here, I have described the evolution of PCB in different steps. Connecting a circuit without any soldering gun or breadboard is a complex process. I tried to connect an amplifier circuit with a transistor, four resistors, and three capacitors, which you can see in the video.
PCB Designing using Kicad (Part 2/12)
If we connect different electronics components directly with wire or their leads, we have to face a lot of problems like, loose connection, problems in troubleshooting, low reliability, low durability etc. Also if we try to move it from one place to other, we may lose the connections due to no physical support. The only solution to avoid these all problems is “PCB”.PCB:PCB stands for “Printed circuit board”. In this, wire connections printed as copper tracks. It can provide physical support to the circuit. It can avoid loose connections, and testing and troubleshooting the circuit may become also simple.
PCB Designing using Kicad (Part 3/12)
KiCad is free software suit for EDA (Electronic design automation), which was created in 1992 by Jean-pierre charras. It has GNU and GPL licenses. I have selected KiCad software to explain PCB tutorials. Since it is open source software, anyone can try this and practice my tutorials. Work-flow:Before getting started with KiCad, we must know about some basics and work flow of KiCad. In this tutorial, I am going to explain KiCad work flow, step by step. Please follow the same procedure when working with KiCad.
PCB Designing using Kicad (Part 4/12)
When we are designing a PCB in any CAD software, we need to find suitable components. Like, if we need resistor, we must be clear about component type, dimensions (optional), SMD component or through hole component, and different parameters. Any EDA software consists of components libraries. We can select a required component from library, but the library may not have all the components. If we need any component which is not present in the library, then we need to create and save it in the library so as to use it in future. In KiCad, we can use library editor to create a new component. Library editor is a part of Eeschema. Before creating a component we need to gather sufficient details about component, like pin diagram, pin configuration, its size, shape, dimension etc. So before starting library editor, go though the component data sheet.
PCB Designing using Kicad (Part 5/12)
In small circuits, we can connect components directly with wire (using “place wire” option). But in complex circuits like motherboard circuit, we may have to establish a lot of connections between different sections, whereby many connections may overlap. So, there is a chance of getting confused in circuit designing. Also, the probability of getting errors is more. We can overcome this problem by using labels or Net names (Net Labels). Net is a simple electrical connection between components. We can create Net by using place wire.
PCB Designing using Kicad (Part 6/12)
In PCB designing, the first step is Creating circuit or schematic capture. In this, we have to draw the schematic with necessary Electronic components. This step includes adding components, connections with wire, verifying the circuit, etc. To create a circuit in KiCad, we have to use Eeschema. It is powerful schematic capture software distributed as part of KiCad and is limited only by the available memory. Thus, there is no real limitation to the number of components, component pins, connections, or sheets. In the case of multi-sheet diagrams, the representation is hierarchical. Note: Above table contains only some commonly used and important Eeschema options. I haven’t covered all of them.


