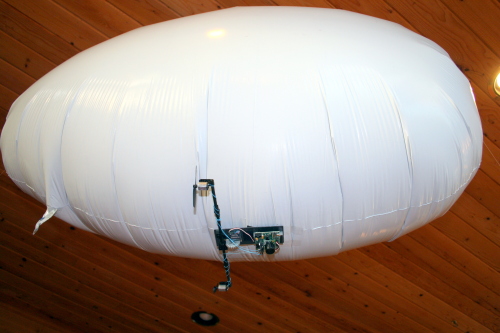
Figure 1: BlimpDuino is an Arduino project
BlimpDuino is an Arduino project which was brought into existence by Chris Anderson from DIY Drones. As the name itself reflects, it is a blimp that has been built using Arduino controller. In general terms, blimp can be explained as an airship sans an internal structural framework. It functions by relying on the gas filled inside its envelope as well as its strength to maintain the shape.
BlimpDuino is an open source autonomous product and includes an Arduino controller board with on-board infrared and ultrasonic sensors, interface for an optional RC mode, simple gondola with a pair of vectoring differential thrusters and a ground-based infrared beacon.
The commercial kit for a BlimpDuino board consists of the following:
- BlimpDuino Board with SMD parts smoldered on
- Through hole components to be soldered by user
- Laser cut plastic platform for the board, battery, optional RC, motor parts
- Servo, gears and motor shaft for vectoring function
- 2 motors and props
- 1 IR ground beacon
- 52-inch mylar envelope
The whole project can be divided into following sections:
Hardware:
The BlimpDuino board is the core of the kit which is soldered and configured in the required manner. Then it is fitted on to the gondola along with the vectoring thrusts and RC receiver.
Loading the code:
After the configuration is completed, the FTDI cable is plugged into FTDI port of the board to start the process of loading up the code. Then the BlimpDuino board is switched on which is followed by a blink of the LED lights. The code is loaded and after 30 minutes, the message “Done Uploading” appears on the screen.
Using the BlimpDuino:
The procedure starts with filling Helium into the envelope in order to inflate it. Once the board is configured in a proper manner, it is tapped on the bottom of the envelope with all the components facing down and then more helium is added till it starts floating in the air.
The Blimp can be operated in 2 modes- RC and Autonomous.
When the blimp faces the beacons, the navigation mode will be turned on and the vectoring servo moves according to the movement of blimp towards the beacon. However when the beacon is not visible to the blimp, the altitude hold only mode is activated and the vectoring servo is either pointed up or down and it holds the altitude in one place.
If you wish to build a BlimpDuino on your own, you can refer to the step-by-step procedure explained by Chris.
Filed Under: Reviews


Questions related to this article?
👉Ask and discuss on EDAboard.com and Electro-Tech-Online.com forums.
Tell Us What You Think!!
You must be logged in to post a comment.