This is a DIY project developed by Andreas Lundquist where he combined his digital camera so as to control it remotely only through a Bluetooth connection and clicked photos in the process. Using an Arduino with a camera opens up a lot of scope for time lapse or pin and shoot photography. This arrangement also serves a similar purpose of availing the benefits of a more technologically advanced photography experience.
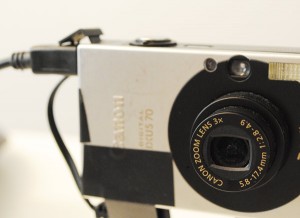
In this task, Andreas made use of a smartphone, Canon camera, Arduino Uno, ReadBearLabs Bluetooth Low Energy shield V 2.0 (BLE)and a USB cable. First and foremost, he installed Canon Hack Development Kit (CHDK) in the camera. It is basically a firmware that allows additional features and can be tested in time lapse photography. The setup was mainly arranged to capture photos at a wedding from the top angle such that it was remotely controlled by Bluetooth.
Moving on to the software part, one would need Evothings Workbench, Evothings Client for iOS/Android and Arduino IDE 1.0.5 for the project. Initially, Andreas installed the latest version of CHDK in the camera. One can also refer to various tutorials on the internet to use the same. After that, he browsed the menu and navigated to the settings so as to make the desired changes.
In the next step, he made a prototyping cable by cutting an ordinary cable followed by soldering pins onto each wire. For arranging the hardware, he mounted the BLE on top of the Arduino board and connected the black and red wires of the USB cable to this setup with another end plugged into the camera. He also connected the Arduino UNO with his laptop and a smartphone was also kept beside in order to connect the devices through Bluetooth.
Then in order to let the BLE shield function, he installed two libraries into the Arduino IDE. He also created an Android application in order to receive data through the BLE shield and then translated them into commands. In this project, there were 5 steps including the zoom-in and zoom out in a single step as well as completely along with the shoot command.
Finally coming to the implementation part, he set up the Bluetooth connection between the mobile phone and the device. Then he tapped on connect and selected the desired command like zoom or shoot. The camera could be operated accordingly without even touching it.
As per Andreas, this is just an example of an application. The same project can be utilized and modified to perform much more than this. After the completion of the project, it was reported that the CHDK firmware was at times unable to detect signals or misinterpret them. However, he later fixed the problem by toggling the camera’s context.
In the demonstration video, you can see this DIY remote control app in action along with the complete setup.
Filed Under: Reviews

Questions related to this article?
👉Ask and discuss on Electro-Tech-Online.com and EDAboard.com forums.
Tell Us What You Think!!
You must be logged in to post a comment.