In this Project we are going to establish a connection between two ESP8266 Modules. This can be done by setting one ESP as an Access Point (Server) and other ESP as a Station (Client). Then establishing a wireless connection between them and the Client sends a message to the Server saying “Hello World!”.
You can go through “Getting started with ESP8266” if you are new to this. Before continuing with this project you have to flash ESPs with NodeMCU firmware and go through Getting Started with the ESPlorer IDE.
Circuit Connection:
The schematics for this project are very straight forward. You only need to establish a serial communication between Serial Adapter and your ESP8266 to upload some code.
Make the Connection as given below:
|
WiFi Module |
USB-TTL
|
|
VCC |
3.3v |
|
GND |
GND |
|
TX |
RX |
|
RX |
TX |
|
CH_PD |
Connected to 3.3v to enable chip firmware boot |
Don’t forget to pull up CH_PD HIGH, you won’t get a response from the module if it is not done.
You can also use Arduino for the connection. For more details refer here.
The connection details are as below:
|
WIFI Module |
Arduino UNO
|
|
Vcc |
3.3v |
|
Gnd |
Gnd |
|
TX |
TX |
|
RX |
RX |
|
CH_PD |
Connected to 3.3v to enable chip firmware boot |
Downloading ESPlorer:
It’s recommended to use the ESPlorer program created by 4refr0nt to create and save Lua files into your ESP8266.
Follow these steps:
-
Download ESPlorer.
-
Unzip that folder.
-
Go to the main folder.
-
Run ESPlorer.jar. It’s a JAVA program, so you need JAVA installed on your computer.
-
Open the ESPlorer.
Creating Access Point:
For creating an Access point and to make one ESP8266 to set up a network of its own, allowing other devices to connect directly to it you can refer this article.
Client Script
Writing Client Script:
Copy and paste the below code below into ESPlorer. The ESP Client acts as a Station and searching continuously for the Access point. Once this client establishes a communication with server it start sending a message “Hello World!” for every 5 seconds.
print(“ESP8266 Client”)
wifi.sta.disconnect()
wifi.setmode(wifi.STATION)
wifi.sta.config(“test”,”password”) — connecting to server
wifi.sta.connect()
print(“Looking for a connection”)
tmr.alarm(1, 2000, 1, function()
if(wifi.sta.getip()~=nil) then
tmr.stop(1)
print(“Connected!”)
print(“Client IP Address:”,wifi.sta.getip())
cl=net.createConnection(net.TCP, 0)
cl:connect(80,”192.168.4.1″)
tmr.alarm(2, 5000, 1, function()
cl:send(“Hello World!”)
end)
else
print(“Connecting…”)
end
end)
Note: You have to change the IP address according to the IP address of the server which is displayed when you run the server script in server ESP8266.
Uploading Your Lua Script:
Follow these instructions to send commands to your ESP8266:
-
Connect your FTDI programmer and select your FTDI COM Port.
-
Set baud rate at 9600
-
Select NodeMCU+MicroPtyhon tab
-
Copy the your Lua script into ESPlorer and save your file with the name “init.lua”.
-
Upload to the ESP and Run on ESP.
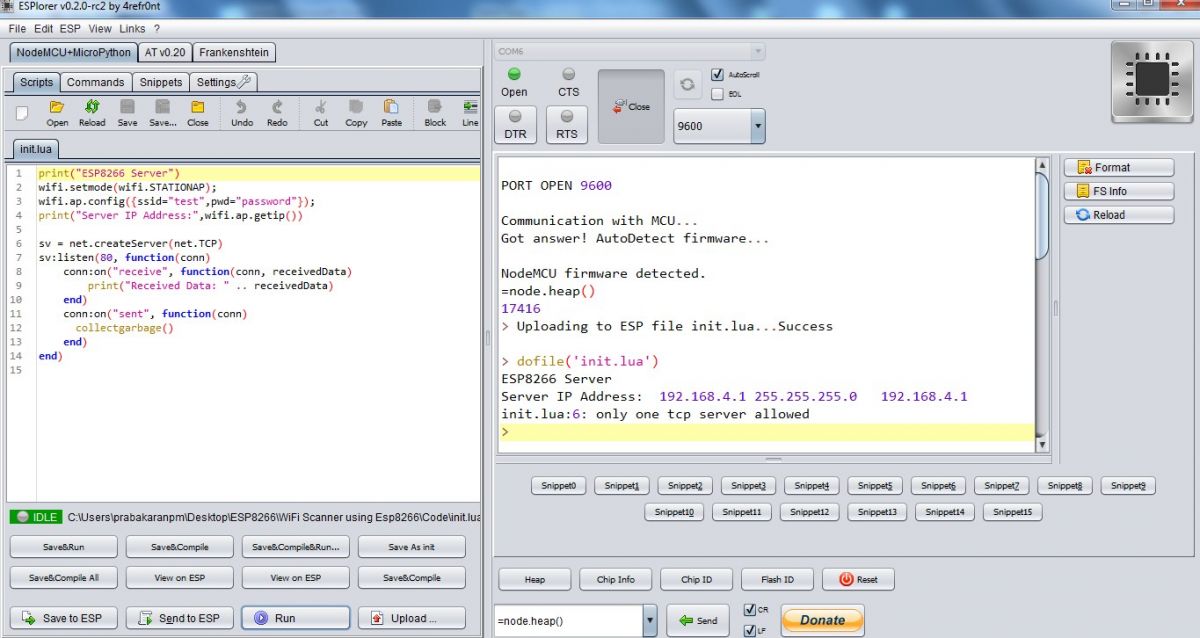
Fig. 1: Screenshot of Uploading Lua Script
Working:
In this project the Client will keep on trying to connect with the server, if it is connected it will send message “Hello World!” to the Server via the established connection.

Fig. 2: Screenshot of Arduino IDE Sending Message to the Server
Note: On the left window, It’s Arduino IDE Serial window which is used to connect the server . On the right window, It’s ESPlorer Output Window.
Check this video
Filed Under: Featured Contributions

Questions related to this article?
👉Ask and discuss on Electro-Tech-Online.com and EDAboard.com forums.
Tell Us What You Think!!
You must be logged in to post a comment.