During power outages when all the batteries around your home drain away, the only option left for you would be this emergency phone charger. This tutorial shows you how to charge a phone using a 12V DC motor and a couple of other parts.

Fig. 1: Prototype of DC Motor based Simple Emergency Phone Charger
Required Components
Note
Explanation
More about geared DC motors is here: How Greared DC Motor works
Why I choose a 100 RPM motor?
Construction

Fig. 2: Image showing various components used in designing DC Motor based Emergency Phone Charger
-Make a hole in the wheel far from the center. This would let you put in something like a screw driver and turn it.

Fig. 3: Image showing Wheel used as handle to rotate DC Motor on Emergency Phone Charger

Fig. 4: Image showing hole drilled on wheel to fit a screw driver
– Attach the motor to the chassis/clamp so that it stays firm while you are rotating it.

Fig. 5: Image showing DC Motor attached to chassis
– Now attach the wheel to the motor’s shaft and tighten the screw on the wheel.

Fig. 6: Image showing Wheel attached to DC Motor on Chassis
– Arrange the rest of the circuit on a breadboard.

Fig. 7: Prototype of Emergency Phone Charging Circuit
– Cut the USB cable in such a way that the +5V line (red in color) and GND line (black mostly but here it was white) are exposed and connect them to the breadboard at respective locations.

Fig. 8: Image showing Ground and VCC Wires taken out from a USB cable
-Now connect one of the wires from motor to the diode and other to the ground.

Fig. 9: Image showing wire connections between DC motor and Charger Circuit
This is how the full setup looks like:
Fig. 10: Image showing DC Motor based Emergency Phone Charger being tested by a millimeter
I’ve connected a multimeter in parallel to the motor in order to monitor the voltage generated by it.
Project Source Code
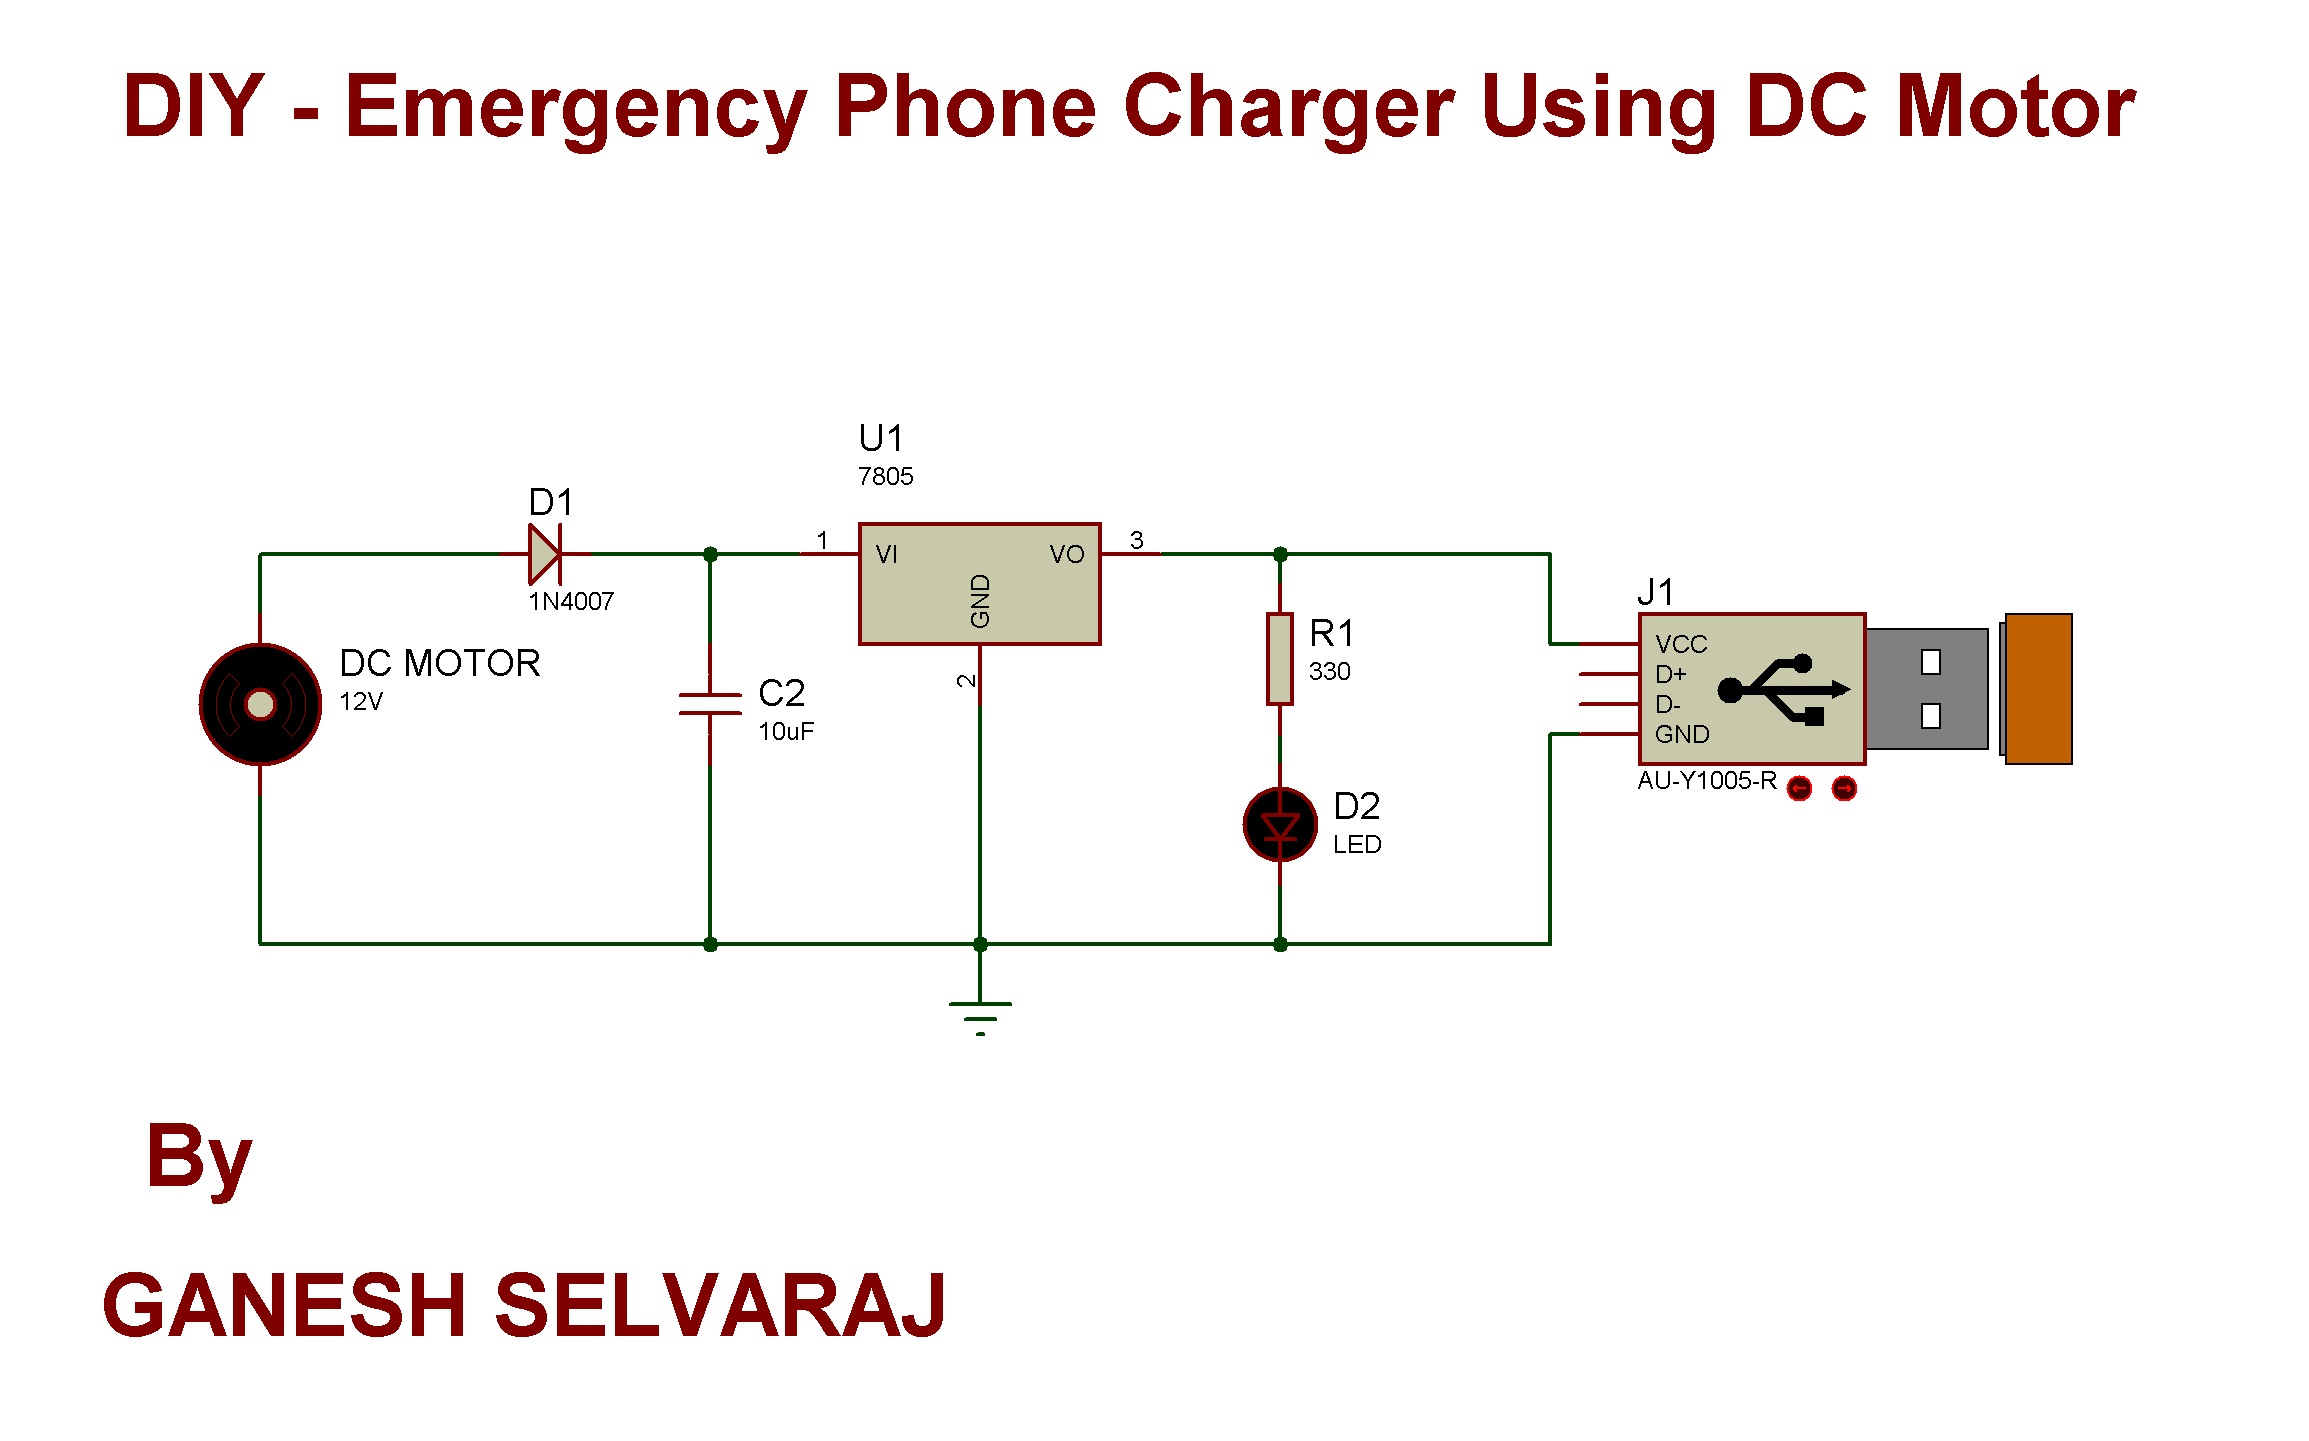
Circuit Diagrams
Project Video
Filed Under: Electronic Projects
Filed Under: Electronic Projects

Questions related to this article?
👉Ask and discuss on EDAboard.com and Electro-Tech-Online.com forums.
Tell Us What You Think!!
You must be logged in to post a comment.