A touch sensor is very popular input device and nowadays widely used as a replacement of push buttons or keys. A touch plate can be used in place of push button or key to providing an input as logic 1 or 0 to the microcontroller. Touch plate (sensor) is conductive material plate or contact that activates when it comes into contact with human body touch.
The given project demonstrates how to interface such touch plate with arduino. When a user touches the plate with his finger, the arduino detects this touch and indicates this on LED as well as sends the message on a serial port.
The circuit is very simple and easy to build and can be built on the breadboard.
CIRCUIT DESCRIPTION
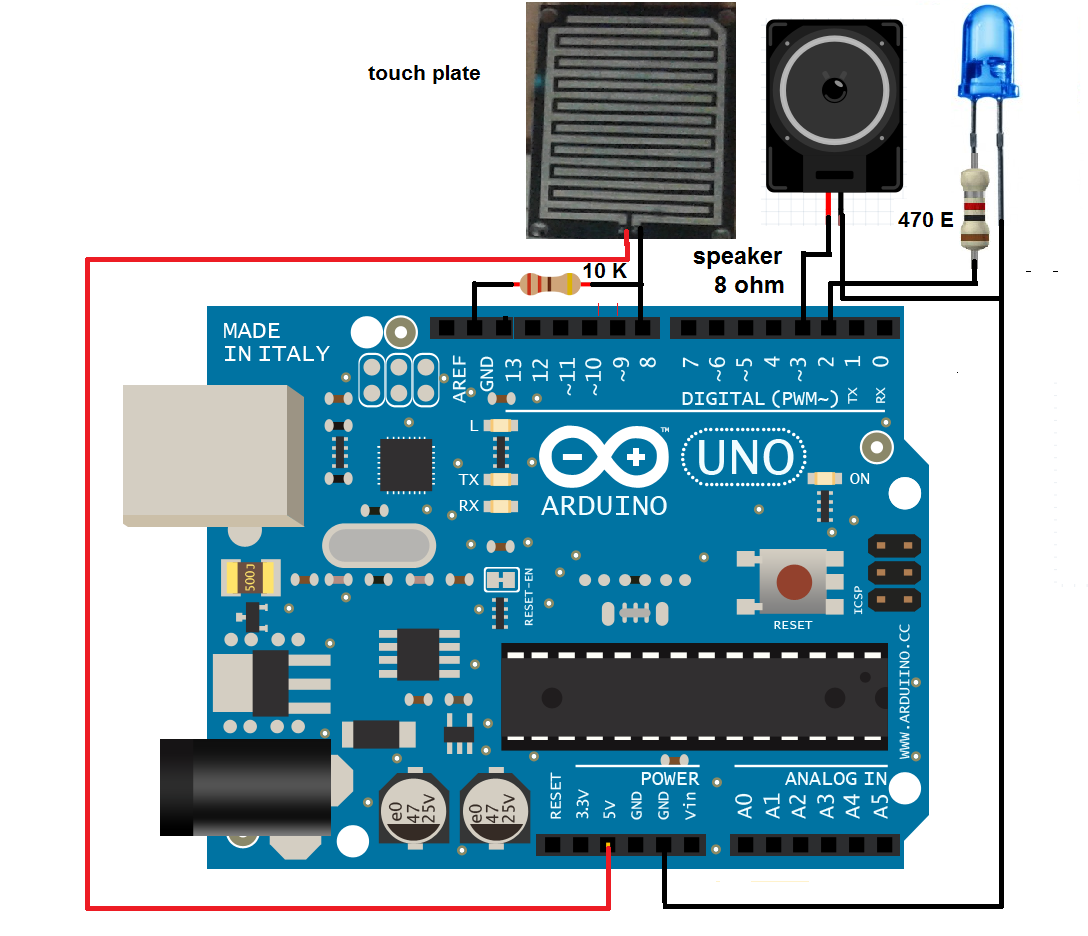
The touch plate has two connecting terminals. One is connected to 5 V supply from the board and other is connected to digital pin 8 as shown. The same pin is pulled down using 10 K resistor. One LED is connected to digital pin 2 through limiting resistor of 470Ω. One 8Ω speaker is connected to digital pin 3.
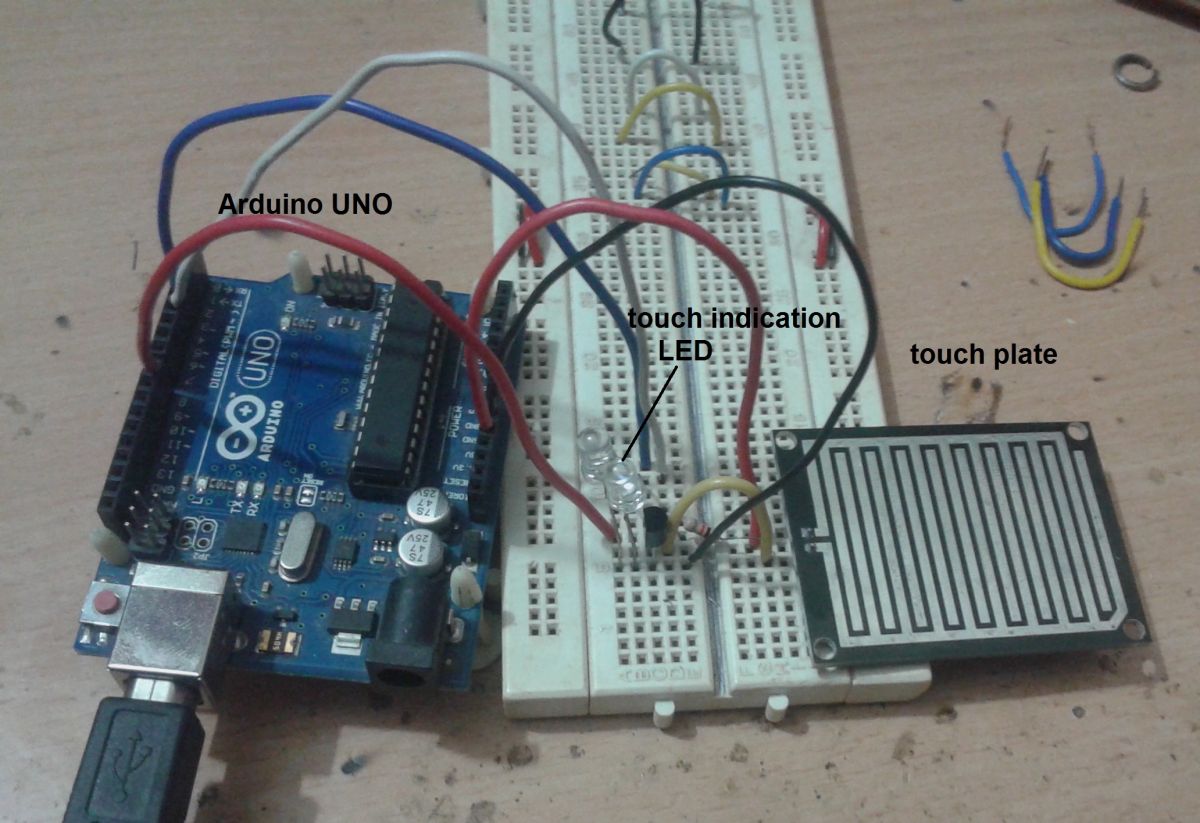
Here is the snap of arrangement.

Fig. 1: Prototype of Arduino and Touch Sensor Interfacing
CIRCUIT OPERATION
• When arduino board is connected to PC/laptop through USB cable, the complete circuit gets supply and the arduino sends message to computer as “touch sensor interfacing”
• Normally pin 8 gets logic 0 input as it is pulled down through resistor
• When user touches the plate the 5 V is given to pin 8, that means it gets logic 1 (high) input
• This is detected as touch and LED glows till user touches the plate
• This also generates beep sound through speaker for audio notification and a message is displayed on arduino IDE serial monitor as “you have touched the plate”
ARDUINO SOFTWARE PROGRAM
Here, the program is written in arduino IDE software and compiled using it. It is uploaded into an internal flash of arduino microcontroller ATMega328 through USB built-in programmer.
Project Source Code
###
#define LED 3 #define touch_pin 8 #define touch_LED 4 void setup() { // put your setup code here, to run once: pinMode(touch_pin, INPUT); pinMode(touch_LED,OUTPUT); pinMode(LED,OUTPUT); Serial.begin(9600); Serial.println("touch sensor interface with Arduino"); digitalWrite(touch_LED,LOW); digitalWrite(LED,LOW); } void loop() { int touch; touch = digitalRead(touch_pin); if(touch==0) { digitalWrite(touch_LED,HIGH); digitalWrite(LED,LOW); Serial.println("You have touched the plate"); tone(3,1500,1000); } else { digitalWrite(touch_LED,LOW); digitalWrite(LED,HIGH); } delay(300); }###
Circuit Diagrams
Project Video
Filed Under: Electronic Projects
Filed Under: Electronic Projects


Questions related to this article?
👉Ask and discuss on Electro-Tech-Online.com and EDAboard.com forums.
Tell Us What You Think!!
You must be logged in to post a comment.