The website Pi My Life Up deals with various interesting projects that are based on a Raspberry Pi. One of these projects, submitted by Gus, explains about building a Raspberry Pi motion sensor while making use of a PIR sensor. It is usually used for security reasons in houses or office buildings so as to detect the movement of a person depending upon the change in the infrared temperature within its view. PIR stands for passive Infrared Sensor that measures Infrared (IR) light radiating from objects in its range of view.
The project basically involves combining a Raspberry PI with a PIR sensor and a piezo speaker. This speaker is also known as a buzzer and uses piezoelectric effect for generating sound. It converts the initial mechanical motion into audible sound with the help of resonators. Other components used in this project include an 8GB SD card and 100Ohm resistor. Further, a wifi dongle could also be used if the PI has to be controlled remotely.
Apart from this, the wires, breadboard and breakout board are some optional tools but these are highly recommended because of their convenient use in prototyping and circuitry. This project utilizes breadboard as a medium between the Pi and the sensor. However, one can also establish a direct connection between the Pi and the sensors as well as buzzer.
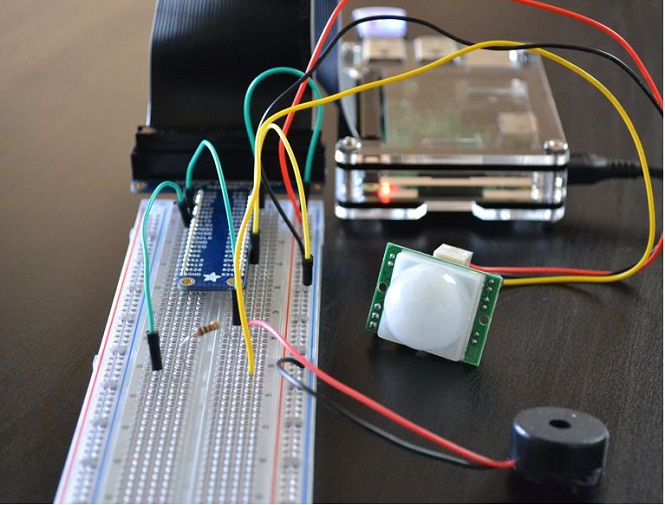
The procedure involves both hardware and software sections. Starting with the hardware, a circuit has to be configured by connecting the wires in a predetermined manner. The ground pin is wired to the negative rail on breadboard while the 5V pin is linked to the positive rail. Then the buzzer is connected to pin 7 and negative rail.
Moving on, a wire from Pin 11 is connected to the breadboard and a resistor is placed at its end. From here the yellow wire of PIR sensor is connected. Lastly, the red and black wires of PIR are linked to the 5V line and ground rail on the breadboard respectively.
Now in the software segment, the setup needs to be programmed so as to bring the device to life. For this, a python script has to be prepared and necessary packages have to be downloaded. After this certain changes have to be made in the script regarding the references, GPIO mode, and Pins. Then the script is tested to check if it’s working or not.
While testing it, as soon as you move your hand in front of the device, the buzzer would generate a beep. If this still doesn’t work, it has to be ensured that the code doesn’t contain any error and the hardware configuration is proper. It is a simple project that requires basic knowledge about circuits and boards. This sensor could be used in any field ranging from a simple counter at a store to a setup involving a Raspberry Pi camera with the help of some improvisation.
If you wish to carry out the task on your one then you may refer to the video uploaded by Pi My Life Up that gives an insight about the configuration as well as coding of the sensor.
Filed Under: Reviews

Questions related to this article?
👉Ask and discuss on Electro-Tech-Online.com and EDAboard.com forums.
Tell Us What You Think!!
You must be logged in to post a comment.