A majority of the wattmeters we see today are analog in nature. They consist of numerous moving parts and contain bulky components which not only take up space but also cost a lot of money and are not as accurate as they should be. In this tutorial you will learn how to make a wattmeter which is purely electronic and has no moving parts. The components are also easily available at an affordable price.

Fig. 1: Prototype of Arduino based Power Monitor
Components Needed
Working Principle
The IC takes the current and voltage as input from the power source and then multiplies them after taking phase difference into consideration. The output given is a pulse of varying frequency which depends on the input power received. Thus a higher input power leads to a higher frequency of the output pulse and a lower power leads to a lower frequency.

Fig. 2: Image showing Arduino based Power Monitor tested by an AC Voltage Generator
Step by Step Procedure
Project Source Code
###
int pin = 7; int count=0; unsigned long duration,power; void setup() { Serial.begin(9600); pinMode(pin, INPUT); } void loop() { duration = pulseIn(pin, LOW); if(duration>14000){ power = duration - 14000; } else{ power=0; } Serial.println(power/100); delay(100); }###
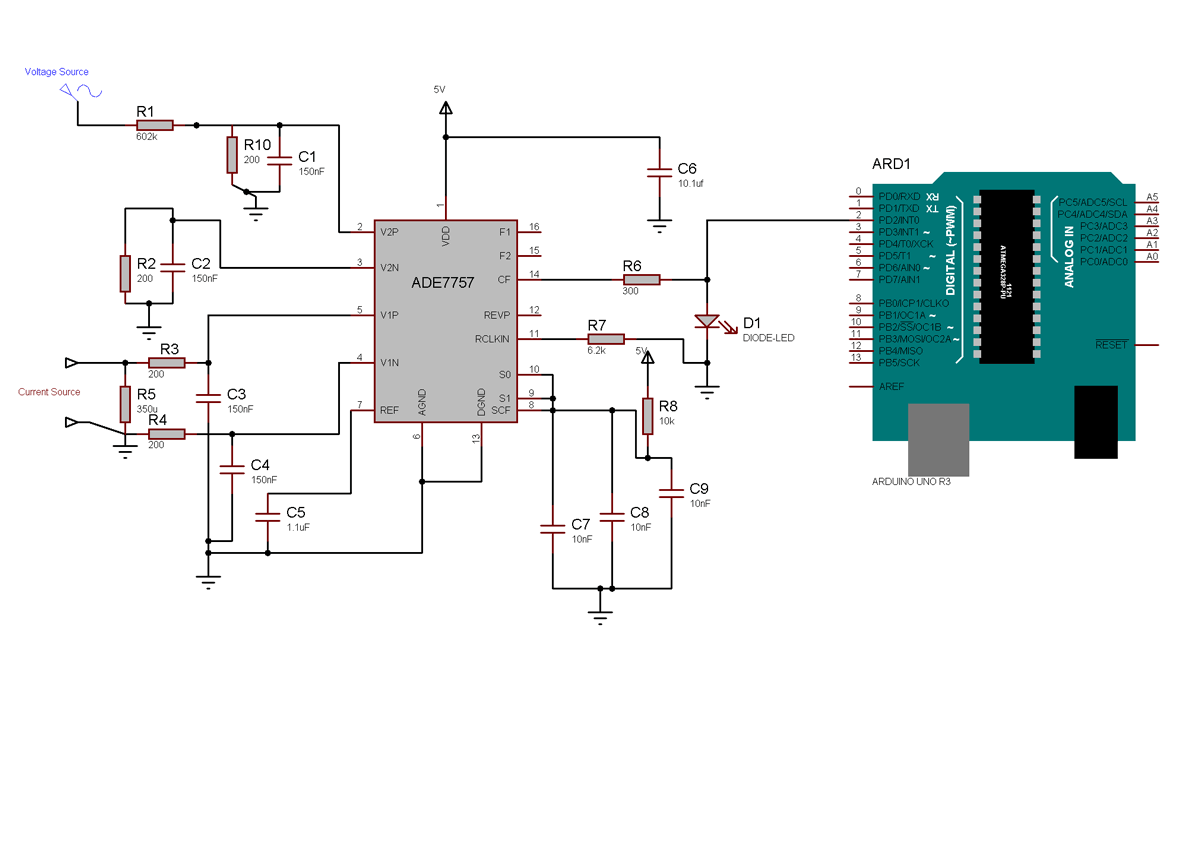
Circuit Diagrams
Project Video
Filed Under: Electronic Projects
Filed Under: Electronic Projects

Questions related to this article?
👉Ask and discuss on EDAboard.com and Electro-Tech-Online.com forums.
Tell Us What You Think!!
You must be logged in to post a comment.