The Raspberry pi is a microcontroller board which runs on a SoC chip from the Broadcom with ARM11 processor at the core. The Board is a mini computer itself without any input or output devices but ports provided to connect them. The board is designed with an intention of providing computer education to the remote schools where the PCs are not very commonly used. The board can be connected to a normal TV set using a RCA connector. It can be connected to an HD TV screen using the HDMI port provided in the board. The board can be connected with an Ethernet cable and access them remotely in TUI or GUI mode.
The operating systems like Archlinux ARM, OpenELEC, Pidora, Raspbmc, RISC OS and the Raspbian and also Ubuntu versions are available for the Raspberrypi board. The board after connected to a PC screen and keyboard directly or through remote login can be used as a normal computer and is a great for learning the basics of computer and the programming and development. This article discusses getting started with the C programming in the Raspberrypi.
In this project the Raspberrypi board is booted with Ubuntu and is remotely accessed in GUI mode with a windows7 PC. Once starts accessing the Raspberrypi the host OS has little significance and one will be doing things in the Ubuntu OS most of the time using the Linux commands. There are number of software in the Linux which can simulate the command line (TUI) running inside the GUI. The Ubuntu installed in the Raspberrypi uses software called LXterminal and RootTerminal for simulating the command line.
The software can be selected and run from the applications button at the lower left corner of the Desktop as shown in the following image.
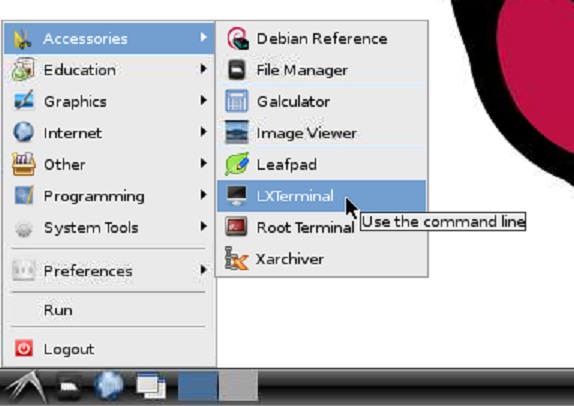
Fig. 2: Select LXterminal Or RootTerminal To Use Ubuntu In Raspberry Pi
The user can select the LXTerminal or Root Terminal software and if the LXTerminal is selected the window will open up as shown in the following image:
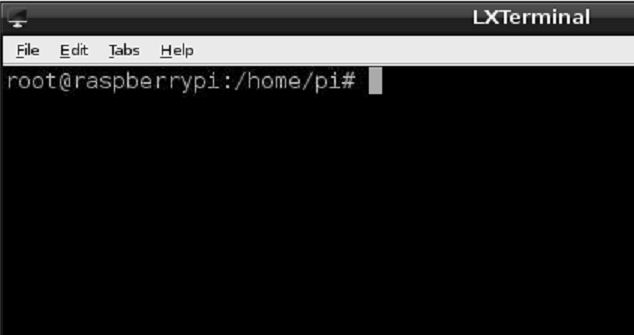
Fig. 3: LXterminal Window In Raspberry Pi
The string that can be read from the window has the following meaning. The “root” is the current user login and the “raspberrypi” is the computer name. The “/” followed by the “:” represents the enire filesystem and is called the “root directory”. The “home” is the folder where all the user data can be found inside their respective folders. The second slash represents the entire “home” folder and “pi” is the folder where the current user “pi”‘s data are stored. The string simply suggests that the user is there currently in the user folder named “pi”.
It is a better practice to keep all the programming trials inside a separate folder. A separate folder can be created using the ‘make directory’ command “mkdir”. The following command will create a new folder named raspberrypi_C.
mkdir raspberrypi_C

Fig. 4: Command To Create New Folder Named raspberrypi_C
One can confirm whether the folder is created or not by typing the ‘list directory’ command “ls” or with an option “ls –color”
ls –color

Fig. 5: Command “ls” To List Directory In Raspberry Pi
As shown in the above figure the folders will be displayed in dark blue color, image files in pink color, executable files in green color, zip files in red color and normal text files in white color. The newly created folder “raspberrypi_C” is also displayed as marked in the image.
Using the ‘change directory’ command “cd” one can jump into any required folder. To enter the folder ‘raspberrypi_C’ the “cd” command can be used followed by the folder name as shown below:
cd raspberrypi_C

Fig. 6: Command “cd” To Change Directory’ In Raspberry Pi
Notice that the string displayed has now changed from “/home/pi” to “/home/pi/raspberrypi_C” which means that the user is currently inside the folder “raspberrypi_C”.
Now to type in the first c program on the Raspberrypi a text editor is required. There is a text editor which can be operated in the command line itself and which is used by the Linux programmers around the globe. The text editor software is called “VIM” and can be downloaded and installed into the Ubuntu using the following command
apt-get install vim

Fig. 7: Command To Download And Install Text Editor Software “VIM” In Raspberry Pi
Before using this command make sure that the Raspberrypi board is connected to the internet.
To open a file for editing using the vim simply type the command “vim” followed by the file name. Actually any file can be opened using the vim and if the file with the provided name does not exist in the current folder the vim will create a file with that name and open it up for editing. To create a file named “hello_world.c” and open it for editing using the vim the following command can be used:
vim hello_world.c

Fig. 8: Command To Edit File Using The Vim In Raspberry Pi
The command will open up a text editor window from the command line itself as shown in the following image.
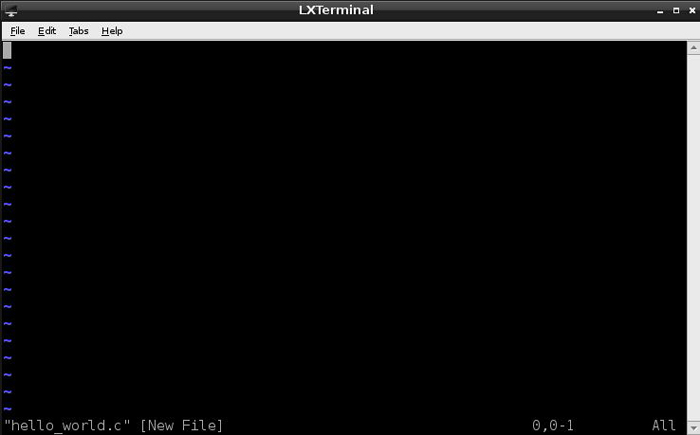
Fig. 9: Vim Editor Window ‘normal mode’ In Raspberry Pi
This is the vim editor window in its ‘normal mode’. Any commands that can be passed on to the vim like saving a file, undo changes, exit from the vim etc. can be done with the ‘command mode’. To go to the command mode of vim simply press the “:”, type the required command which is specific for the vim editor and press enter.
Since the C coding is about to be written into it is recommended to turn the syntax highlighting on. The command for highlighting the syntax is “syntax on”. Anything other than the actual text including the commands typed will appear at the bottom of the window as shown in the following image.
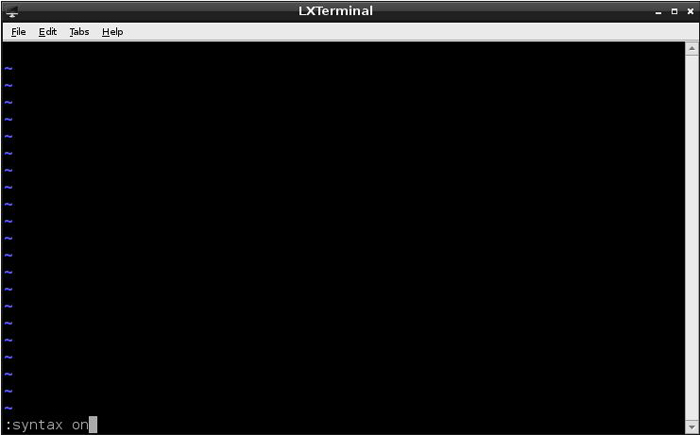
Fig. 10: LXterminal Window With Syntax On In Raspberry Pi
To start typing the code the user should jump out of the ‘command mode’ and use the ‘insert mode’. To jump to ‘normal mode’ back from command mode or any other mode simply press ESC key. To enter the insert mode press the key “i”. In the insert mode the user can type in the required text very much like in any other text editor.
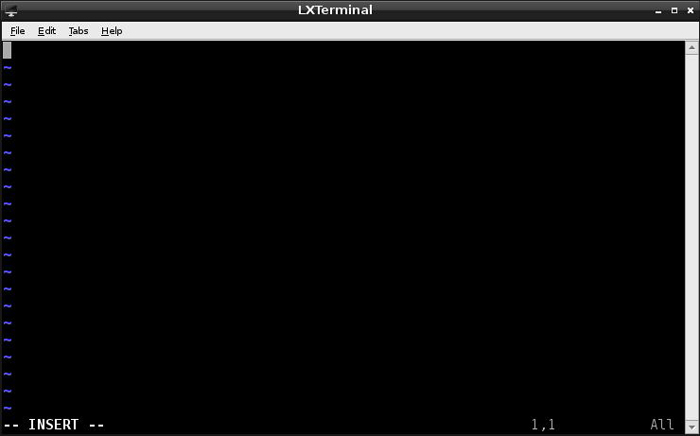
Fig. 11: LXterminal Window To Type Code With Command Mode In Raspberry Pi
Now the user can start typing the first simple program for the Raspberrypi. The following is the image of the simple program which can display a text “HELLO WORLD” written in the vim editor.
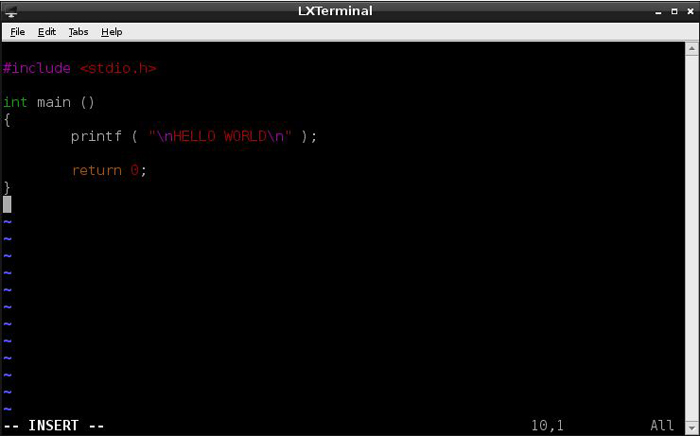
Fig. 12: Code To Display Text “HELLO WORLD” In Vim Editor Of Raspberry Pi
If done with typing in the code the user can jump back to the normal mode using ESC key. The line number if required can be displayed along with the text by using the vim command “set nu” after entering the command mode using the “:” key.
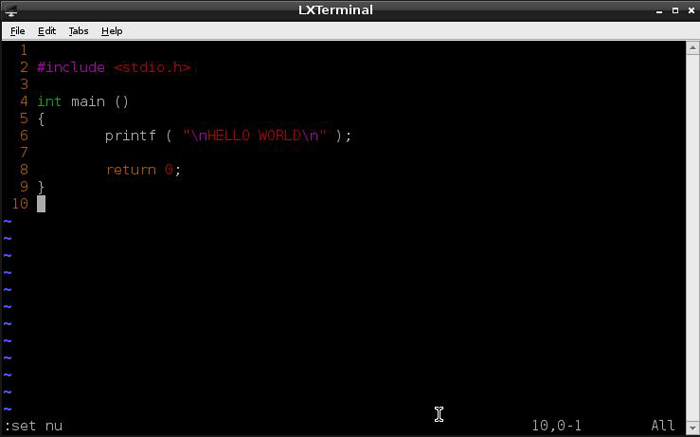
Fig. 13: Command To Display Line Number With Text In LXTerminal Window Of Raspberry Pi
To save the file use the command “w” and to quit the vim, use the command “q”. Use the command “q!” to quit without saving. The save and quit command can be used together as “wq” as shown in the following image which will quit the user from the vim back to the command line.
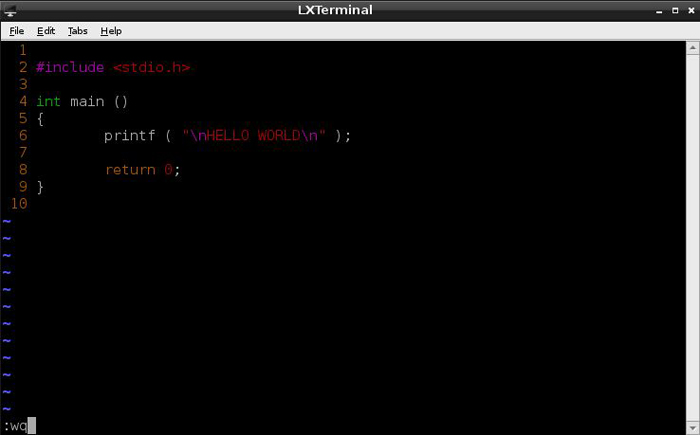
Fig. 14: Command To Save And Quit In LXTerminal Window Of Raspberry Pi
The user will be directed back to the command line where the command used to open the vim editor is also visible. Now to ensure that the file named “hello_world.c” has been created use the ‘list’ command “ls” again which will list the file named “hello_world.c” as shown below:

Fig. 15: Command To List Hello World File “ls”
Now it’s time to compile the .c file into an executable file and there are number of compiler software that can run from the command line and ‘cc’ or ‘gcc’ are the commonly used for compilers for C programs.
To compile any .c file using ‘cc’ from the command line simply type “cc” followed by the file name, here the user can type
cc hello_world.c
The ‘cc’ creates the executable file with a default file name called “a.out” but the required executable file name can be specified by using the option “-o” follows by the required file name. To compile the .c file “hello_world.c” to an executable file “hello_world” the following command can be used.
cc hello_world.c -o hello_world

Fig. 16: Command To Compile “hello_world.c” To An Executable File “hello_world In Raspberry Pi
If there were any error in the code it should have appeared in the command line, since there is nothing appears other than the usual string after done the compilation it can be assumed that the executable file is created successfully. To confirm use the list command again as shown in the following image:

Fig. 17: Executable File Of ‘hello_world’
The green colored file is the executable created by the software ‘cc’ from the .c file ‘hello_world’. To execute this file or any other file from inside the folder where the file exists use “./” followed by the executable file name. Here to execute the file named ‘hello_world’ use the following command.
./hello_world
The following image of the command line shows all the commands that have been used for creating a .c file, compiling it to generate an executable file and finally executing the executable file. The result of the program execution “HELLO WORLD” can be also be seen in the image.

Fig. 18: “HELLO WORLD” Program In Raspberry Pi On Screen
Filed Under: Raspberry pi


Questions related to this article?
👉Ask and discuss on Electro-Tech-Online.com and EDAboard.com forums.
Tell Us What You Think!!
You must be logged in to post a comment.