Liquid Crystal Display (LCD) is made use in various kinds of devices from small display screen in calculator to large screens in televisions. In case of a microcontroller based system the LCD is the most effective output device. Special kind of Liquid Crystal drivers are used with the commonly found LCD modules in microcontroller systems.
The custom characters can be used to display various kinds of smileys in LCD display. Smileys are now a days very popular especially in SMS using mobile phones, online messenger applications etc. This particular project demonstrates how is it possible to create a smiley and display it in a 16x2 LCD. The project is done with the help of easy-prototyping platform Arduino.
The Arduino is an easy-prototyping platform where the hardware is very simple and the coding and IDE is very easy to start with. Since the basic Arduino board does not have a built –in LCD module to display data one should connect it externally to display data like strings, sensor values etc. The libraries in the Arduino IDE help in accessing the LCD module very easily.

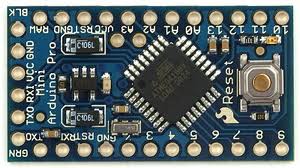
Fig. 2: Typical Arduino Pro-Mini Board

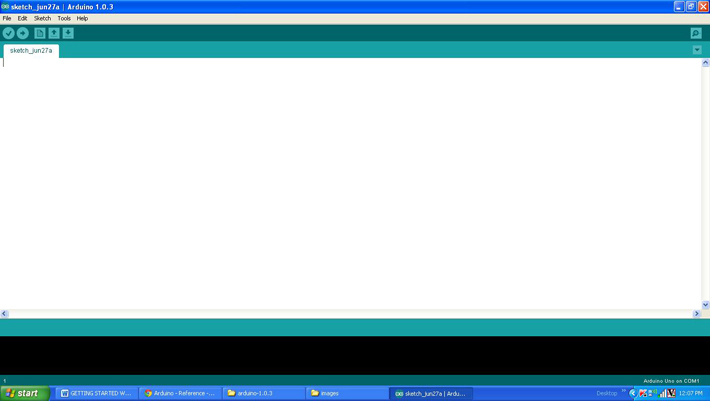
Fig. 3: Arduino IDE Software Window
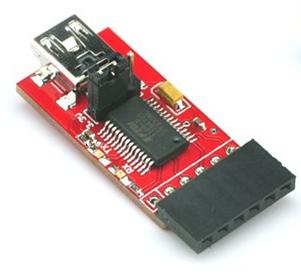
Another hardware which can perform the USB to TTL conversion is used to upload the program into the arduino board.

Fig. 4: External USB to TTL converter board for programming Arduino and serial communication
It is assumed that the reader has gone through the project how to get started with the arduino and done all the things discussed in it.
This project makes use of the custom characters that can be generated in an LCD module. The LCD module has two or more controllers which helps in displaying the characters corresponding to the ASCII value which is send by the microcontroller. The ASCII character patterns are stored in the internal CGROM of the LCD controllers. The LCD modules also provide a CGRAM where the user can store the custom characters and display them. The method of generating custom characters is well explained in a previous project on how to create custom characters in an LCD.
One has to work out the character of the custom character that needs to be displayed in the LCD screen as explained in the project on how to create custom characters in an LCD . The custom characters which are displayed in this project are shown in the following image.

Fig. 5: Custom Character On LCD Using Arduino Circuit On Breadboard
There are basically two symbols used in this project of which one is a smile symbol and another is a heart symbol. The bit patterns that need to be stored in the LCD to display those characters are find out using the method of drawing the pixel array and assuming the bit value for the pixel which is ON as 1and the pixel which is off as 0.
The 8*5 pixel array and the corresponding binary array for the smile symbol displayed in the project are shown in the following image;
![]()
Fig. 6: 8*5 Pixel And Binary Array For Positive Half Cycle Of Smileys
The 8 byte long character array for the above shown custom character can be defined in the code as given below;
{
0b00000,
0b00000,
0b01010,
0b00000,
0b10001,
0b01110,
0b00000,
0b00000
};
The 8*5 pixel array and the corresponding binary array for the heart symbol displayed in the project are shown in the following image;
![]()
Fig. 7: 8*5 Pixel And Binary Array For Negative Half Cycle Of Smileys
The 8 byte long character array for the above shown custom character can be defined in the code as given below;
{
0b00000,
0b01010,
0b11111,
0b11111,
0b11111,
0b01110,
0b00100,
0b00000
};
The Arduino IDE has a library called <LiquidCrystal.h> which provides lot of functions to access the LCD module. Few functions from the library are used in this project also which are actually very useful in small applications. The details of those functions are already discussed in the previous projects on how to interface an LCD , how to display sensor value on LCD , how to connect the LCD with the PC and how to make an LCD scrolling display .
The code written for this project has a function lcd.createChar() which helps to create the custom characters in an LCD screen. The details of the lcd.createChar() function are discussed in the following section.
lcd.createChar()
The function lcd.createChar() can be used to write a custom character to the required location in the CGRAM. The function has two parameters in which the first parameter is the location in the CGRAM memory where the character array corresponding to the custom character need to be stored and the second parameter is the character array itself. For example if there is a custom character array called ‘cc’ and it need to be stored in the 5th location of CGRAM one can use the following statement;
lcd.createChar(5, cc);
The above statement writes the character array to the 5th location of the CGRAM of the LCD controller from where it can be displayed by calling the lcd.write() function discussed in the projects on how to connect the LCD with the PC and how to make an LCD scrolling display.
lcd.write(5);
The code written for this project can store the smileys in the CGRAM of the LCD module and display them in the second line of the LCD module in such a way that the entire second line is filled with the two smileys.
Once done with the coding one can verify and upload the code to the Arduino board as explained in the project how to get started with the Arduino and can find the smileys in the LCD module and also the blinking LED.
Project Source Code
###


/*================================= EG LABS =======================================

Display smileys on a 16*2 LCD along with blinking an LED


 The circuit:

 * LED attached from pin 5 to ground through a 1K resistor


 LCD:

 * LCD RS pin to digital pin 12

 * LCD Enable pin to digital pin 11

 * LCD D4 pin to digital pin 5

 * LCD D5 pin to digital pin 4

 * LCD D6 pin to digital pin 3

 * LCD D7 pin to digital pin 2

 * LCD R/W pin to ground

 * 10K resistor:

 * ends to +5V and ground

 * wiper to LCD pin 3

 * LED anode attached to digital output 6

 * LED cathode attached to ground through a 1K resistor

//================================= EG LABS =======================================*/


// include the library code:

#include <LiquidCrystal.h>


// initialize the library with the numbers of the interface pins

LiquidCrystal lcd(12, 11, 5, 4, 3, 2);


//----------------- store the custom characters in arrays ---------------------//

byte heart[8] =

              {

                0b00000,

                0b01010,

                0b11111,

                0b11111,

                0b11111,

                0b01110,

                0b00100,

                0b00000

              };


byte smile[8] =

              {

                0b00000,

                0b00000,

                0b01010,

                0b00000,

                0b10001,

                0b01110,

                0b00000,

                0b00000

              };


//----------------- store the custom characters in arrays ---------------------//


// give the LED pin a name:

int led = 6;


void setup()

{

  //---- create custom characters ----//

  lcd.createChar(1, heart);

  lcd.createChar(2, smile);

  //---- create custom characters ----//


  // initialize the led pin as an output.

  pinMode(led, OUTPUT);


  // set up the lcd's number of columns and rows:

  lcd.begin(16, 2);


  lcd.print("ENGINEERS GARAGE");

  lcd.setCursor(0, 1);

  lcd.write(1);lcd.write(2);lcd.write(1);lcd.write(2);

  lcd.write(1);lcd.write(2);lcd.write(1);lcd.write(2);

  lcd.write(1);lcd.write(2);lcd.write(1);lcd.write(2);

  lcd.write(1);lcd.write(2);lcd.write(1);lcd.write(2);

}


void loop()

{

  //---- blink LED -----//

  digitalWrite(led, HIGH);

  delay(1000);

  digitalWrite(led, LOW);

  delay(1000);

   //---- blink LED -----//

}

###
Circuit Diagrams
Project Components
Project Video
Filed Under: Arduino
Filed Under: Arduino


Questions related to this article?
👉Ask and discuss on Electro-Tech-Online.com and EDAboard.com forums.
Tell Us What You Think!!
You must be logged in to post a comment.