For making these lamps you will need a hole saw set, power drill, rotary tool, clamp, block of wood, hollow dowel, cabinet handle, screws, grommet, clear varnish, and black paint. To make the base of this lamp, the maker of this project used Brazilian hardwood known as “Massaranduba”, what makes it a preferred choice is its great density that offers the required weight for making the base of lamp. However, the only drawback is – it is difficult to drill.
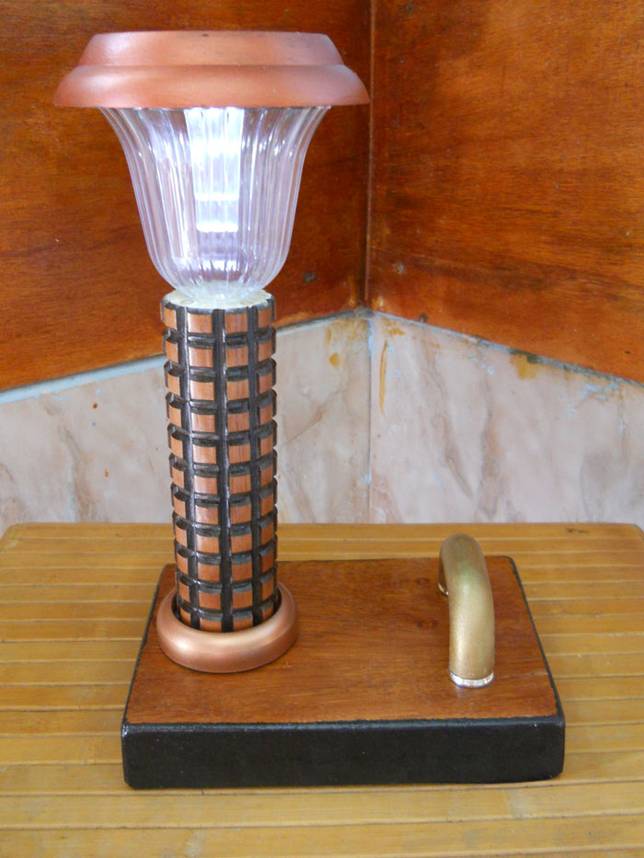
Another most important thing for this build is a good quality set of hole saws as well as a clamp. Do not use cheap hole saws as those are likely to break down during this process. The clamp is most important one so that the block of wood can be kept away from spinning. Also, make sure not to paint the edges of the wood before the project is complete. Once you have clamped the wood in a secure manner, you can always use the hole saws for drilling a concentric circles set. Now with the help of a sharp knife or file or any other object scrap away the excess wood. Once the hole for lamp’s leg has been drilled, you can drill two holes for mounting the handle.
For the leg of the lamp, you can always use any wooden trophy or any other thing that is available around you. If the head of your lamp’s leg is too tight for the head of solar lamp, you can always sand it a little over the inner edges with a rotary tool. Paint the lower end of your wooden base with black color, while the upper one can be painted using any color that matches with your lamp’s leg. If you are using the all-weather black oil-based paint make sure that you are patient enough to let it dry for sometime.
Keep this away from wind as that may lead to deposition of dust over your paint job. You can use the grommet at the leg of the lamp for support as well as decorative purposes. Screw the handle tightly close to the lamp leg. Now the solar lamp head that you plan to fix over it may have all good qualities except for some good style. You can paint it with a desired color to impart a rich look, but colver the solar cell with tape before you start painting. Now just place the solar garden lamp over the dowel and you lamp is all set.
Filed Under: Reviews

Questions related to this article?
👉Ask and discuss on Electro-Tech-Online.com and EDAboard.com forums.
Tell Us What You Think!!
You must be logged in to post a comment.