In the previous tutorials, MQTT protocol packets and MQTT security mechanisms were discussed. Now it’s time to start getting hands dirty. For creating a communication network in which multiple IoT devices can communicate with each other via a MQTT broker, it is important to configure IoT devices as MQTT clients. The MQTT is developed on the top of TCP/IP stack, so the devices must have TCP/IP stack with them if they want to communicate to each other via MQTT broker.
In this tutorial, a Smartphone and a PC will be configured as MQTT clients. For making an android Smartphone MQTT client, MQTT dashboard application which is an android app can be used. This android app supports MQTT protocol to communicate with other MQTT clients. For setting the PC as MQTT client, MQTT lens which is a chrome add-on that also supports MQTT protocol can be used. Once the mobile and PC are set MQTT clients, they can communicate via MQTT Broker.
Setting Mobile as MQTT Client –
For setting a mobile as an MQTT client, any MQTT supported app can be downloaded or a custom app that supports MQTT protocol can be created. There are many android apps available on the Google Play Store that can be used to make an android phone MQTT Client. In this tutorial, IOT MQTT Dashboard app is used.
Download and install the app. After installation on the android phone, open the app. There will open a dashboard window. In that window, tap the Plus sign.
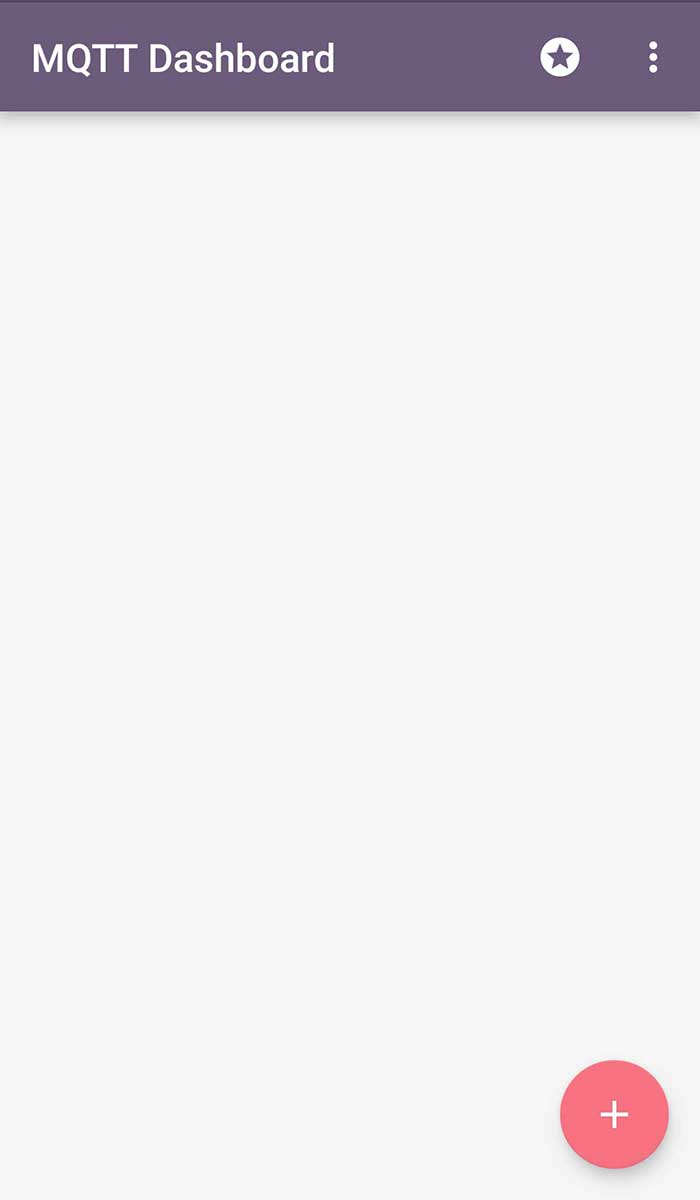
Fig. 1: Mobile Screenshot of Main Activity in IOT MQTT Dashboard
There will open a new window for connection establishment.
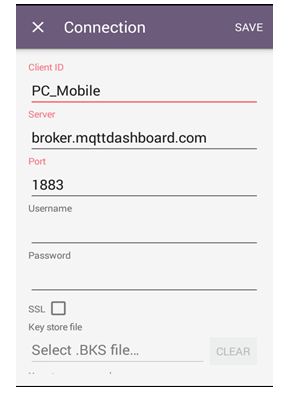
Fig. 2: Mobile Screenshot of New Connection Activity in IOT MQTT Dashboard
In the client ID field, set a unique name (a string) so that when mobile client will connect to the MQTT broker, the MQTT broker can easily identify and send or receive the packet data to that particular client only. The two clients should not have the same name. So, the client name should be unique. The client ID can be maximum 24 bytes.
After client ID field, MQTT broker has to be mentioned. In this tutorial, HiveMQ is used as MQTT broker. Any other broker like Mosquitto, Eclipse Paho or CloudMQTT can also be used. The server field must be entered the domain name or public IP address of the MQTT broker/server. The HiveMQ broker domain is- broker.mqttdashboard.com.
Next set the port number of the public broker on which it can communicate. The Port 1883 is used for no security while port 8883 is used to enable transportation TLS/SSL security. Here the data is sent on port 1883 which is an unencrypted channel.
Next set the username and password to connect to the MQTT broker. However, it is not mandatory to mention username and password. As the port 1883 is used which is an unencrypted port, there is no need to set the SSL as 1 because SSL should be set 1 only if encrypted channel or port is used.
Save the setting by tapping the create button. The mobile client will send a request to the public broker and the broker will listen to that request and provide a connection to the MQTT client.
This way, the mobile can be set as MQTT client. The MQTT client can now be connected to the MQTT broker and the status of being connected will be visible in the App.
Setting PC as MQTT Client –
To configure PC as a client, a browser plugin – MQTTlens is used. It has the capability to connect with the MQTT broker and can communicate with other MQTT clients. This plugin is available for Chrome browser and can be added to it from the Chrome Web Store. MQTT lens supports some extra functionality for initiating connection with the broker. With this add-on connection of PC as MQTT client can be easily setup.
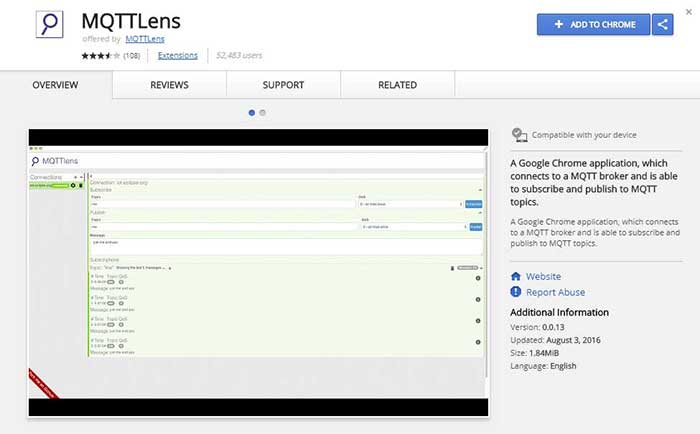
Fig. 3: Screenshot of MQTTLens Chrome Extension for setting PC as MQTT Client
After adding the extension, a dashboard window will open. Tap on the Plus sign to create a connection.
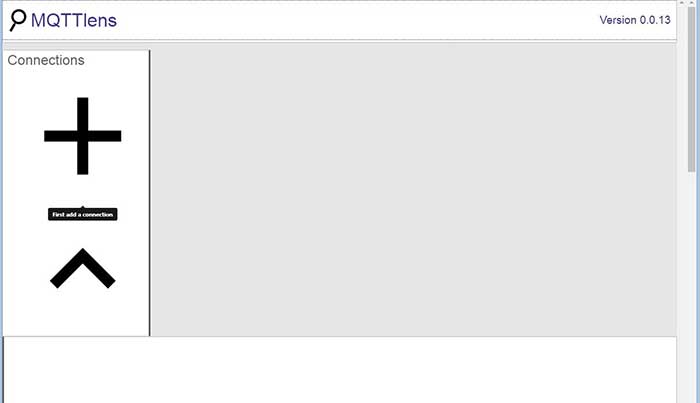
Fig. 4: Screenshot of MQTTLens Main Window
A pop up window will open to add a new connection.
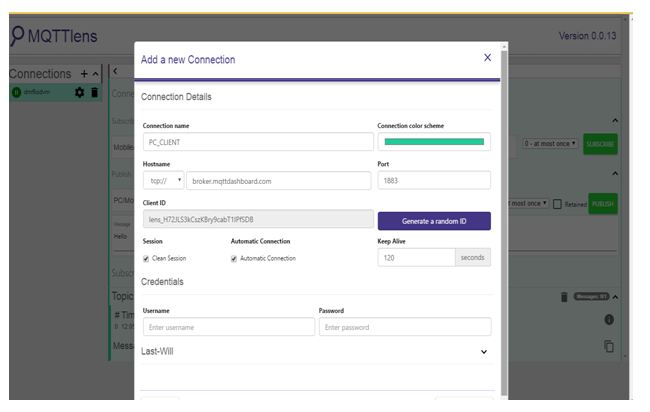
Fig. 5: Screenshot of MQTTLens New Connection Window
In the connection name field, write any name (not mandatory to be unique). Like PC_CLIENT can be used as connection name. Next, set the domain name of the MQTT broker so that PC client can initiate connection with the broker. The same broker (HiveMQ) should be used as is used in the other client devices (mobile client in this case) because the communication between these two clients will be established via the MQTT broker which should be same for both the devices. Next, define the Port on which public broker is connected i.e. 1883.
To identify PC as a unique client, MQTTlens itself generates the unique client ID. Every time the client establish connection with the broker, the client generates a random client ID. The MQTTlens has a facility of clean session, automatic connection, keep alive and last-will connection.
The clean session is set to 1 so that the server could discard any previously connected client’s information and data and so treat the new connection as clean. Every time PC client connects to the server, it treats the connection as new connection and doesn’t store any previous subscriptions and messages.
Next, automatic connection is to 1 to automatically connect the PC to the broker. The Keep Alive seconds is set to 120 seconds which is the maximum amount of time the client and broker can be connected even if they are not exchanging their data to each other.
The Username and password field are not mandatory fields but can be set if desired. They are not set here. Next last-will topic and last-wil message can be set if desired. When last-will topic and last-will messages are set, if MQTT broker is sending message to the subscribed client and the connection between the two suddenly is closed then the message will be sent as last-will message to that topic. If the last-will is not set then if connection between client and server is suddenly disconnected, the message packet will be lost and client will not get anything.
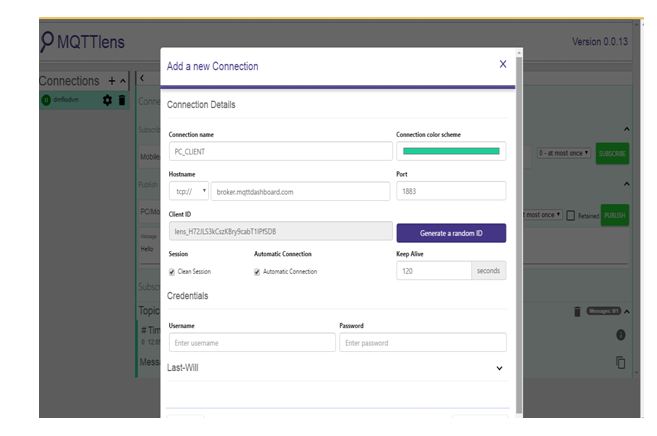
Fig. 6: Screenshot of MQTTLens New Connection Fields
Save the settings by clicking the ‘Create Connection’ button. After saving the setting, the MQTT client can be connected to the MQTT broker and the status of being connected will be visible in the application.
This way the PC will act MQTT client through browser plugin. Now the PC is set as MQTT client and it can connect to the other clients via MQTT broker.
In this tutorial, an android smart phone and a PC have been set as MQTT Clients with HiveMQ broker with no security. The next tutorial will discuss on setting topics and messages on publisher side and subscriber side. After that the two clients can communicate with each other via the (public) MQTT broker.
You may also like:
Filed Under: Featured Contributions, IoT tutorials, Tutorials





Questions related to this article?
👉Ask and discuss on Electro-Tech-Online.com and EDAboard.com forums.
Tell Us What You Think!!
You must be logged in to post a comment.