This project is based on Arduino Platform. The game we choosed here is very common in casino, club and the indoor playing. This project uses three different coloured LEDs (RGB led) that show three different cases, these three cases are continuously changes with random blinking of different coloured LEDs, player will have jackpot when he/she will get all the three LEDs with same coloured cases. It is assumed that the reader has gone through the project how to get started with the arduino and interface LCD with arduino.
Here are some images of complete set up of Arduino based Jackpot Game.
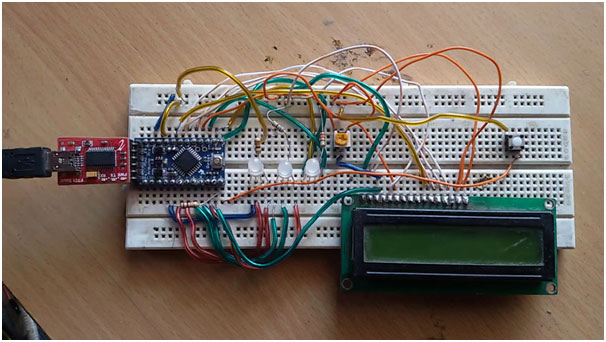
Fig. 1:
Prototype of Arduino based Jackpot Game
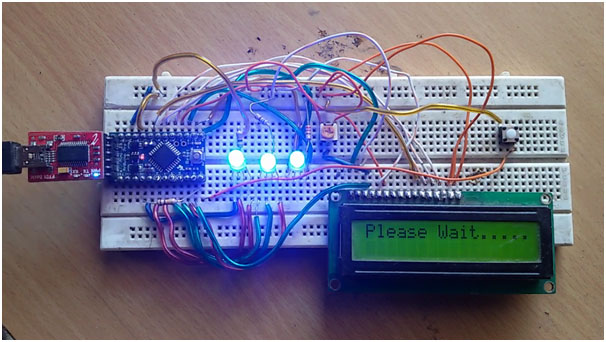
Fig. 2:
Image showing initial messages flashed on Arduino based Jackpot Game

Fig. 3:
Image showing initial messages flashed on Arduino based Jackpot Game

Fig. 4: Image showing ready message flashed on Arduino based Jackpot Game
Working
This is a simple and interesting LED game for children’s. The circuit of this game consist a 16×2 liquid Crystal Display for displaying the status for LED’s like JACKPOT, SORRY etc.
When player pushes the switch, LCD will display wait till the result gets displayed. LEDs goes on blinking randomly and after certain time it will get stop with randomly cases on those three LEDs, if player gets exactly same cases on all the three LEDs LCD will show JACKPOT otherwise it will show “try it next time”.

Fig. 5: Block Diagram of Arduino based Jackpot Game
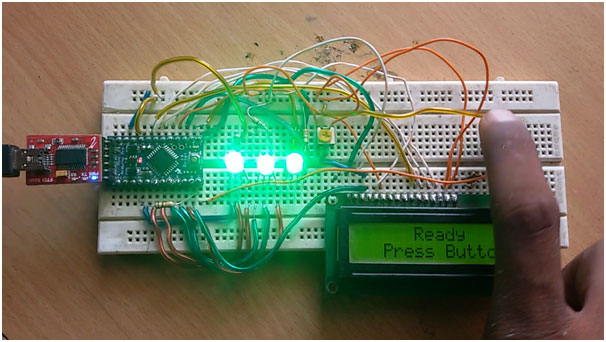
Fig. 6:
Image showing a user playing Arduino based Jackpot Game
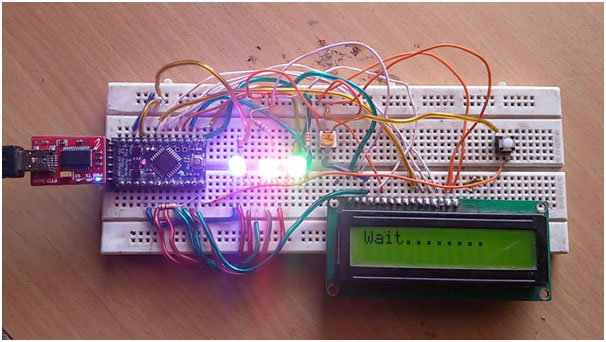
Fig. 7: Image showing intermittent message while Arduino release a jackpot
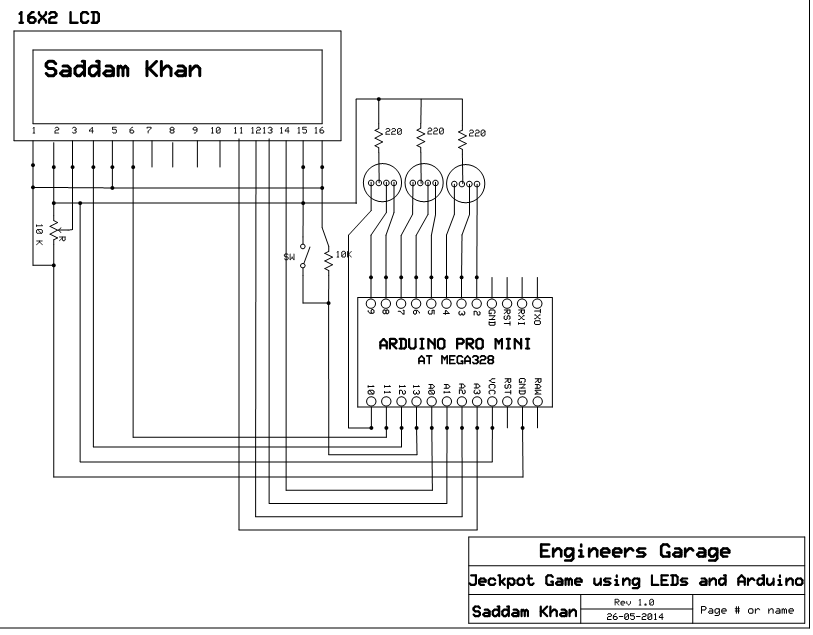
Connections of this circuit are very simple a 16×2 LCD is connected to Arduino in 4-bit mode. And data pin is directly connected to arduino analogue/digital pins (A0/14, A1/15, A2/16, A3/17). And control pins are connected to pin 11 and 12 of Arduino. A push button is directly connected to +5 volt for play game. And three RGB LEDs are connected to pins (2,3,4,5,6,7,8,9,10) of Arduino.
Programming of this project is also very simple. Here we used random number generator. C language already contains a function of generating random number.
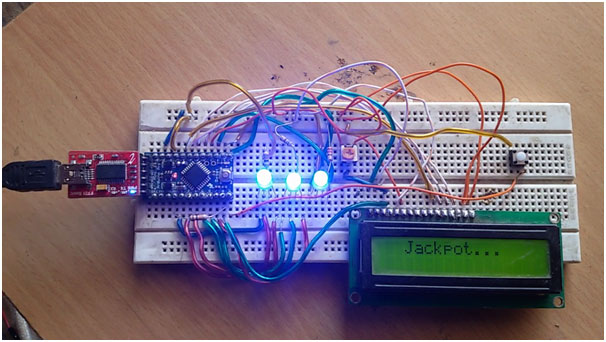
Fig. 8:
Image showing game result on Arduino based Jackpot Game

Fig. 9: Image showing game result on Arduino based Jackpot Game
Rand();
And calculation as follow.
temp=rand();
temp=(temp%100)/3.50;
it will generate a random number less then 28.
It generates a integer random number and then further some calculation we gets a random number for use. In program a 2 dimensional array defined for show pattern on LEDs.
Code for displaying pattern
charpatt[27][9]={
{1,1,0,1,1,0,1,1,0},
{1,1,0,1,1,0,1,0,1},
{1,1,0,1,1,0,0,1,1},
{1,1,0,1,0,1,1,1,0},
{1,1,0,1,0,1,1,0,1},
{1,1,0,1,0,1,0,1,1},
{1,1,0,0,1,1,1,1,0},
{1,1,0,0,1,1,1,0,1},
{1,1,0,0,1,1,0,1,1},
{1,0,1,1,1,0,1,1,0},
{1,0,1,1,1,0,1,0,1},
{1,0,1,1,1,0,0,1,1},
{1,0,1,1,0,1,1,1,0},
{1,0,1,1,0,1,1,0,1},
{1,0,1,1,0,1,0,1,1},
{1,0,1,0,1,1,1,1,0},
{1,0,1,0,1,1,1,0,1},
{1,0,1,0,1,1,0,1,1},
{0,1,1,1,1,0,1,1,0},
{0,1,1,1,1,0,1,0,1},
{0,1,1,1,1,0,0,1,1},
{0,1,1,1,0,1,1,1,0},
{0,1,1,1,0,1,1,0,1},
{0,1,1,0,1,1,0,1,1},
{0,1,1,1,0,1,0,1,1},
{0,1,1,0,1,1,1,1,0},
{0,1,1,0,1,1,1,0,1},
};
USES:
This is very useful project, in many of the playing clubs mostly in big malls with indoor playing clubs for children’s this is very easy to play.
Components Used
1. Arduino Board (Arduino Pro Mini)
2. Programmer for Arduino (FTDI basic Breakout)
3. RGB LEDs
5. Resistors
6. Push Button
Project Source Code
###


#include <LiquidCrystal.h>

 #define sw 9

  LiquidCrystal lcd(11, 12, 17, 16, 15, 14);

   int led[]={2,3,4,5,6,7,8,9,10};

    int led1[]={2,5,8,3,6,9,4,7,10};

     int temp=28;

      char patt[27][9]={

               {1,1,0,1,1,0,1,1,0},

               {1,1,0,1,1,0,1,0,1},

               {1,1,0,1,1,0,0,1,1},

               {1,1,0,1,0,1,1,1,0},

               {1,1,0,1,0,1,1,0,1},

               {1,1,0,1,0,1,0,1,1},

               {1,1,0,0,1,1,1,1,0},

               {1,1,0,0,1,1,1,0,1},

               {1,1,0,0,1,1,0,1,1},


               {1,0,1,1,1,0,1,1,0},

               {1,0,1,1,1,0,1,0,1},

               {1,0,1,1,1,0,0,1,1},

               {1,0,1,1,0,1,1,1,0},

               {1,0,1,1,0,1,1,0,1},

               {1,0,1,1,0,1,0,1,1},

               {1,0,1,0,1,1,1,1,0},

               {1,0,1,0,1,1,1,0,1},

               {1,0,1,0,1,1,0,1,1},


               {0,1,1,1,1,0,1,1,0},

               {0,1,1,1,1,0,1,0,1},

               {0,1,1,1,1,0,0,1,1},

               {0,1,1,1,0,1,1,1,0},

               {0,1,1,1,0,1,1,0,1},

               {0,1,1,0,1,1,0,1,1},

               {0,1,1,1,0,1,0,1,1},

               {0,1,1,0,1,1,1,1,0},

               {0,1,1,0,1,1,1,0,1},

              };


void setup()

{


  for(int i=0;i<9;i++){

   pinMode(led[i],OUTPUT);

    }

   pinMode(sw, INPUT);


   lcd.begin(16,2);

    lcd.setCursor(0,0);

     lcd.print(" JACKPOT Game By");delay(2000);

      lcd.setCursor(0,1);

       lcd.print("  Saddam Khan   ");delay(2000);

        lcd.clear();

         lcd.setCursor(0,0);

          lcd.print("Please Wait......");

           delay(1000);


   for(int i=0;i<9;i++){

    digitalWrite(led[i], patt[0][i]);

     }


   delay(1000);

    for(int i=0;i<9;i++){

     digitalWrite(led[i], patt[23][i]);

      }


      delay(1000);

       for(int i=0;i<9;i++){

        digitalWrite(led[i], patt[13][i]);

      }


      lcd.setCursor(0,0);

       lcd.print("     Ready       ");

        lcd.setCursor(0,1);

         lcd.print("  Press Button   ");

          delay(2000);

}


void loop()

{

 int state=0;

  while(1)

  {

     state=digitalRead(sw);

      if(state==HIGH)

      {

       lcd.clear();

        lcd.setCursor(0,0);

         lcd.print("Wait........");

          for(int i=0;i<10;i++){

           run();

     }

      temp=rand();

       temp=(temp%100)/3.50;

        for(int i=0;i<9;i++){

         digitalWrite(led[i], patt[temp][i]);

      }

    delay(1000);


    if(temp==13 | temp== 0 | temp==23)

    {

      lcd.clear();

       lcd.setCursor(0,0);

        lcd.print("  Jackpot...");

    }


   else if(temp== 5 | temp==8 | temp==11 | temp==15 | temp==19 | temp==21)

    {

      lcd.clear();

       lcd.setCursor(0,0);

        lcd.print(" You are doing   ");

         lcd.setCursor(0,1);

          lcd.print("     Great       ");

    }


    else

    {

      lcd.clear();

       lcd.setCursor(0,0);

        lcd.print("Sorry.........   ");

         lcd.setCursor(0,1);

          lcd.print("Best Luck Again   ");

    }

    }

    delay(100);

  }

}


void run()

{


  for(temp=0;temp<27;temp++){

   for(int i=0;i<9;i++){

    digitalWrite(led1[i], patt[temp][i]);

     delay(5);

    }

  }

}

###
Circuit Diagrams
Project Video
Filed Under: Electronic Projects
Filed Under: Electronic Projects


Questions related to this article?
👉Ask and discuss on Electro-Tech-Online.com and EDAboard.com forums.
Tell Us What You Think!!
You must be logged in to post a comment.