Engineers Garage

  • Projects and Tutorials
    • Electronic Projects
      • 8051
      • Arduino
      • ARM
      • AVR
      • PIC
      • Raspberry pi
      • STM32
    • Tutorials
    • Circuit Design
    • Project Videos
    • Components
  • Articles
    • Tech Articles
    • Insight
    • Invention Stories
    • How to
    • What Is
  • News
    • Electronic Products News
    • DIY Reviews
    • Guest Post
  • Forums
    • EDABoard.com
    • Electro-Tech-Online
    • EG Forum Archive
  • Digi-Key Store
    • Cables, Wires
    • Connectors, Interconnect
    • Discrete
    • Electromechanical
    • Embedded Computers
    • Enclosures, Hardware, Office
    • Integrated Circuits (ICs)
    • Isolators
    • LED/Optoelectronics
    • Passive
    • Power, Circuit Protection
    • Programmers
    • RF, Wireless
    • Semiconductors
    • Sensors, Transducers
    • Test Products
    • Tools
  • EE Resources
    • DesignFast
    • LEAP Awards
    • Oscilloscope Product Finder
    • White Papers
    • Webinars
  • EE Learning Center
    • Design Guides
      • WiFi & the IOT Design Guide
      • Microcontrollers Design Guide
      • State of the Art Inductors Design Guide
  • Women in Engineering

Light Weight Capacitive Power Supply Design

By Ashutosh Bhatt


Circuit designers are now experimenting with capacitor based power supply due to its low cost and light weight features. Unlike resistive type power supply, heat generation and power loss is negligible in capacitor power supply. But there are many limitations in capacitor power supply. It cannot give much current to drive inductive loads and since it is connected directly to mains, capacitor breakdown can damage the load. Moreover, there is the risk of shock hazards, if handled carelessly. capacitor

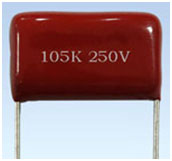
Fig. 1: Image of a Capacitor

If properly designed and constructed, the capacitor power supply is compact, light weight and can power low current devices. But before selecting the capacitor, it is necessary to determine the current that can be supplied by the capacitor. This note will help you to calculate the current in AC capacitor.

When an AC capacitor and Resistor are connected to AC lines, aconstant current can be maintained through the resistor R1, so long as the rectance of the capacitor is greater than the resistance of the resistor. The current flow then depends on the value of capacitor C1 assuming that V1 is greater than V2. 

Capacitor Power Supply

Fig. 2: Circuit Diagram For Registor and Capacitor Connection

Now the current through R1 is
IRMS = V1 x Xc
Where Xc is the reactance of the capacitor C1.
Suppose the line voltage V1 is 230 volt at 50 Hz, then IRMS is
IRMS = 230 (2 p 50 C) = 72220 C or IRMS = 70 mA per uF.
Suppose C1 is 105 K /J. It is 1 uF capacitor and it can give 70 mA current theoretically. Similarly a 225 K ( 2.2uF) capacitor can give 159 mA current.
Let us see the current in a 225 K capacitor.
First of all we have to calculate the Rectance (X) of the capacitor.
X = 1 / 2 p f C
Here f is the 50Hz mains frequency and C is the capacitance of 225K capacitor in Farads. As you know 1 microfarad (uF) is equal to 1/ 10 6 Farads.
Therefore 2.2 uF is 2.2 x 1/ 10 6 = 2.2 x 10 – 6
So X = 1 / 2 p x 50 x C x 10 – 6 = 1447.6 Ohms or 1.44 Kilo Ohms.
Now let us see the current that can be delivered by the 225 K capacitor.
Current I in mA = Volt / Rectance in Kilo Ohms
Here supply voltage is 230 volts and reactance X of 225 K capacitor is 1.44 K
So 230 / 1.44 = 159 mA 
Do not use this power supply for testing prototypes or as battery charger. Do not construct this on Bread board. Use common PCB.
 
So, theoretically a 225 K capacitor can give 159 milli ampere current but practically we can expect only 100- 120 mA current because, the current through the capacitor depends on input voltage, reactance of capacitor etc.
If two 225 K capacitors are connected in parallel, current can be doubled.
 
X and Y rated AC capacitors
There are two classes of AC capacitors, Class X and Y. Class X capacitors are connected from line to line while Y capacitors are connected from line to ground. Another significant difference between these two classes is if an X capacitor fails it does not expose anyone to electrical shock as opposed to a Y capacitor, which upon failure would expose anyone to electrical shock. Of the two types of interference capacitors the Class Xis more common with the Class X2 being the most common. 

X and Y rated AC capacitors

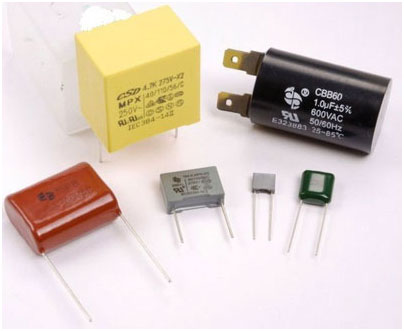
Fig. 3: Image showing Different types of Capacitors

Class X capacitors are subdivided into 3 types, class X1, X2 and X3. The difference is in the peak voltage rating for the capacitors. Class Y capacitors are divided into 4 types, Y1, Y2, Y3 and Y4. Like X capacitors the different classes have different peak voltage ratings.
Most Important : Prevent Shock Hazards

Electric Shock

1. Capacitor power supply is directly connected to mains and there is no galvanic isolation. Front end of the power supply is at mains lethal potential.
2. Do not touch or trouble shoot when it is connected to mains.
3. Always use insulated screw driver and tester.
4. It is better to place a rubber sheet or wooden plank on the floor so that foot rests on the insulator while working with AC circuits.
5. Always keep the left hand behind the body while testing live wires.
6. Always enclose the circuit is a shock proof case. Do not keep the case opened.
7. These forms of power supply should be constructed only by experienced persons to avoid shock hazards.


Circuit Diagrams

Capacitor-Power-Supply-circ_1


Filed Under: Electronic Projects


Questions related to this article?
👉Ask and discuss on Electro-Tech-Online.com and EDAboard.com forums.


Tell Us What You Think!! Cancel reply

You must be logged in to post a comment.

HAVE A QUESTION?

Have a technical question about an article or other engineering questions? Check out our engineering forums EDABoard.com and Electro-Tech-Online.com where you can get those questions asked and answered by your peers!


Featured Tutorials

  • Introduction to Brain Waves & its Types (Part 1/13)
  • Understanding NeuroSky EEG Chip in Detail (Part 2/13)
  • Performing Experiments with Brainwaves (Part 3/13)
  • Amplification of EEG Signal and Interfacing with Arduino (Part 4/13)
  • Controlling Led brightness using Meditation and attention level (Part 5/13)
  • Control Motor’s Speed using Meditation and Attention Level of Brain (Part 6/13)

Stay Up To Date

Newsletter Signup

Sign up and receive our weekly newsletter for latest Tech articles, Electronics Projects, Tutorial series and other insightful tech content.

EE Training Center Classrooms

EE Classrooms

Recent Articles

  • What are the battery-selection criteria for low-power design?
  • Key factors to optimize power consumption in an embedded device
  • EdgeLock A5000 Secure Authenticator
  • How to interface a DS18B20 temperature sensor with MicroPython’s Onewire driver
  • Introduction to Brain Waves & its Types (Part 1/13)

Most Popular

5G 555 timer circuit 8051 ai Arduino atmega16 automotive avr bluetooth dc motor display Electronic Part Electronic Parts Fujitsu ic infineontechnologies integratedcircuit Intel IoT ir lcd led maximintegratedproducts microchip microchiptechnology Microchip Technology microcontroller microcontrollers mosfet motor powermanagement Raspberry Pi remote renesaselectronics renesaselectronicscorporation Research samsung semiconductor sensor software STMicroelectronics switch Technology vishayintertechnology wireless

RSS EDABOARD.com Discussions

  • Measure AC current accurateley (100mA to 10A)
  • Mosfet SSR triac output shunt circuit design
  • Tessent MBIST for memories with dedicated test clock
  • Very low voltage/power Schmitt trigger?
  • Natural Convection Heatsink for 80W power dissipation?

RSS Electro-Tech-Online.com Discussions

  • Best way to reduce voltage in higher wattage system?
  • surge arresters
  • Someone please explain how this BMS board is supposed to work?
  • Need a ducted soldering fan for solder smoke extraction
  • DIY bluetooth speaker
Engineers Garage
  • Analog IC TIps
  • Connector Tips
  • DesignFast
  • EDABoard Forums
  • EE World Online
  • Electro-Tech-Online Forums
  • Microcontroller Tips
  • Power Electronic Tips
  • Sensor Tips
  • Test and Measurement Tips
  • 5G Technology World
  • About Us
  • Contact Us
  • Advertise

Copyright © 2022 WTWH Media LLC. All Rights Reserved. The material on this site may not be reproduced, distributed, transmitted, cached or otherwise used, except with the prior written permission of WTWH Media
Privacy Policy | Advertising | About Us

Search Engineers Garage

  • Projects and Tutorials
    • Electronic Projects
      • 8051
      • Arduino
      • ARM
      • AVR
      • PIC
      • Raspberry pi
      • STM32
    • Tutorials
    • Circuit Design
    • Project Videos
    • Components
  • Articles
    • Tech Articles
    • Insight
    • Invention Stories
    • How to
    • What Is
  • News
    • Electronic Products News
    • DIY Reviews
    • Guest Post
  • Forums
    • EDABoard.com
    • Electro-Tech-Online
    • EG Forum Archive
  • Digi-Key Store
    • Cables, Wires
    • Connectors, Interconnect
    • Discrete
    • Electromechanical
    • Embedded Computers
    • Enclosures, Hardware, Office
    • Integrated Circuits (ICs)
    • Isolators
    • LED/Optoelectronics
    • Passive
    • Power, Circuit Protection
    • Programmers
    • RF, Wireless
    • Semiconductors
    • Sensors, Transducers
    • Test Products
    • Tools
  • EE Resources
    • DesignFast
    • LEAP Awards
    • Oscilloscope Product Finder
    • White Papers
    • Webinars
  • EE Learning Center
    • Design Guides
      • WiFi & the IOT Design Guide
      • Microcontrollers Design Guide
      • State of the Art Inductors Design Guide
  • Women in Engineering