Electronic tools and equipment (including software and hardware) are an essential requirement for any project undertaken by hobbyists as well as engineers. In this blog, we will talk about the hardware tools that are used for preparing the setup of a project. There are certain tools that are quite crucial, whether one is maintaining an electronics kit or working on some basic circuits.

Electronics Tools for Beginners and Professionals (Image Courtesy: eFileCabinet)
It’s imperative for hobbyists and beginners to get acquainted with the functioning of all these hardware parts so as to make the best use of such tools. Moreover, one has to ensure that the quality and cost of these components is met without any compromise on the safety front.
Mentioned here is a list of electronic tools and equipment that are useful for every engineer while working on electronic projects:
1. Hand Tools
The most basic category of tools used in every electronic project is the hand tool. These tools are manually operated without any power source and have been in use since the Stone Age. These require a lot of dexterity as well as precision to operate.
a) Driving Tools
Driving tools are usually used in projects while dealing with tightening, loosening, and removing the screws. These are also used to remove bits, screws, nuts, and bolts from surfaces and require manual force during operation.
Screwdrivers:
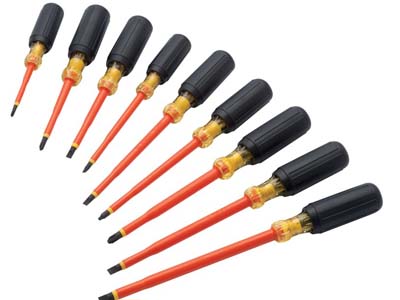
A set of screwdrivers used in Electronics Projects (Image Courtesy: Amazon)
These tools are made of hard steel and are tempered at the tip to loosen or tighten screws with slotted heads. Usually, it is recommended to purchase screw drivers in a complete set so that you have one for every kind of screw. Screwdrivers can be availed in different shapes and size, mainly including:
Standard/Flat Screw Driver: It is a wedge-shaped driver resembling a negative sign at the tip and is used for driving screws with a single slot head.
Philips Screw Driver: It has a cross tip resembling a positive (+) sign and used to drive screws with cross slot heads.
Stubby Screw Driver: It has a short shank or blade and is used in tight spaces where a standard screw driver can’t be used.
Wrench:
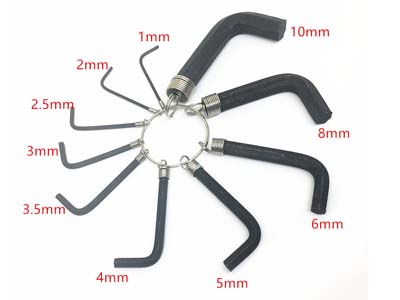
Allen Wrench Set (Image Courtesy: AliExpress)
A wrench is used to turn objects, usually rotary fasteners like nuts and bolts, or to keep them from turning. The main function is to drive screws with hexagonal slot heads or Allen-headed screws. In other words, it is used to drive screws in places where regular screw drivers don’t work.
b) Cutting Tools
These tools are used for removing certain parts of materials from a workpiece by means of operations like deforming, turning, or shaping.
Utility Knife:
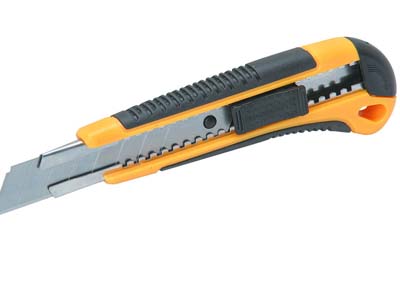
Utility Knife (Image Courtesy: Pinterest)
It’s one of the essential elements while dealing with electronics as it can cut through most of the materials. It’s portable, practical, and even has a belt clip for convenient carrying.
Hacksaw:
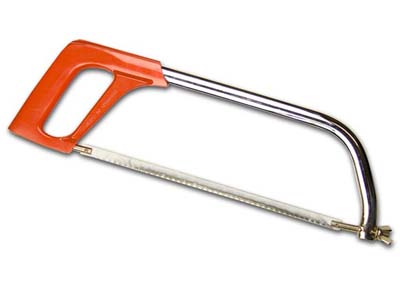
Hacksaw
It’s a fine-toothed saw made for cutting metals but it can also cut various materials like plastic and wood. These can be either manual or powered and come in different varieties.
Pliers:
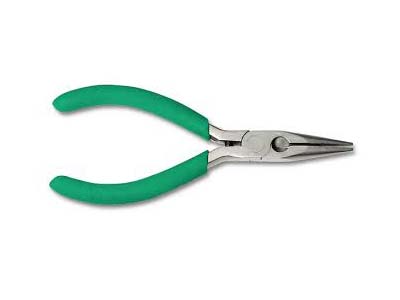
Pliers used in Electronics (Image Courtesy: Waytek)
Pliers are multi-purpose tools including the following categories:
Nose Pliers: These come handy when you have to hold components with short leads that need to be soldered onto or desoldered from the PCB but cannot be held with bare hands.
Side Cutting Pliers: These can also be used to trim off excess components on the circuit boards or to cut wires into shorter length before being used.
Channel Lock Pliers: These are used to tighten Romex connectors in electrical boxes, removing knockouts from the boxes and adjusting expansion-type ceiling fan boxes.
Linesman Pliers: These can cut, twist wires together and grip wires for pulling. They have a squared off end that is great for twisting wires, a center cutting blade and a grip area to pull wires.
Wire Stripper:
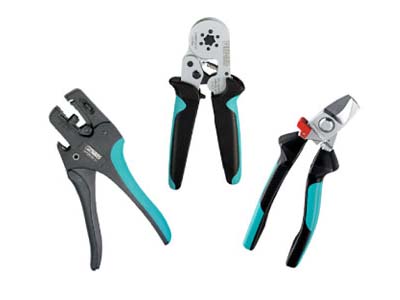
Wire Stripper Tools used in Electronics (Image Courtesy: Carlton Bates)
It’s a hand-held tool for removing the electrical insulation off the wires without damaging the interior wire. Manual modes need some caution during use while the automatic ones allow even the first-time users to remove insulation quickly.
These tools are equipped with different sized cutting teeth for various sized wires and have a cutoff portion in order to cut the wire.
c) Surgical Tools

Surgical Tools used in Electronics including scissors, tweezers, and forceps (Image Courtesy: evilmadscientist)
There are certain surgical tools that can be sometimes used as electronic tools like tweezers, forceps, and scissors. While in medical settings, such tools are used to extract objects from the body, in electronics settings these tools can help in dealing with the circuits and breadboard while performing soldering or desoldering.
Although tweezers and forceps are identical, the fundamental difference is that tweezers have sharper tips and these are pinched together to extract an object, while forceps have larger handles and their tips have teeth or ridged sections to grasp materials. Basically, these instruments are used to hold things that are too small to hold with hands or where precision is required.
d) Boring Tools
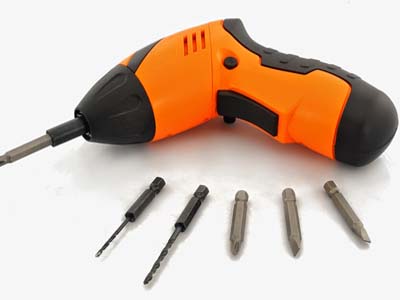
Portable Electric Drill used in Electronics (Image Courtesy: blogspot)
The process of drilling and boring implies making holes with the help of revolving tools. Boring simply pushes away the material to one side without removing it while drilling detaches the material to leave a hole. Moreover, drilling is done at high speed with low torque whereby a little material is removed at each revolution whereas boring needs low speed and high torque as it has a larger radius. These tools include:
Portable electric drill: boring holes in plastic or metal chassis with drill bits
Mini drill: drilling holes in printed circuit boards
Metal files: contain a narrow, pointed and parallel ridges at one end to which a handle can be fitted.
2. Soldering Tools
While working with printed circuit boards and breadboards one needs to use some soldering tools to connect the circuits with wires and components. For this, there are soldering and de-soldering tools as follows:
a) Soldering Iron
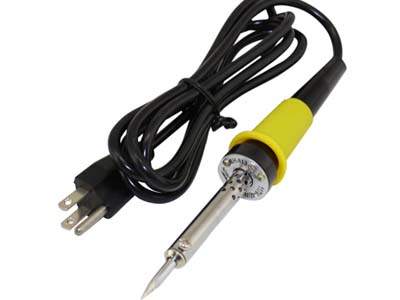
Soldering Iron (Image Courtesy: Circuit Specialists)
A soldering iron is a device for applying heat to melt solder to form an electrical and physical connection between two surfaces. It is composed of a heated metal tip and an insulated handle. For electrical projects, wires are usually soldered to PCBs, other wires, or terminals.
The price range lies from $10 to $200 whereby basic models can be used with easy by directly plugging them into an outlet from the hand tool. Besides, the soldering iron tips are often removable and can be availed in a wide range of shapes and styles to accommodate different kinds of soldering work.
b) Soldering Station
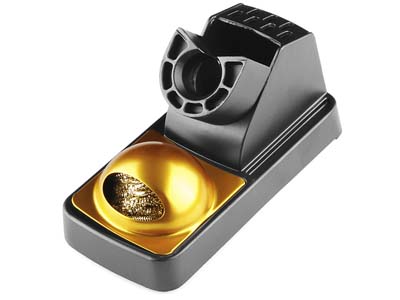
Soldering Iron Stand (Image Courtesy: SparkFun)
The soldering tool stand is used to keep the soldering iron in a place away from flammable materials. The station also comes with a sponge to clean the tip of the soldering iron.
c) Desoldering Tools
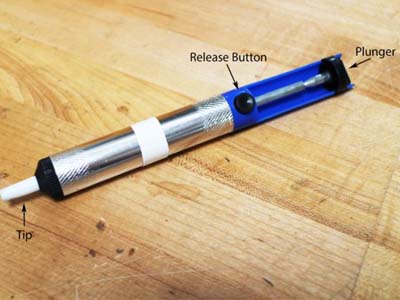
Desoldering Pump (Image Courtesy: Instructables)
These tools are used to remove the soldered wires and components on printed circuit boards for repair and troubleshooting usually when there is a fault in the connections. These include pumps and copper braid wicks. A desoldering pump draws solder away with a quick vacuum action.
3. Measurement Tools
With almost every electronic project, one needs to measure certain parameters associated with the device or circuit like voltage, resistance, current, or some signals, etc. For this purpose, one is required to have the following tools:
a) Multimeter:
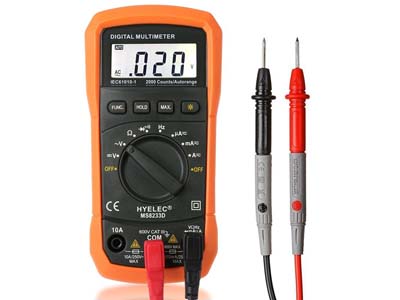
Multimeter (Image Courtesy: Amazon)
A multimeter is quite important as it measures voltage, current, resistance, and other aspects of electricity and circuits. Usually, these are small in size, run on batteries, and carry large digital displays. There is also a knob to select the measurement function and a pair of test leads for connecting the device to the circuit. Although the full-featured professional multimeters can be bought for hundreds of dollars, a basic model can be purchased for approximately $10.
b) LCR Meter
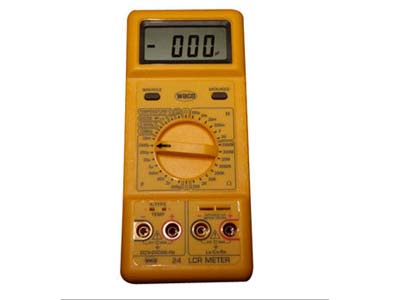
LCR Meter (Image Courtesy: techno instruments)
LCR meters are used for measuring inductance, capacitance, and resistance involved in an electronic setup. These are available in two variants- a low-cost version and a high-cost version. The former one measures the total impedance of a component while the latter measures all the impedance of the components, equivalent series resistance (ESR) and the Quality (Q) factor of the component.
c) Oscilloscope
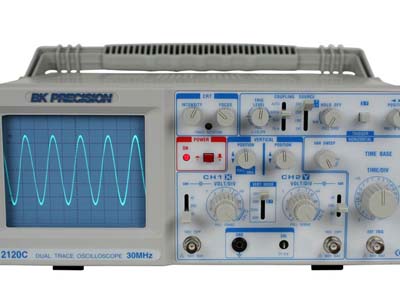
Oscilloscope (Image Courtesy: B&K Precision)
Although oscilloscopes may not be needed by hobbyists and beginners, these come handy while learning electronics and troubleshooting circuits. An oscilloscope displays time-varying signals like voltage waveform patterns on a screen which help in visualizing the circuit functions. While the basic models cost around $300, the sophisticated ones can be bought for up to several thousands of dollars.
d) Signal Generator
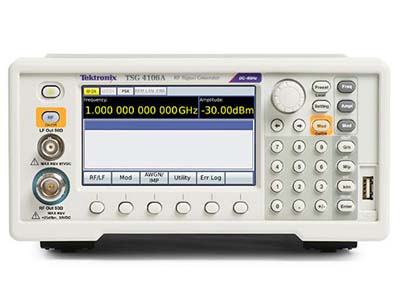
Signal Generator (Image Courtesy: Tektronix)
It’s a device that generates electronic signals and waveforms which are either repetitive or non-repetitive, depending upon the requirement and field of applications. There are different categories of signal generators carrying different levels of capabilities, dimensions, designs, and parameters. The applications include designing, repairing of electronic devices, and troubleshooting.
Every versatile signal can create an unlimited number of signals to meet the debug challenges. One can also vary the output of the signal generator by setting the amplitude and frequency of the output signal while a simulation is in the process.
4. Prototyping Tools
While dealing with electronic components, beginners tend to make a lot of mistakes due to lack of experience in connecting wires. So in almost every project, particularly for the beginners, it is recommended to use breadboards and zero boards for establishing connections. These prototyping tools include:
a) Breadboard
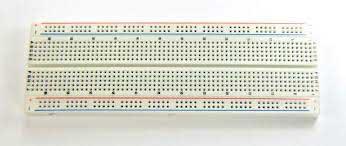
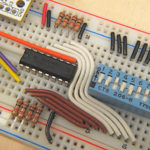
Breadboard (Image Courtesy: Adafruit Learning System)
A breadboard is a flat plastic base with a matrix of holes in which wires and components are connected. A breadboard is used to build prototype versions of sophisticated electronic circuits by plugging wires, resistors, capacitors and other devices. This is helpful in practicing as the connection is not permanent so that the wires can be plugged in and out as per the needs.
b) Jumper Wires
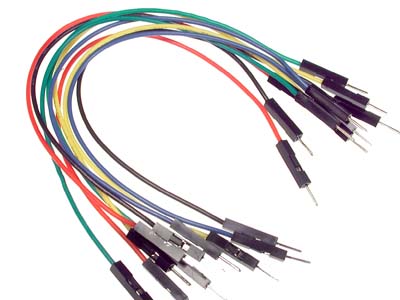
Jumper Wires (Image Courtesy: Solarbotics)
Jumper wires are used on the breadboard to make connections among all the components. These can be connected to separate boards or devices as they are generally compatible with 2.54 mm or 2mm headers.
c) Zero PCB
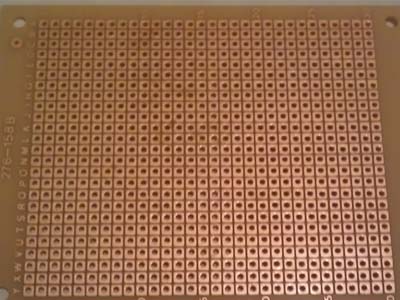
Zero PCB (Image Courtesy: efxkits)
A Zero Board or Zero PCB is a board with copper patches devoid of any connections. In order to work on such a board, the user has to either solder the components or connect them by soldering their legs to the wire.
5. Auxiliary Tools
Apart from the above-mentioned tools, there are some miscellaneous tools that are required in every electronic setup- including hobbyist as well as professional level projects. These are:
– Magnifying Glass
– Paint Brush
– Measuring Tape
– Hammer
– Flashlight
You may also like:


Filed Under: Tech Articles

Questions related to this article?
👉Ask and discuss on EDAboard.com and Electro-Tech-Online.com forums.
Tell Us What You Think!!
You must be logged in to post a comment.