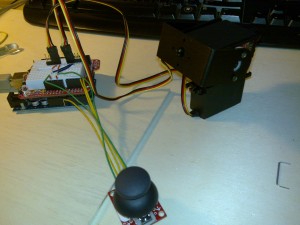
Figure 1: Manage 2-Servo motors with Arduino
An Italian developer named Fabio Biondi, who holds several years of experience in prototyping, built an interesting Arduino project. In this DIY task, he used an Arduino board and an analog joystick so as to control two servos; where one is connected to the horizontal axis and the other to the vertical axis. The servos in question were linked with each other using a Lynx B-Pan Tilt Kit (BPT-KT). The project is quite simple to take on due to the fact that this kit is easily accessible through the online stores at a price of just USD 29.93.
The kit mainly includes- aluminium multi-purpose servo bracket single (ASB-04), aluminium C servo bracket single (ASB-03), 2 standard servos (HS-422) and hardware containing parts like screws, nuts and nylon rivets. After obtaining the kit, one has to assemble the servos in a pan & tilt assembly to the multipurpose brackets with the help of the rivets. It could act as a perfect tool as a remote piloted robot.

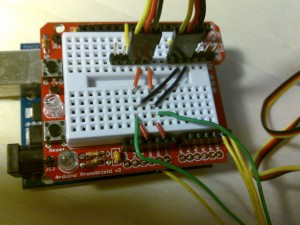
Figure 2: Close view of 2-servo-motors with Arduino
In order to prepare the setup, Fabio used the following materials:
- Arduino Duemilanove
- Proto shield Board
- Mini Thumb joystick
- Lynx B-Pan Tilt Kit
In spite of using all the above parts, one can also eliminate the use of protosheild board as the Arduino microcontroller is sufficient for the arrangement to work. Moreover, the servos can also be used without the Lynx B-Pan Tilt Kit but the addition of this assembly adds multiple robotic movements which looks fascinating.
After the servos are assembled in a Pan-Tilt arrangement, the next step is to configure the circuit. For this, the first servo is linked to the digital PWM pin 10 while the second one is attached to the PWM pin 3. Apart from this, the mini joystick is attached to analog pins 4 and 5. When all the components are arranged systematically, the movement of joystick will accordingly manage the movement of both the horizontal and vertical servos with the same pace.
As per Fabio, one can also manage the movement of 3-4 servos by using a separate Servo controller. Similarly the count can be increased to even 8 or 16 whereby only one pin from the Arduino will be capable to manage all of them. With some more improvisation this project can be tweaked in order to achieve a higher level of robotic efficiency.
If you wish to make your own DIY project to manage the servos with a joystick, you can have a look at the link mentioned below. It contains the complete procedure with all the hardware and software requirements along with a video that demonstrates the working of the project.
Filed Under: Reviews


Questions related to this article?
👉Ask and discuss on EDAboard.com and Electro-Tech-Online.com forums.
Tell Us What You Think!!
You must be logged in to post a comment.