One of the most important elements of any aquarium is oxygen. Even though water is part oxygen, it’s bonded with hydrogen, which is tough to separate and breathe in — even for fish. In open streams and oceans, oxygen is dissolved in the water through the open air, rainfall, and the flow of the tide. The oxygen enters the water through a process known as gas exchange.
Home or office aquariums, however, require an artificial process to induce oxygen in the water. One solution is to perform ongoing water changes in the fish tank, which are time-consuming and wastes resources. Another solution is aeration, which circulates the water to ensure oxygen absorption.
But how much is enough is an important question for fish owners. When is the aquarium water healthy enough for its marine life?
In chemistry, pH is used as a scientific measure of the acidity in water and can be used to test the quality of aquarium water. The pH levels range from 0 to 14, where 7 is the neutral point. In an aquarium, a reading above 7 is a good thing.
In this tutorial, we’ll learn how to monitor the pH level of water in an aquarium tank. If it’s less than 7, an aerator or air pump will be used to increase the oxygen in the tank.
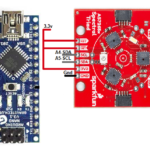
To measure the pH, we’ll use the atlas-scientific pH level sensor. Here are the specifications of the sensor…
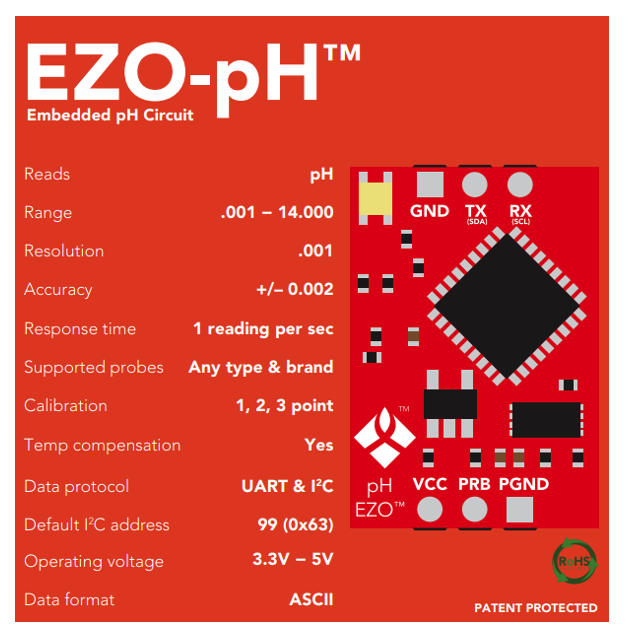
Communication with an external controller is possible on two protocols: the universal asynchronous receiver-transmitter (UART) and I2C. For the project, we’ll use the UART protocol.
The sensor updates every one second. The operating voltages are also favorable for stand-alone solutions.
Circuit diagram

Typically, aquarium aerators work on 220 volts. The relay is used to switch the aerator on and off. It should be is connected to Arduino UNO’s pin#8.
The code
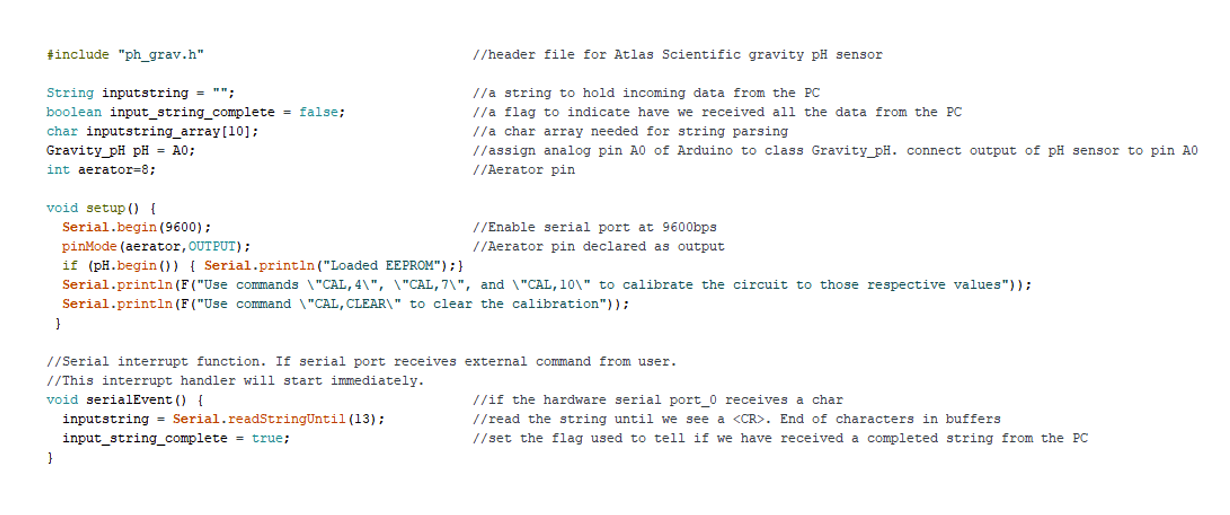
First, download the default standard libraries from Atlas, which are necessary for this project. The libraries for pH probe are available at the Atlas libraries. You’ll need to import and include them in the Arduino sketch.
Only a few variables are declared, globally. The purpose of each one is included in the code.
In setup function, Arduino’s serial monitor must be initialized and the communication baud rate is set to 9600bps. The Atlas sensor’s default baud rate is also 9600bps. Next, declare the aerator pin’s output. The upcoming “if” statement initializes the pH sensor module. There are a few commands inside of it required for calibration (discussed below). The serial event function is the interrupt handler for the serial port.
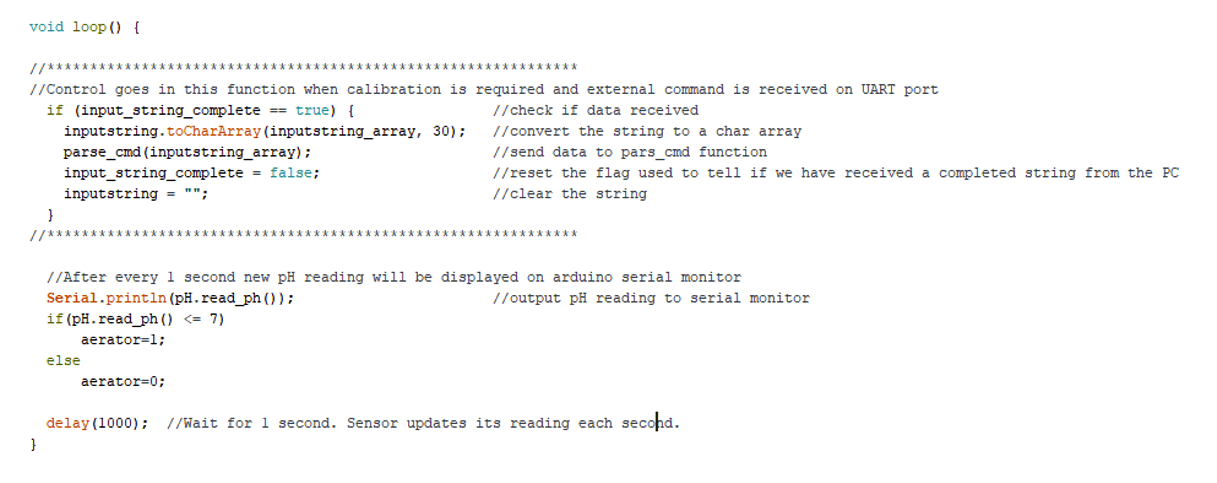
In the loop function, check the variable, input_string_complete. If it’s true, this means that calibration is requested by the user. The calibration steps follow.
The outside loop function’s pH value continuously prints on the serial monitor. The “if” statement maintains that if the pH value is less than 7, then the aerator stays off. (There’s a delay of one second is because the sensor updates to a new value after every second.)
The final step includes the calibration function.
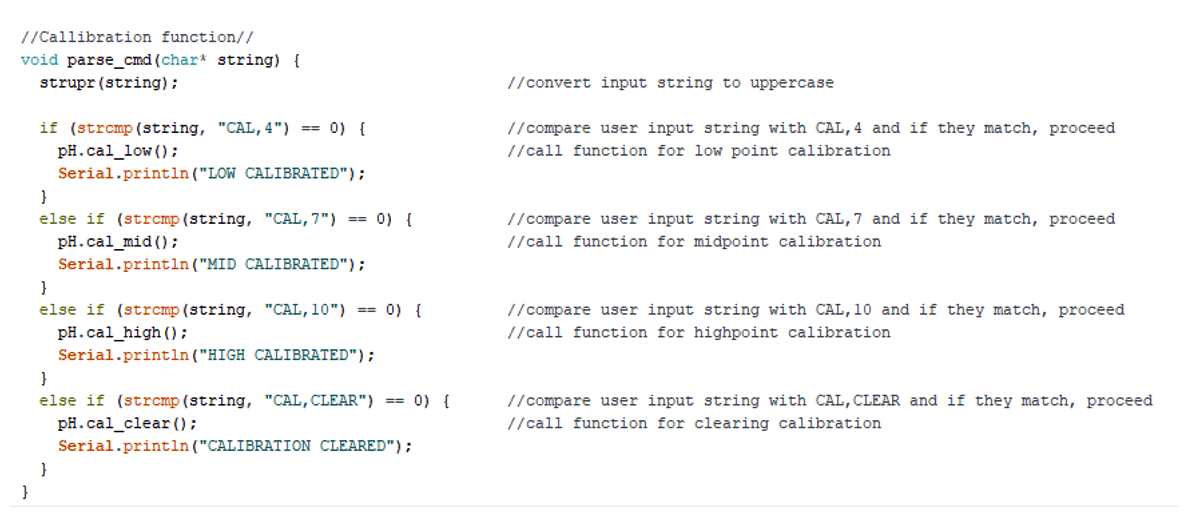
Sensor calibration
The Atlas pH Sensor offers many functions, including calibration. The calibrated values are stored in Arduino’s EEPROM, where the calibration settings will be saved even if the power is switched off.
Three calibrations are possible:
- Single point
- Two-point
- Three-point
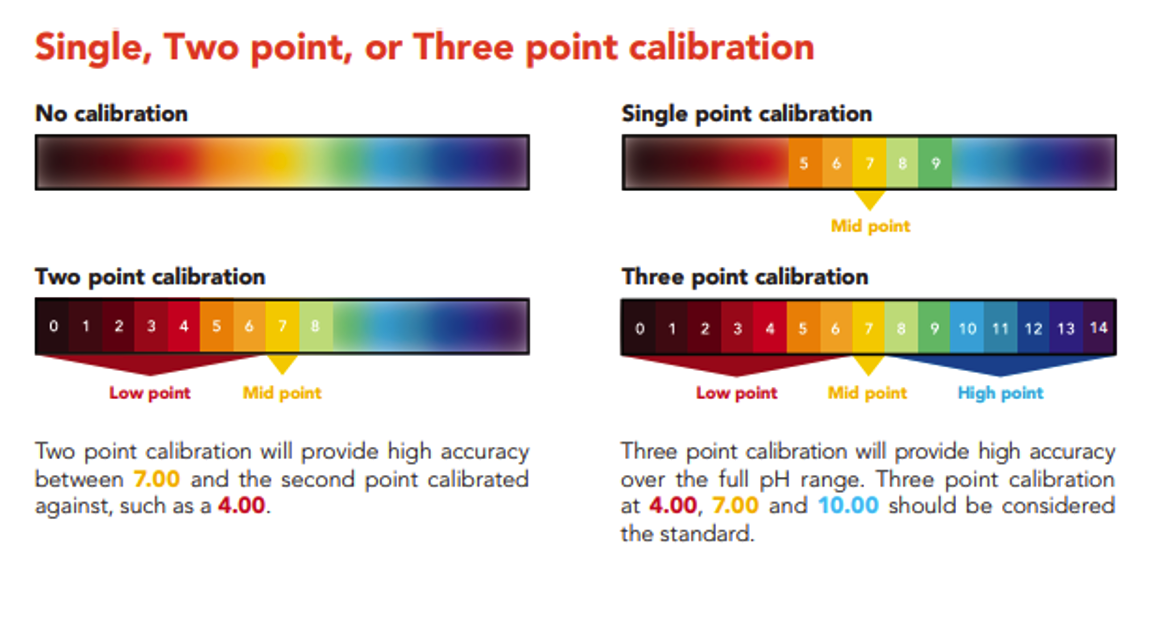
Each calibration depends on the three resins that are included with the sensor. These are special chemicals dedicated to determining the low, mid, and high points for calibration.
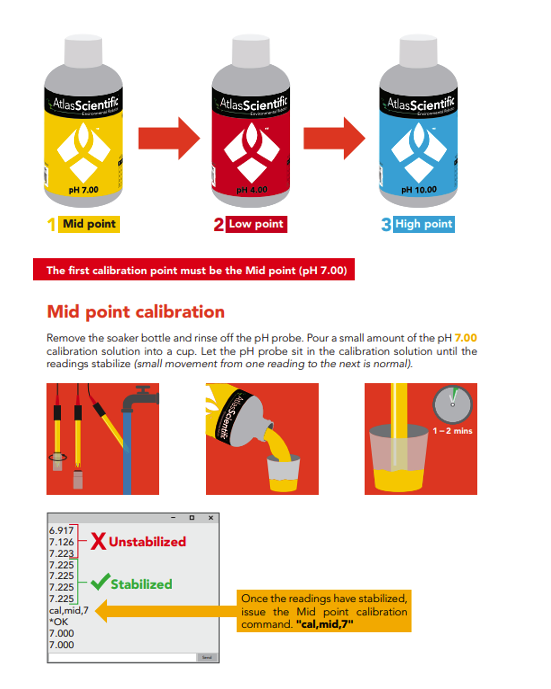
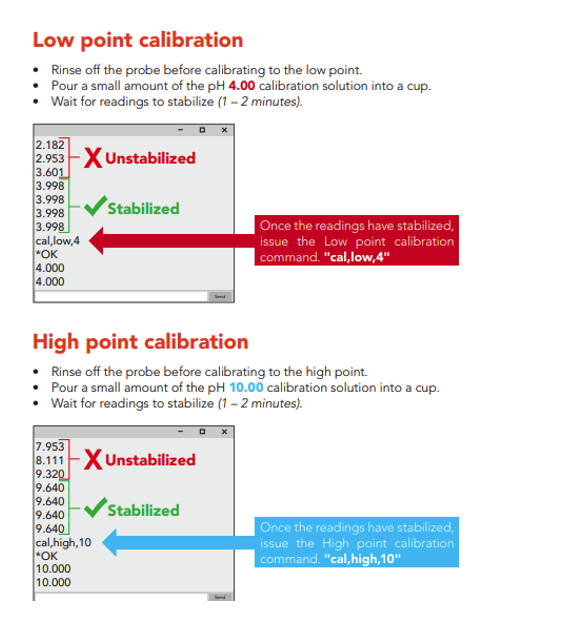
The calibration commands can be issued through Arduino’s serial monitor while the sensor is in circuit and working. After calibrating, the sensor will start its normal operation. Arduino’s EEPROM saves the values. You can find the EEPROM function that saves the calibrated values in the Atlas libraries.
IMPORTANT: If your code fails to compile or shows an EEPROM error, download the Arduino EEPROM library and include it in the Arduino library repository.
Also note, the sensor settings can be altered and several more operations can be performed (such as, continues response, fix response, communication mode change, entering sleep of standby mode, change baud rate, factory reset, etc.).
Where to purchase the parts:
You may also like:

Filed Under: Microcontroller Projects

Questions related to this article?
👉Ask and discuss on Electro-Tech-Online.com and EDAboard.com forums.
Tell Us What You Think!!
You must be logged in to post a comment.