OpenCV is one of the best computer vision tools available out there. It is the most popular machine vision library among developers and makers. Due to being open-source, the library has enjoyed vast community support and evolved as one of the most mature software packages. OpenCV itself stands for “Open-source Computer Vision.” The latest version of the library is OpenCV 4.7 available for free commercial use under Apache license. The library is especially useful for real-time computer vision applications. It also supports most of the common machine learning algorithms like K-Nearest Neighbor, Naive Bayes, Random Forest, Decision Tree, Support Vector Machine, Artificial Neural Networks (ANN), and deep neural networks.
Whether one wants to build a machine vision project using C++ or Python, OpenCV is the best tool to start with. A computer vision project can be easily built on any PC or Mac using OpenCV. It is also possible to invest in OpenCV in embedded machine vision projects. The new generation microcomputers like Raspberry Pi, NVIDIA Jetson Nano, RockPi, etc., are quite capable to support the OpenCV environment.
There are great benefits to running embedded computer vision applications on these low-cost embedded computers. The microcomputers can run 24×7 hours to host a dedicated computer vision project that may even involve machine learning algorithms or deep learning, that too without any special arrangements other than a good heat sink. The application can be implemented at incredibly low costs without compromising efficiency. Plus, the microcomputers are capable of doing a lot of computation locally which makes them best suitable for edge computing or as a fog.
In this tutorial, we will look into how to install OpenCV 4.5 on Raspberry Pi. The Raspberry Pi model used in this tutorial is Raspberry Pi 4B with 8GB RAM. Other Raspberry Pi 4 models can also be used. Even though the setup can be done on Raspberry Pi 3 or 2, OpenCV may have a compromised performance on those boards. The Raspberry Pi 4B used in this tutorial is installed with Raspbian Bullseye. The same instructions that are dictated here are applicable to OpenCV installation on NVIDIA Jetson Nano booted from a Debian OS.
The OpenCV setup on Raspberry Pi or any other Linux microcomputer is the first thing one needs to do before embarking on the development of a machine vision application. The setup is time-consuming and could be frustrating to newbies, particularly to those who are new to Linux and Shell scripting. Even if one step is missed, the entire setup can jeopardize. This tutorial will take you step-by-step to complete the installation of OpenCV 4.5 plus QT5 on Raspberry Pi 4B installed with Raspbian Bullseye.
There are two ways to install OpenCV on any system. One is a simple PIP install method. The second is compiling OpenCV from the source. The PIP install method is simple and short but does not expose all tidbits of the software. The compiling from source though takes hours to complete, resulting in a full and optimized installation, where all features of OpenCV can be reaped at once. This tutorial details the compile from source method and takes step-by-step through complete installation on a Raspberry Pi. Unlike a PC or Mac, installation on a microcomputer like Raspberry Pi involve several steps required to optimize the installation specifically for the target board. All these steps are provided in this tutorial in the right sequence.
Without wasting any time let us quickly get to the setup. The complete process will take few hours to complete. Depending upon the target board like some other Raspberry Pi variant or a different microcomputer, it may take even longer. So, be patient and have occasional breaks right out from your cubicle to grab some coffee while the installation completes. Let’s get started.
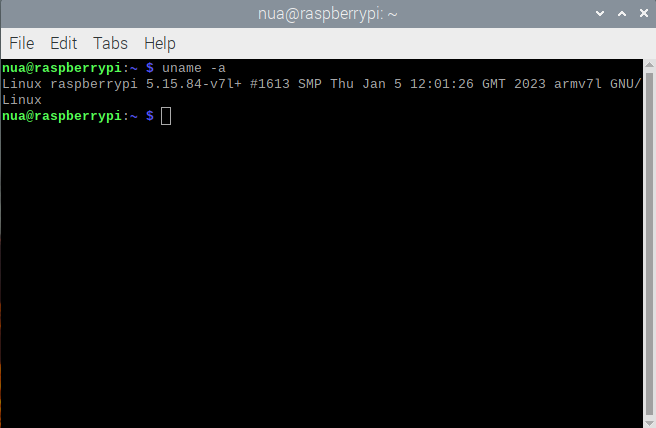
Confirm OS specifications
The first thing that you need to check is OS specifications. The setup for a 32-bit operating system would be different than a setup for the 64-bit operating system. Open Bash Terminal and execute the following command.
$ uname -a
If the Linux version reported contains the string ‘armv7l’, the OS installed on Raspberry Pi is 32-bit. If it contains the string ‘aarch64’, it is 64-bit. The installation guide presented in this tutorial is for 32-bit operating systems only.
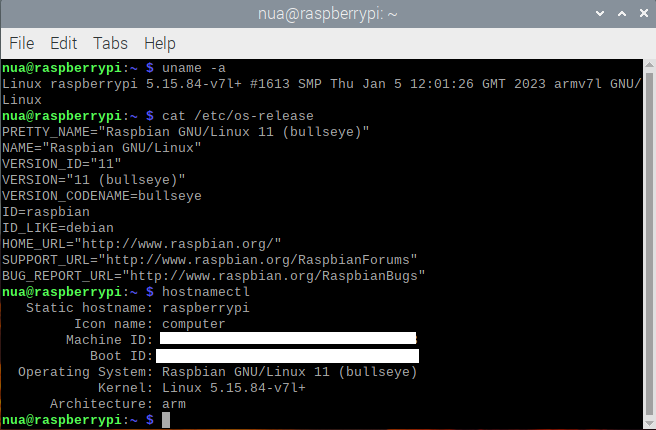
Next, you need to confirm the operating system version. This can be done by executing the following command in the Terminal.
$ cat /etc/os-release
The above command results in meta-information about the Raspbian version installed on Raspberry Pi. Our Raspberry Pi 4B (8GB) is installed with the latest Raspbian Bullseye OS. There is one other command that provides even more information about the board as well as the operating system. That is as follows.
$ hostnamectl
 If you have not prepared your Raspberry Pi, better install the 32-bit Raspbian OS for this tutorial and the computer vision tutorials that follow this. If you already have Raspberry Pi installed with an operating system, confirm if it is the 32-bit version. We suggest installing 32-bit Raspberry Pi OS with desktop and recommended software.
Expand filesystem
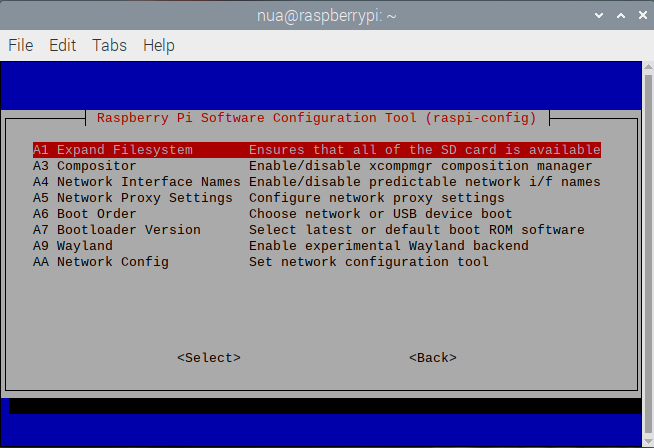
Next, you must expand the Raspberry Pi filesystem and make use of all space on the MicroSD card. By default, when an OS image is applied to a MicroSD card, a lot of space on it is left unusable. Since the OpenCV setup itself consumes a few gigabytes, we must reclaim all space on a 32GB MicroSD card by expanding Raspberry Pi filesystem. Otherwise, the setup could fail or even if completed, OpenCV may not have sufficient space for user files and updates. A depleted space could result in the serious underperformance of a computer vision application. To expand the filesystem on Raspberry Pi, open Bash Terminal and execute the following command to open Raspberry Pi configurations.
$ sudo raspi-config
 In the pop-up window, select “advanced options.”

Next, select “A1 Expand Filesystem”‘ and click “OK” to reboot.
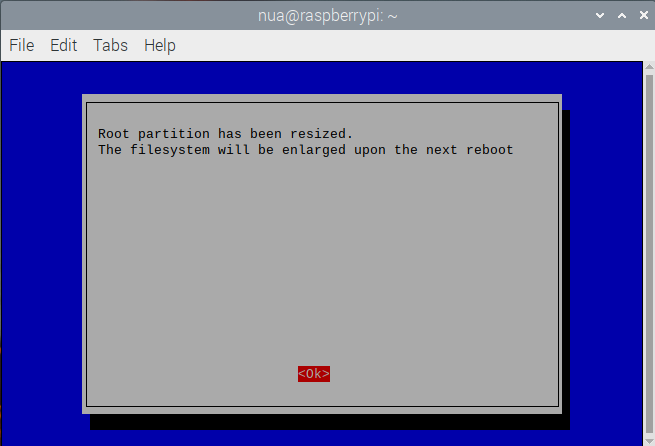
 After reboot, the entire space on the MicroSD card will be reclaimed by the Raspberry Pi OS. The newly available space on the card can be checked by executing the following command in the Bash Terminal.
df -h
 You can see we have 18GB space available on the MicroSD card after expanding the filesystem while 8.9GB is used by the OS.
Increase GPU memory
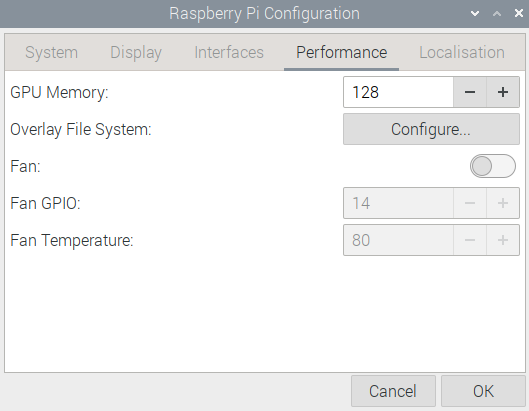
The RAM is used by both CPU and GPU. In Raspberry Pi 2B/3B, only 64MB of RAM is allocated to GPU while in Raspberry Pi 4B, it is just 76MB. This can be inadequate for machine vision projects. The RAM allocation to GPU must be at least 128 MB, so a computer vision application does not choke. To increase RAM allocation to GPU, open “Raspberry Pi Configuration” window by navigating to Raspberry Pi Menu->Preferences->Raspberry Pi Configuration.

In the “Raspberry Pi Configuration” window, select “Performance” tab and increase the GPU memory to 128. When you click “OK” after increasing RAM allocation to GPU, Raspberry Pi prompts you to reboot. Select “Yes” to reboot, and GPU allocation takes effect.

Upgrade EEPROM
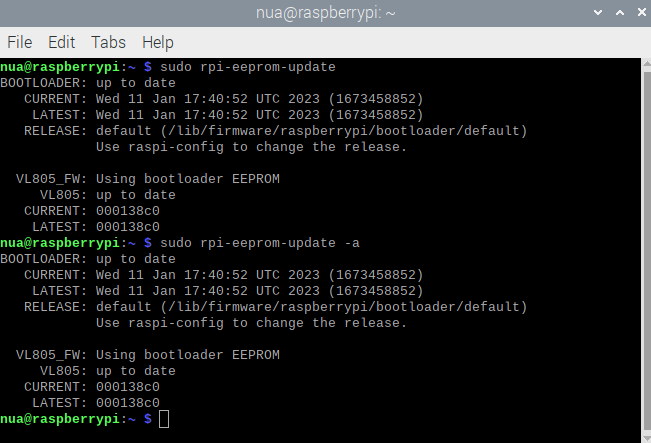
Another optimization that we must do before proceeding to OpenCV installation is upgrading Raspberry Pi EEPROM. While the Raspberry Pi boots its operating system from the MicroSD card, it is also booted partially from two EEPROMs. Though EEPROMs have nothing to do with OpenCV, the latest release of EEPROM has been noted to reduce the CPU temperature from 65˚C to 48˚C. The computer vision applications are quite CPU-extensive, if a simple upgrade on EEPROM can drop CPU temperatures, that can boast the application’s performance. To check out the EEPROM version, execute the following command in the Bash Terminal.
$ sudo rpi-eeprom-update
If the EEPROM is reported to be updated, it’s fine. Otherwise, execute the following command in the Terminal to update EEPROM.
$ sudo rpi-eeprom-update -a
Increase SWAP space
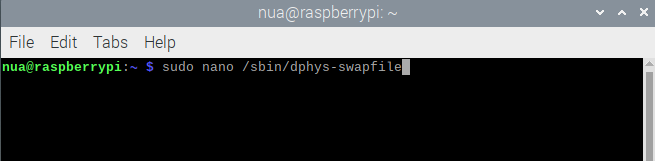
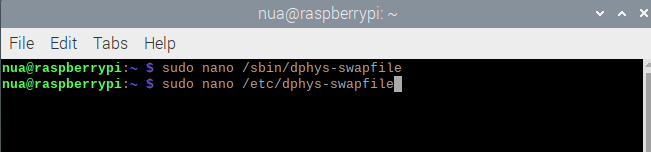
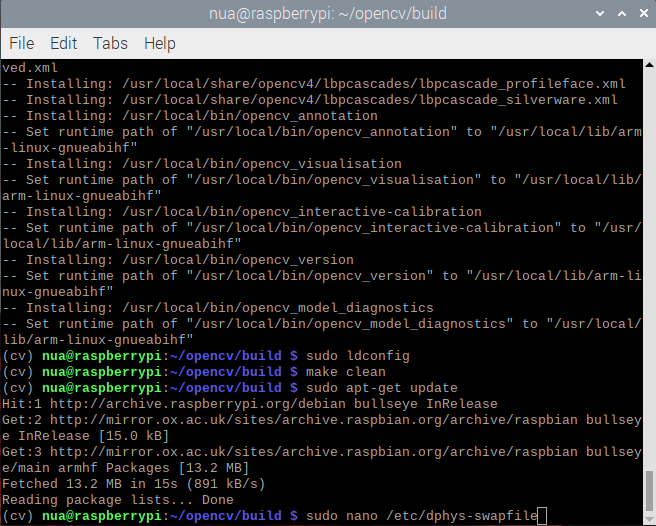
OpenCV requires a lot of memory to compile. The latest stable version OpenCV4.5 requires at least 6.5GB of space before building. That is why, you must increase the swap space, which is by default limited to 2048 MB. To increase the swap space, open /sbin/dphys-swapfile by executing the following command in the Bash Terminal.
$ sudo nano /sbin/dphys-swapfile
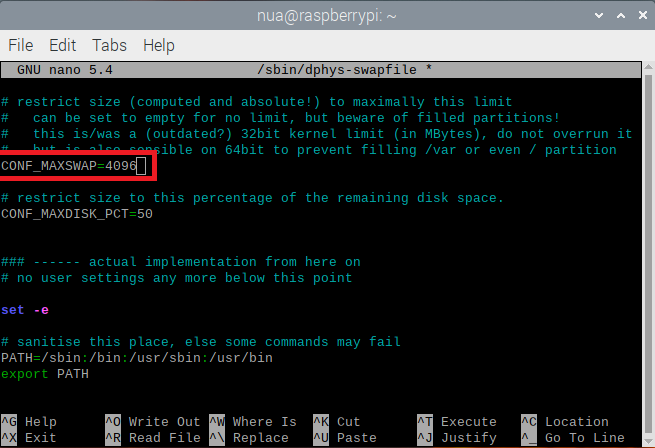 Once the file is open in the nano editor, jump over to the CONF_MAXSWAP flag and change it to 4096 MB from 2048 MB. Save file by pressing Ctrl+S and close the file by pressing Ctrl+X. Next open /etc/dphys-swapfile by executing the following command.
$ sudo nano /etc/dphys-swapfile
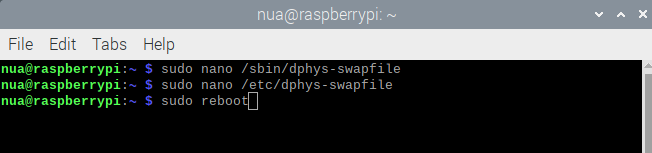
Now, change CONF_SWAPSIZE to 4096 from 2048. Finally reboot Raspberry Pi for changes to take effect by executing following command in the Terminal.
$ sudo reboot
Successfully updating and upgrading Raspbian
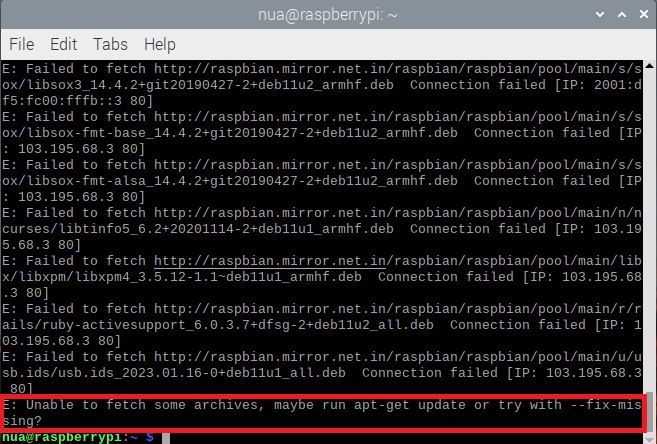
On a fresh installation of Raspbian, when commands for updating and upgrading the OS are run, it is observed that while the update is done successfully, the upgrade results in the following error.
E: Unable to fetch some archives, may be run apt-get update or try with –fix-missing?
The above error is only encountered in 32-bit Raspberry Pi OS. In 64-bit Raspberry Pi OS, no such error is encountered. While many makers turn to 64-bit OS just to get around the above error. The error is a result of missing files and libraries from the source repository. It can be easily corrected by redirecting the source repository to a suitable mirror link. It is important to get around this error, otherwise, broken or missing files in Raspbian can result in unpredictable behavior by our OpenCV application.
To redirect the source repository, open /etc/apt/sources.list in the nano editor by executing the following command in the Bash Terminal.
$ sudo nano /etc/apt/sources.list

When the file opens in the nano editor, comment the first line indicating original source repository and add the following line at the end.
deb http://mirror.ox.ac.uk/sites/archive.raspbian.org/archive/raspbian bullseye main contrib non-free rpi
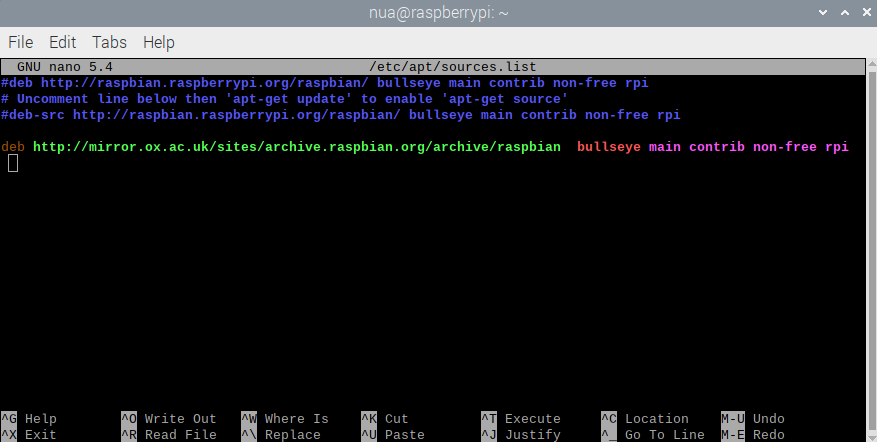
Save the file by pressing Ctrl+S and close the file by pressing Ctrl+X. Reboot Raspberry Pi for changes to take effect. Now when you update and upgrade 32-bit Raspbian, no errors are encountered. The other mirror links that are workable near specific geographical locations can be found in this link.
Install dependencies
Before installing OpenCV, you need to install several third-party packages required by OpenCV. Some of these packages might have come already installed with Raspbian. Still, it is better to install all required packages than to encounter some errors later. If the latest version of some package is already installed with Raspbian, it will be automatically skipped by the command execution. Run the following commands in the Bash Terminal one by one to install the required sets of software packages by OpenCV.
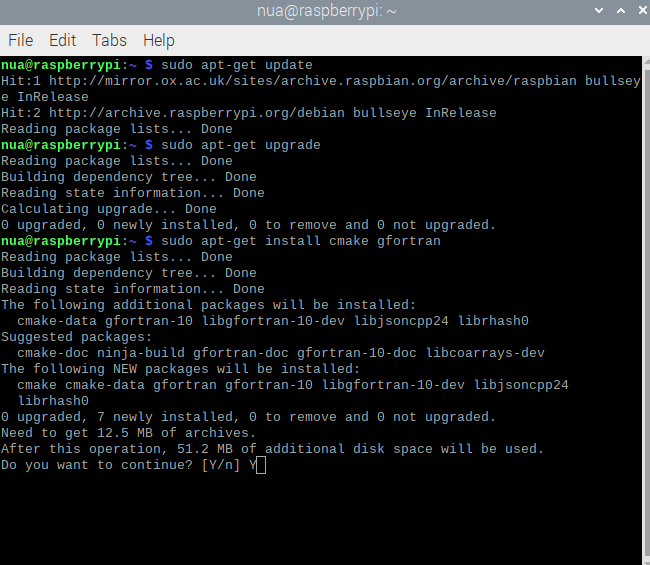
$ sudo apt-get update
$ sudo apt-get upgrade
$ sudo apt-get install cmake gfortran
$ sudo apt-get install python3-dev python3-numpy
$ sudo apt-get install libjpeg-dev libtiff-dev libgif-dev
$ sudo apt-get install libgstreamer1.0-dev gstreamer1.0-gtk3
$ sudo apt-get install libgstreamer-plugins-base1.0-dev gstreamer1.0-gl
$ sudo apt-get install libavcodec-dev libavformat-dev libswscale-dev
$ sudo apt-get install libgtk2.0-dev libcanberra-gtk*
$ sudo apt-get install libxvidcore-dev libx264-dev libgtk-3-dev
$ sudo apt-get install libtbb2 libtbb-dev libdc1394-22-dev libv4l-dev
$ sudo apt-get install libopenblas-dev libatlas-base-dev libblas-dev
$ sudo apt-get install libjasper-dev liblapack-dev libhdf5-dev
$ sudo apt-get install protobuf-compiler
 Install QT5
QT5 is an open-source framework for developing cross-platform graphical user interfaces. It can be used in Raspberry Pi too for building beautiful user interfaces for embedded applications. Some computer vision applications may require interaction through a user interface. Though adding a user interface can slow down the machine vision application a little bit, it may be required or could be useful to add an interface in some applications. For installing QT5 in Raspbian Buster, execute the following commands one by one in Bash Terminal.
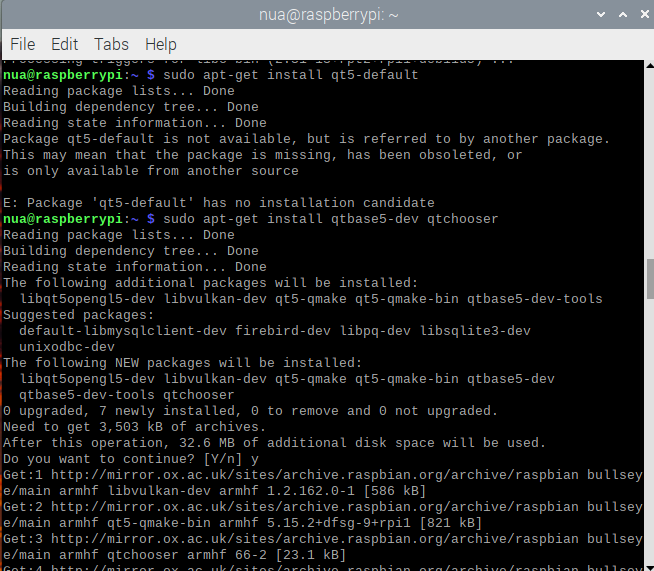
$ sudo apt-get install qt5-default
$ sudo apt-get install qtcreator
$ sudo apt-get install qtdeclarative5-dev
For installing QT5 in Raspbian Bullseye, execute the following commands one by one in Bash Terminal.
$ sudo apt-get install qtbase5-dev qtchooser
$ sudo apt-get install qt5-qmake qtbase5-dev-tools
$ sudo apt-get install qtcreator
$ sudo apt-get install qtdeclarative5-dev
 We already have some tutorials on building graphical user interfaces on Raspberry Pi for embedded applications using Tkinter framework. You must have a look at them.
Python GUI with Tkinter
Tkinter and TTK widgets
TTK menus, layout management, events & multi-threading
GUI-controlled LED driver
Interfacing a push button & digital input
Download OpenCV
After installing all third-party packages, it’s time to install OpenCV. There are two packages for OpenCV — a basic version and additional contributions. You can find the latest releases of OpenCV from this link. We will be installing OpenCV4.5.5 here. You can also install the latest one and change the version number accordingly in the following commands. The installation will consume enough RAM, so first check if enough RAM is available for installation by executing the following command in the Bash Terminal.
$ free -m
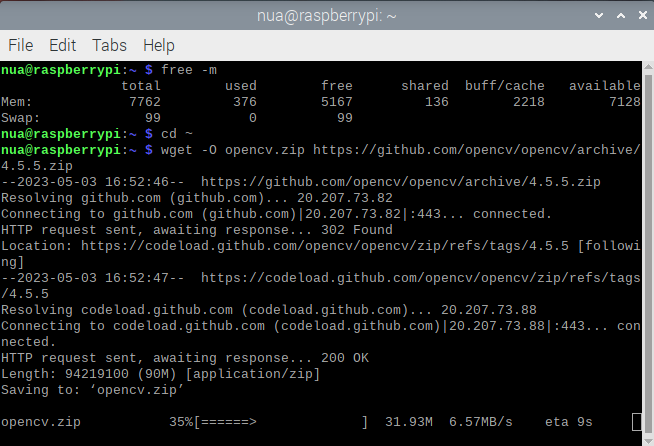 As we are using 8GB variant of Raspberry Pi 4B, you can notice we have more than sufficient RAM at our disposal. Next open the root directory by executing the following command in the Bash Terminal.
$ cd ~
Download the OpenCV4.5 packages in the root directory by executing the following commands in Bash Terminal.
$ wget -O opencv.zip https://github.com/opencv/opencv/archive/4.5.5.zip
$ wget -O opencv_contrib.zip https://github.com/opencv/opencv_contrib/archive/4.5.5.zip
Unzip the packages by running the following commands in the Terminal.
$ unzip opencv.zip
$ unzip opencv_contrib.zip
Rename directories to simpler names by executing the following commands in the Terminal.
$ mv opencv-4.5.5 opencv
$ mv opencv_contrib-4.5.5 opencv_contrib
Finally, get rid of the downloaded ZIP files by executing the following commands in the Terminal.
$ rm opencv.zip
$ rm opencv_contrib.zip
 Installing virtual environments
OpenCV can be installed on a system with or without a virtual environment. If you are willing to work with only one version of OpenCV, there is no need for a virtual environment. However, it is possible that you may need to exploit some features from a newly released OpenCV version or try some old OpenCV version, you cannot run both versions together without virtual environments. Suppose you have two OpenCV versions installed on your Raspberry Pi, and you import OpenCV in a Python script, how will Python come to know which OpenCV version to import? OpenCV installation typically occupies a little more than 1GB of space on a MicroSD card. There is no harm in installing and keeping more than one OpenCV version on the same SD card. But, multiple OpenCV versions can be called within a script only through different virtual environments. So, if you have both OpenCV 4.5 and OpenCV 3.4 installed on the same MicroSD card, you need two different virtual environments to call different CV versions in Python scripts.
If you do not wish to access OpenCV through virtual environments and still want to work with different versions of OpenCV, the only way left is to install different versions of OpenCV on different MicroSD cards carrying Raspbian OS. For installing virtual environments on Raspberry Pi, it will be best to do it through pip, virtualenv, and virtualenvwrapper. You must have pip installed on Raspberry Pi. With a 32-bit Raspberry Pi OS including desktop and recommended software, pip3 must be already installed on Raspberry Pi. To install virtualenv and virtualenvwrapper, execute the following commands in the Bash Terminal.
$ sudo pip3 install virtualenv
$ sudo pip3 install virtualenvwrapper
 After both virtualenv and virtualenvwrapper are installed, open the ~/.bashrc file by executing the following command in the Terminal.
$ nano ~/.bashrc
In the ~/.bashrc file, append the following lines in the bottom.
export WORKON_HOME=$HOME/.virtualenvs
export VIRTUALENVWRAPPER_PYTHON=/usr/bin/python3
source /usr/local/bin/virtualenvwrapper.sh
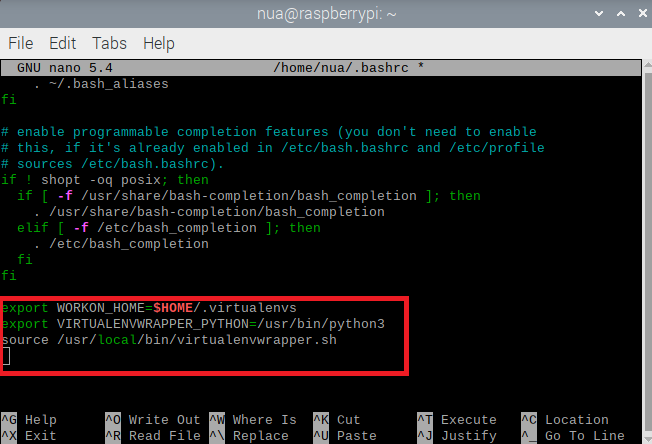 Save the file by pressing Ctrl+S and close the file by pressing Ctrl+X. Now reload the ~/.bashrc file to apply changes to the current bash session by executing the following command.
$ source ~/.bashrc
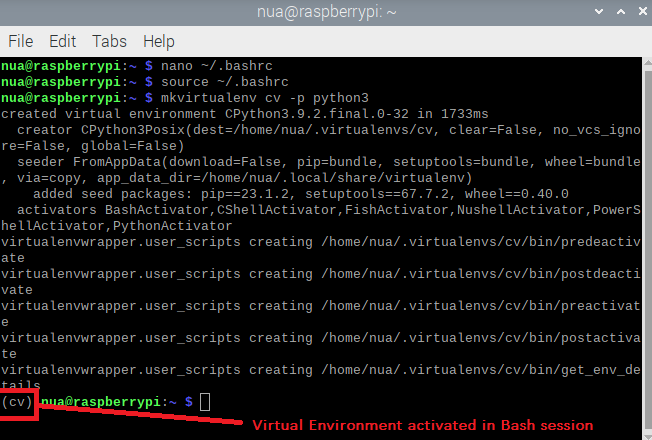
Next create a virtual environment with the name “cv” with Python3.x by executing the following command in the Terminal.
$ mkvirtualenv cv -p python3
As soon you will create a virtual environment, it will be activated in the current Bash session.
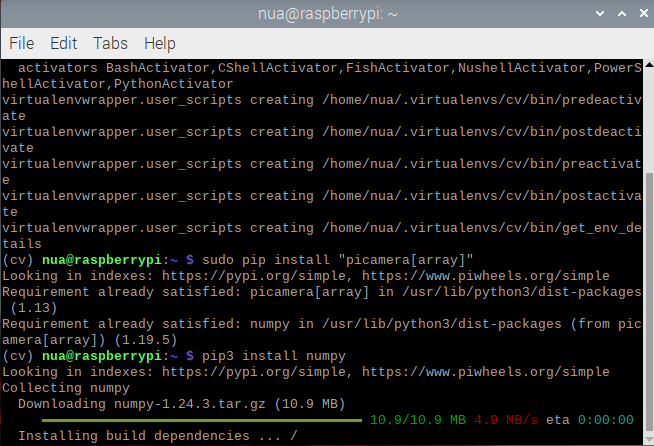
While the virtual environment is activated, install picamera and numpy within the environment by executing the following commands in the Bash Terminal.
$ pip install “picamera[array]”
$ pip3 install numpy
 You can deactivate the virtual environment in a current Bash session anytime by executing the following command.
$ deactivate
Also, the virtual environment can be activated in a current Bash session anytime by executing the following command
$ workon cv
Note that “cv” is the name of the virtual environment we created.
Build OpenCV
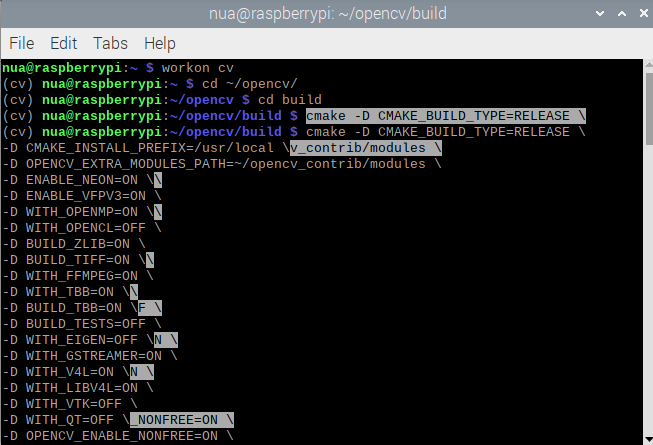
Now, it’s time to build the OpenCV package. Activate the ‘cv’ virtual environment by executing following command in the Bash Terminal (if it is not activated).
$ workon cv
Open OpenCV folder, create a directory named build, and open the directory by executing the following commands.
$ cd ~/opencv/
$ mkdir build
$ cd build
Finally, tell cmake to build OpenCV by executing the following command that includes a number of important flags.
$ cmake -D CMAKE_BUILD_TYPE=RELEASE \
-D CMAKE_INSTALL_PREFIX=/usr/local \
-D OPENCV_EXTRA_MODULES_PATH=~/opencv_contrib/modules \
-D ENABLE_NEON=ON \
-D ENABLE_VFPV3=ON \
-D WITH_OPENMP=ON \
-D WITH_OPENCL=OFF \
-D BUILD_ZLIB=ON \
-D BUILD_TIFF=ON \
-D WITH_FFMPEG=ON \
-D WITH_TBB=ON \
-D BUILD_TBB=ON \
-D BUILD_TESTS=OFF \
-D WITH_EIGEN=OFF \
-D WITH_GSTREAMER=ON \
-D WITH_V4L=ON \
-D WITH_LIBV4L=ON \
-D WITH_VTK=OFF \
-D WITH_QT=OFF \
-D OPENCV_ENABLE_NONFREE=ON \
-D INSTALL_C_EXAMPLES=OFF \
-D INSTALL_PYTHON_EXAMPLES=OFF \
-D PYTHON3_PACKAGES_PATH=/usr/lib/python3/dist-packages \
-D OPENCV_GENERATE_PKGCONFIG=ON \
-D BUILD_EXAMPLES=OFF ..
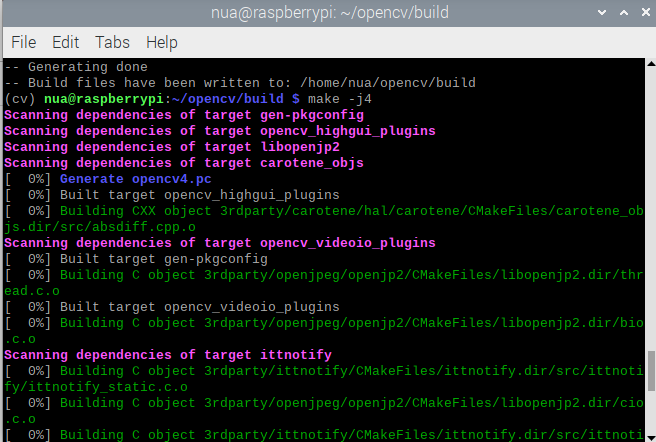
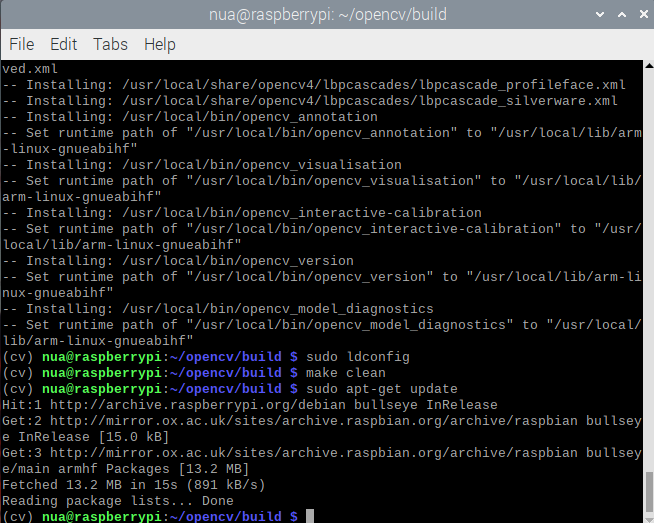
 The build process will take a lot of time. Once OpenCv is built, you could see the output message as shown in the image below.

Make & install OpenCV
After building OpenCV is done, launch the compilation process using all four cores of Raspberry Pi by executing the following command within the activated virtual environment of the current Bash session.
$ make -j4
 On Raspberry Pi 4, it may take around 2 hours. On other variants of Raspberry Pi, it could take 5~8 hours. You need to wait until the 100% build target is complete.

Once OpenCV is successfully compiled, install the OpenCV in the “cv” virtual environment by executing the following command.
$ sudo make install
Next, create the necessary links & cache to the recently installed OpenCV package by executing the following command.
$ sudo ldconfig
Clean resources and update the database of the system by executing the following commands.
$ make clean
$ sudo apt-get update
Finally, open /etc/dphys-swapfile file & reset CONF_SWAPSIZE to 100.
Sym-link to OpenCV
We have OpenCV installed in a virtual environment ‘cv’. Finally, we need to create a symbolic link to the library. Otherwise, Python could not find and import OpenCV. For creating a symbolic link open ~/.virtualenvs/cv/lib/python3.9/site-packages folder. The folder path can be different depending on the name assigned to the virtual environment and Python version. Recall the name you assigned to the virtual environment and confirm the Python version by executing the following command.
$ python –version
Execute the following commands to open ~/.virtualenvs/cv/lib/python3.9/site-packages folder, create a symbolic link named ‘cv2.so’ and return to root folder.
$ cd ~/.virtualenvs/cv/lib/python3.9/site-packages
$ ln -s /usr/local/lib/python3.9/site-packages/cv2/python-3.9/cv2.cpython-37m-arm-linux-gnueabihf.so
$ cd ~
 Check OpenCV installation
Last, you must now check your OpenCV installation. Activate the ‘cv’ virtual environment and import the OpenCV library by the symbolic link “cv2” in a Python script. If OpenCV is successfully imported into the script without producing any errors, OpenCV is installed for the virtual environment.
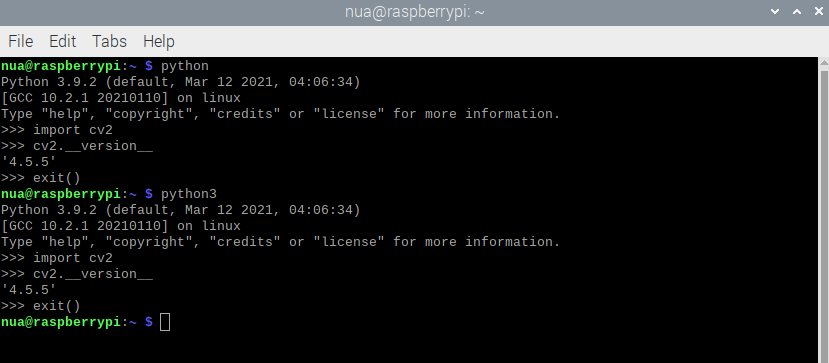
You can confirm build information about the installed OpenCV version by running the following Python script.
$ python
>>> import cv2
>>> print( cv2.getBuildInformation() )
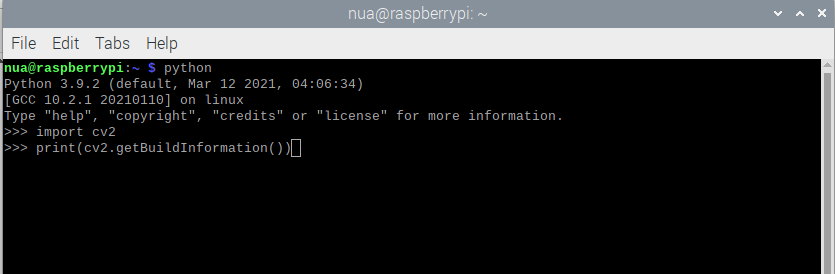
On running the script, the build information for the installed OpenCV version will be printed to the Terminal.

This completes the installation of OpenCV4.5 on Raspbian Bullseye. A similar installation will follow for other microcomputers running a Linux Debian derivative.
You may also like:


Filed Under: Electronic Projects, Raspberry pi.

Questions related to this article?
👉Ask and discuss on Electro-Tech-Online.com and EDAboard.com forums.
Tell Us What You Think!!
You must be logged in to post a comment.