 Does the CPU of your Raspberry Pi heat up? And does it drive you crazy? Here’s a pretty easy solution: A DIY water cooler for a Raspberry Pi’s ARM processor. 3D printing is used by the author to obtain the required parts. If you don’t have access to a 3D printer, the parts are sold by the author online. If you have access to a printer, the image of the parts can be downloaded from the author’s blog.
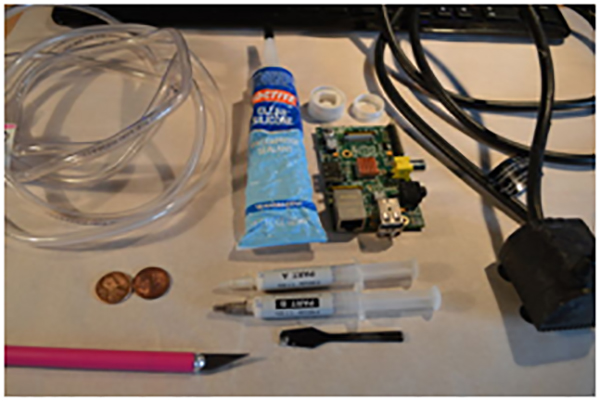 This DIY doesn’t require any electronics other than the Raspberry Pi. The other supplies required include a copper penny which acts as a heat conducting plate. Be sure that the penny has been minted before 1982 as it has to be 95% copper. If you possess any other copper item which is mostly pure copper, it must be cut to the size of a penny to be used in the project. Vinyl tubing, silicone waterproof sealant, thermal paste, water pump, coolant solution, a X-Acto knife are the other supplies required prior to starting the project. Also, be sure to have some sort of reservoir to hold the coolant.
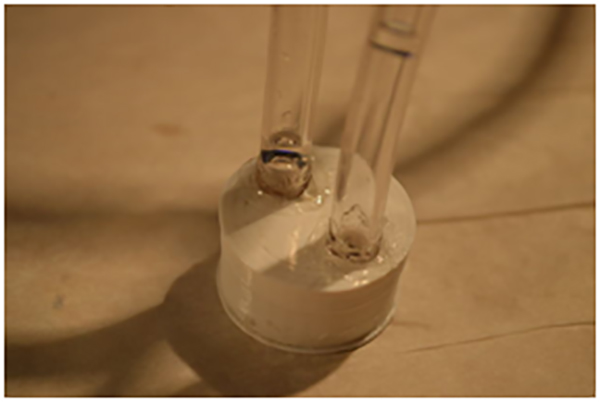
 It is necessary to check for leaks before mounting your Raspberry Pi. Also, the vinyl tube has to be inserted in the printed object with a little force. This step is crucial as it prevents leaks. It is also necessary to check whether the tubing has been sealed. For the final leak test, let the water pump run. If you observe any leaks, patch them up with some silicone. Also, be careful not to damage your board by spilling the coolant onto it.
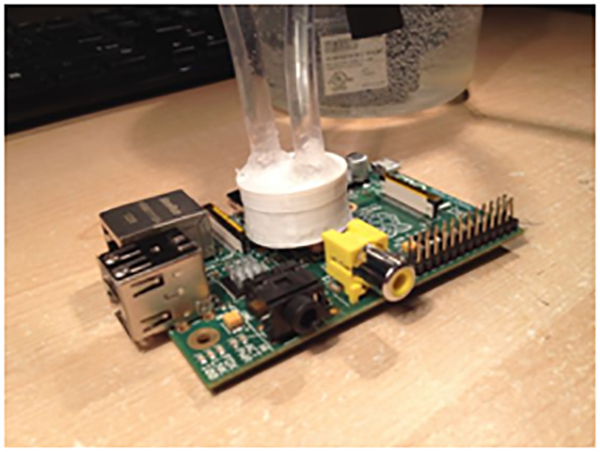
 The end result is that the Raspberry Pi handles turbo mode without heating up the CPU. This DIY is really very simple as it does not require any wiring or any components. So here is an efficient way of liquid cooling your Pi without a heat sink in 8 simple steps.
Filed Under: Reviews

Questions related to this article?
👉Ask and discuss on EDAboard.com and Electro-Tech-Online.com forums.
Tell Us What You Think!!
You must be logged in to post a comment.