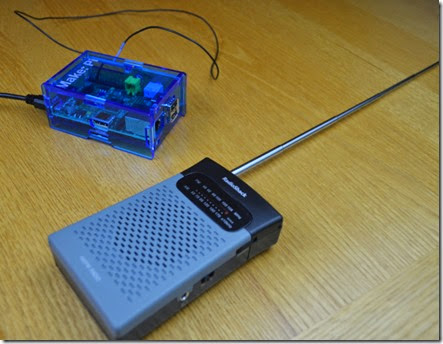
“My howtos and projects” has come out a new level of hacking where they turns Raspberry Pi into a powerful FM transmitter also called as PiFM. The best part of this software is that it enhances the capability of Pi only with a single length of wire. Moreover, the range of this system is enough to your home, DIY drive-in movie or even a bike parade.
For your enhancement of knowledge, PiFM was originally created by Oliver Mattos and Oskar Weigl and revised by Ryan Grassel under MAKE labs. Further, Raspberry Pi’s broadcast frequency can range between 1 MHz and 250 MHz, make sure you don’t interfere with licensed broadcasters and therefore limit your transmissions to the standard FM band of 87.5-108.0 MHz
Steps
Making of antenna.
For an antenna, just use 40cm of 12 AWG solid wire, cut and strip a female jumper wire and solder it to one end of your antenna. Then, insulate with heat-shrink tubing and add hot glue around the joint for support and stick it on pin 4 of the GPIO pins of your Raspberry Pi.
Flash the SD card and add music.
Flash the image to your SD card and for OSX and Linux users, open up the PirateRadio partition and get started. Windows users has different set of instructions to be followed. In order to add music, include your artist or album folders to the root of the “Pirate Radio” partition of the SD card. Your music files will be nested within these folders, so there’s no need to dump all your music into one mess on the main directory.
Editing the config file.
The desired frequency is set to broadcast on in the pirateradio.config file. In a text editor, configuration is available where you have to set the station frequency to broadcast. Then shuffle to True to shuffle files, or to False to play files alphabetically and then set repeat all to True if you want to loop forever through your playlist.

Play it
Now finally, tune your FM radio to your desired frequency and plug in the Raspberry Pi. Within 15 seconds, you will hear your music loud and clear.
Working of PiFM software
The Raspberry Pi which is ridiculously powerful is turned on and FM transmitter is plugged in a wire as the antenna into GPIO pin 4 and then the code is run. Whereas frequency modulation is adjusted to the frequency using the fractional divider. The Python code defaults to FM of particular frequency with shuffle and repeat turned off. Then it scans the SD card for music files and accordingly builds a playlist based on the options in the file. After passing each file along to a decoder based on the file type, each file is re-encoded into a mono format the PiFM radio can handle. This enables you to play more than just WAV files, you can use your MP3, FLAC, M4A, AAC, or WMA files too.
Conclusion
Raspberry Pi starter kit have everything, all you have to combine everything present in the case. You can make others stuffs too, like building a housing of your own, a cool radio tower· you can add RadioShack’s handy USB battery pack to carry your station wherever you want to. For detailed understanding, you can visit the blogs of “My howtos and projects”
Filed Under: Reviews


Questions related to this article?
👉Ask and discuss on EDAboard.com and Electro-Tech-Online.com forums.
Tell Us What You Think!!
You must be logged in to post a comment.