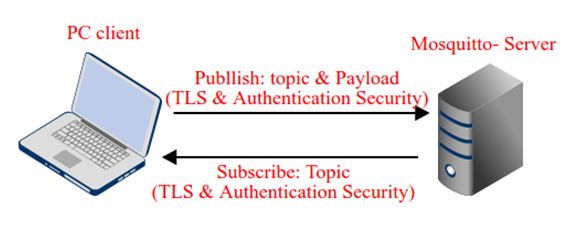
Transport Layer Security (TLS) is a security protocol that uses symmetric cryptography to secure data. In this tutorial, Client-Server communication will be setup using TLS Protocol so that data can be securely exchanged between them. The Mosquitto broker is used to provide TLS security. The Mosquitto broker uses 8883 port as an encrypted transmission port to securely exchange the data between clients.
To learn more about IoT standards and protocols, check out the following tutorial –
Learn more about transport layer protocols from the following tutorial –
Software Required –
• Platform- Linux
• Mosquitto broker Installed
• MQTT-spy client or Linux Terminal.
TLS Protocol –
The TLS protocol provides the following features –
1) Encryption of Data – The data is encrypted end to end so that other than two parties who are exchanging the information, no one can understand the data.
2) Integrity of Data – The encrypted data cannot be manipulated by anyone.
3) Authentication – One party can send the data to other party only when it will have the authenticity to send the data to that party.
In TLS security, Client or Broker uses public key to encrypt the messages, private key to decrypt the messages and certificate to sign the message. To enable TLS security, a client requires the following –
1) CA (certificate authority) certified client certificate
2) Client private key for decryption
3) CA certificate that has signed the server certificate.
To enable TLS security, the server requires the following –
1) CA certified server certificate
2) Server private key for decryption
3) CA certificate that has signed the client certificate.
The openssl is used to create own certificate authority (CA), client keys, server keys and certificates. The openssl can be installed by the following commands –

Fig. 2: Screenshot of Command to Install Openssl
Next, create a folder (any name) in the home directory and move into that directory by terminal. Now follow the below steps to generate the keys and certificates.
1) Create the CA public and private key pair by running the following command in the terminal –

Fig. 3: Screenshot of Command to Create CA Public and Private Key Pairs
In the above command –
genrsa: Generates a RSA private key
-des3: Let using DES3 cipher for the key generation (password)
size_of_private_key_in_bits is 2048
-out: specifies the file name for the key (.key)
This command will generate a CA private key file. It will prompt for writing the user defined password. This password will be further used when the CA certificate will be signed with this private key.
2) Create a CA certificate using the CA key by running the following command –

Fig. 4: Screenshot of Command to Create CA Certificate
In the above command,
req: is Request for certificate
-new: generates new certificate and will prompt user for several input fields.
-x509: creates a self-signed certificate.
-days: specifies the number of days the certificate is valid.
-key: is key file with private key to be used for signing
-out: specifies the file name for the certificate (.crt)
3) Now create the server key pair by running the following command –

Fig. 5: Screenshot of Command to Create Server Key Pair
opensslgenrsa -out mosquitto_server.keysize of private key in bits.
It is not protected with password here. In the above command,
genrsa: generates a RSA private key
-out: specifies the file name for the key (.key)
size_of_private_key_in_bits is 2048
4) Now create a certificate request for server using the server private key by running the following command –

Fig. 6: Screenshot of Command to Create a Certificate Request for Server
In the above command –
req: is Request for certificate
-new: generates new certificate and will prompt user for several input fields.
-key: is key file with private key to be used for signing
-out: specifies the file name for the certificate (.csr)
5) Next, use the CA certificate to sign the broker certificate request by running the following command –

Fig. 7: Screenshot of Command to Sign the Broker Certificate
In the above command,
x509: creates a self-signed certificate.
-req: is Request for certificate
-in: is input file for the certificate
-CA: specifies the file to be signed
-CAkey: is CA private key to sign the certificate with
-CAcreateserial: is the serial number file that gets created if it does not exist
-out: specifies the file name for the certificate (.crt)
-days: specifies the number of days the certificate is valid.
6) For client, the same procedure is followed to generate the client private key, client certificate request and then sign the certificate request by CA certificate.
The client key pair is generated by the following command –

Fig. 8: Screenshot of Command to Generate Client Key Pair
The Client certificate request is made by running the following command –
opensslreq -new -out mosquitto_client.csr -key mosquitto_client.key
The CA certificate to sign the client certificate is generated by running the following command –

Fig. 9: Screenshot of Command to Sign Client Certificate by CA Certificate
Now there are total 9 files created named as follow –
– CA.key : CA key file (public and private)
– CA.crt : CA certificate
– CA.srl : CA serial number file
– mosquitto_server.key : server key
– mosquitto_server.csr : server certificate request
– mosquitto_server.crt : server certificate
– mosquitto_client.key : client key
– mosquitto_client.csr : client certificate request
– mosquitto_client.crt : client certificate
Next, the authentication of clients need to be enabled as well. From that, clients will be connected to the MQTT server only when they know the username and password of MQTT server. Follow the below steps to enable authentication –
1) Create the server_password.txt file anywhere and inside this file, create username and password as following –

Fig. 10: Screenshot of Command to Create server_password.txt
2) Then encrypt this file using the following command –

Fig. 11: Screenshot of Command to Encrypt the Server_password.txt File
3) Next, install Mosquitto broker. As Linux is used, so to install the broker, first add the Mosquitto repository by running the following command and install the mosquito broker –

Fig. 12: Screenshot of Command to Install Mosquito Broker
Next, install Mosquitto clients for the PC by installing Mosquitto developer libraries and Mosquitto client package as follow –

Fig. 13: Screenshot of Command to Install Mosquito Clients
The mqtt-spy can also be used along with the MQTT client. In order to use MQTT spy, skip the above steps. Now the broker is installed along with the client and certificates as well.
Mosquitto by default is configured to run on port 1883. So, there is need of TLS port i.e. 8883. The configuration of Mosquitto broker can be changed to listen on encrypted port. But before that, out of the 9 files generated, copy the following 3 files and paste into folder /etc/mosquitto/
• CA.crt- Paste this file in to /etc/mosquitto/ca_certificates. If this folder is not present then we can make a folder and then paste the file
• mosquitto_server.crt- Paste this file into /etc/mosquitto/certs.
• mosquitto_server.key- Paste this file into /etc/mosquitto/certs
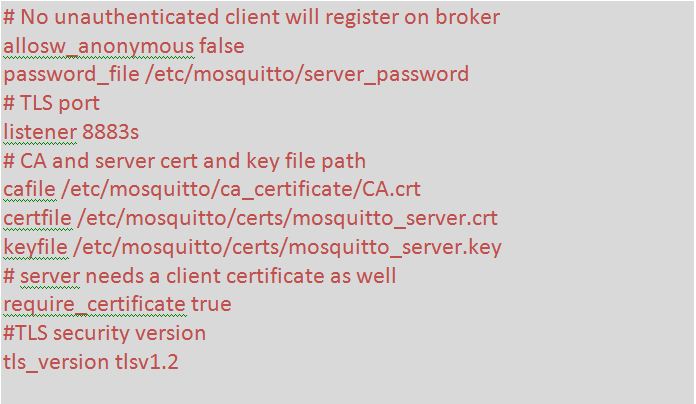
Now copy the password file “server_password.txt” and paste it into /etc/mosquitto path. Now, there is the default configuration file. Change the file – mosquitto.conf as follow –

Fig. 14: Screenshot of changes in Default Configuration File
Now the configuration file has been setup. It’s time to run the Mosquitto broker with this configuration file. Run it with super user by the following commands –
sudomosquitto –c mosquitto.conf –v
It can be seen that the Mosquitto broker is running on port 8883 with TLS security as follow –

Fig. 15: Screenshot of Mosquito Broker Running on Encrypted Port 8883
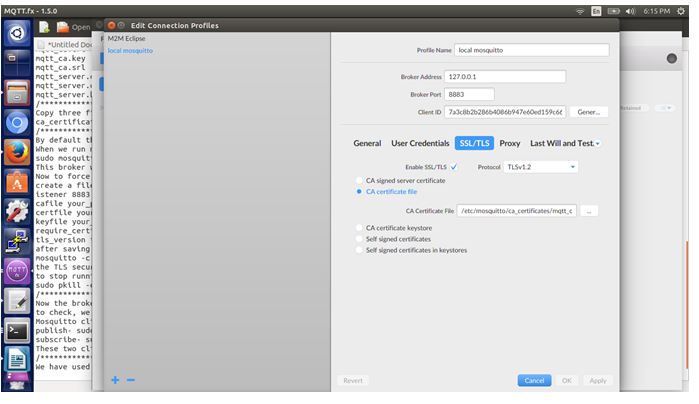
It’s time to test the broker with the MQTT clients. To publish the data on Mosquitto broker, run the following command –

Fig. 16: Screenshot of Command to Publish the Data on Mosquito Broker
And to subscribe the topic from MQTT broker by running the following command –

Fig. 17: Screenshot of Command to Subscribe the Topic from MQTT Broker
It can be seen that whatever is sent on the MQTT broker from publisher side, it is received on the subscriber side. This Client to Server communication is done in highly encrypted form.

Fig. 18: Screenshot of Client to Server Communication using MQTT Broker
Filed Under: IoT tutorials, Tutorials


Questions related to this article?
👉Ask and discuss on EDAboard.com and Electro-Tech-Online.com forums.
Tell Us What You Think!!
You must be logged in to post a comment.