This is second window based application built on the platform of VC++. This project tells you how to control a stepper motor using VC++. With the help of VC++ computer will control all the actions of bipolar stepper motor like varying speed (RPM), varying number of rotations, changing directions etc. 2-degree of motion control is provided means continuous rotations and step rotations. Let us see some of the features of this application
Totally windows based application so very powerful GUI. More user friendly program
Mouse as well as keyboard interface provided. All the controlling actions at your fingertips
Three degree of control is provided for stepper motor. {1} Speed (RPM) control {2} direction control {3} number of rotations control.
Two degree of motion control is achieved for stepper motor {1} continuous rotation of motor at fixed RPM till you press and hold left/right mouse button {2} motor rotates at selected RPM for desired no. of rotations.
Project is divided in two parts (1) Hardware (2) Software
Hardware part is driver which actually drives stepper motor. It provides sufficient current to motor coils so that motor will rotate.
Software part takes care of all controlling actions provides two degree of motion control as well as varies all three parameters of motor RPM, direction and number of rotations.
Hardware Part:-
It’s a small hardware circuit named H-Bridge connected to LPT of PC which works as stepper motor driver.
Software Description:-
As software is built on the platform of visual C++ programming language, one must be familiar with VC++ if he wants to develop this project. He must be knowing all the tools, commands as well as operating of VC++. I am explaining a step by step procedure to develop this application so that one can (even a newvoice) build it very easily. Follow the step by step procedure to build an application.
Open a file menu and click on new tab
Choose project tag and select MFC appwizard standard exe
Give a suitable name of project like “stepcont” or any else
In the first step chose dialog based application
In the second step uncheck 3D controls and ActiveX control boxes
Give suitable title of dialog based application like “Stepper Motor Control using VC++”.
Leave all the options on third step as it is
In the last step you will see that VC++ has created two classes for your dialog based application named ‘CstepcontApp’ & ‘CstepcontDlg’. Leave these name as it is and click finish tab. Finally summary of all the details will appear then click OK button.
You will see VC++ has created standard dialog based exe and you will see this screen shot
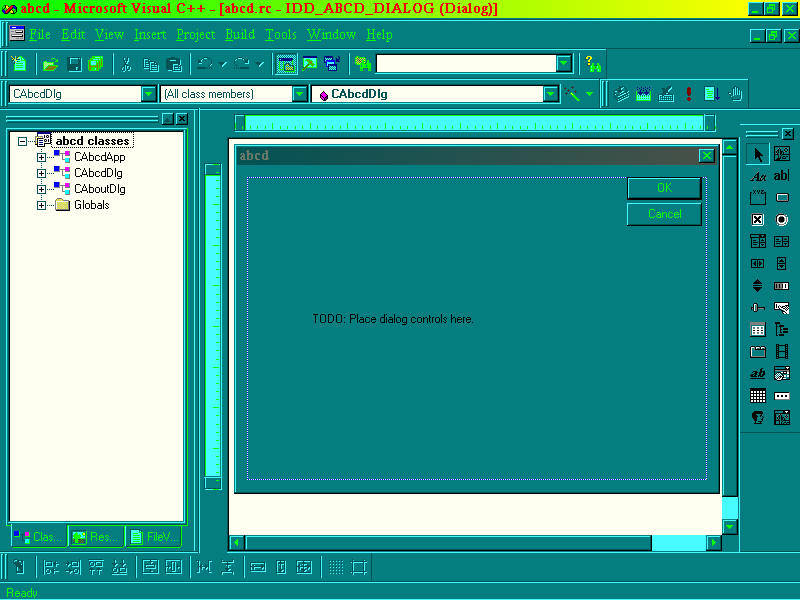
On right hand side you will see application background with two buttons and one text message. On the left hand side you will find three viewing tags class view, resource view & file view. By default you will be in resource view tag. Now the first thing you have to do is to modify the application as per our requirement. So delete both the buttons and the text message and insert the items and set their property as given in table. We shall add 10 push buttons, 3 group box, 1 edit box and last 2 static text. You can add all these using control toolbar. To set the property just right click on any object (button, group box etc.) and choose property from popup menu.
Understanding the Interface
|
Sr. No. |
Object |
Property |
Setting |
|
1 |
Button |
ID |
IDC_CLK |
|
Caption |
&Forward |
||
|
2 |
Button |
ID |
IDC_ACLK |
|
Caption |
&Reverse |
||
|
3 |
Button |
ID |
IDC_INCR |
|
Caption |
&Increase RPM |
||
|
4 |
Button |
ID |
IDC_DECR |
|
Caption |
&Decrease RPM |
||
|
5 |
Button |
ID |
IDC_INCN |
|
Caption |
I&ncrease |
||
|
6 |
Button |
ID |
IDC_DECN |
|
Caption |
D&ecrease |
||
|
7 |
Button |
ID |
IDC_RST1 |
|
Caption |
Reset |
||
|
8 |
Button |
ID |
IDC_XIT |
|
Caption |
E&xit the program |
||
|
9 |
Button |
ID |
IDC_RST2 |
|
Caption |
Reset |
||
|
10 |
Button |
ID |
IDC_RST3 |
|
Caption |
Reset |
||
|
11 |
Group Box |
ID |
IDC_STATIC |
|
Caption |
Direction Control |
||
|
12 |
Group Box |
ID |
IDC_STATIC |
|
Caption |
Speed control |
||
|
13 |
Group Box |
ID |
IDC_STATIC |
|
Caption |
No. of rotations |
||
|
14 |
Static Text |
ID |
IDC_RPM |
|
Caption |
60 |
||
|
15 |
Static Text |
ID |
IDC_ROT |
|
Caption |
1 |
||
|
16 |
Edit Box |
ID |
IDC_MSG |
After setting the properties of all these 16 objects build and run the application our application will look like

Until now we haven’t done any coding but now the coding part will start. You have to attach a function with each button. For this open class wizard from view menu. Follow the steps
- Select the button ID like “IDC_CLK” or any other and click on BN_CLICKED event
- Then press add function button. A message box will appear with name of function. Leave it as it is and click OK. You will be diverted in source code to this edit function.
- Right now don’t edit but follow the same procedure and attach function to each button.
- Now you have to attach a variable to both static texts. For this again open class wizard and select member variable tag.
- You will find all the IDC will appear in dialog box. Select IDC of static text ‘ IDC_RPM ‘.
- Now click add member variable button. Second dialog box will appear. Give the name of variable as “m_rpm”. In a category choose value and in type choose CString click ok.
- do same procedure to attach variable to another static text named m_rot
- Finely open DCMCDlg.cpp file and move to the top of file. Define some variables as given below
int s;
float d,s1,n,r; The code has been explained in the Code Tab.
Function Application and Code Edits
Refer the table given below to know the application of each function in program
|
Sr.No. |
Function name |
Application |
|
1 |
OnXit |
used to quit the program |
|
2 |
OnClk |
rotates motor in clockwise (forward) direction at entered RPM till desired no. of rotations are completed |
|
3 |
OnAclk |
rotates motor in anticlockwise (reverse) direction at entered RPM till desired no. of rotations are completed |
|
4 |
OnIncr |
Increments RPM means the speed of motor by 10 |
|
5 |
OnDecr |
Decrements RPM by 10 till it is not 60. 60 RPM is min limit |
|
6 |
OnIncn |
Increments revolutions by 1 if >1, increase by twice if <1 |
|
7 |
OnDecn |
decrements revolutions by 1 if >1, decrease to half if <1 |
|
8 |
OnRst1 |
resets the RPM to 60 |
|
9 |
OnRst2 |
resets number of rotations to 1 |
|
10 |
OnRst3 |
resets the message box |
Now to rotate the motor continuously at constant speed (60 RPM) we have to add one more function and its name is OnMouseMove.
To attach this function follow the steps given below
- Open classview wizard
- Select ‘CStepDlg’ in Object ID (the name is in my software may be differ in every case)
- Scroll down the message box and select WM_OnMouseMove event.
- Now click on button add function and you will see new member function ON_WM_MOUSEMOVE is created.
- click the button edit code. Now edit the code as given below.
void CStepDlg::OnMouseMove(UINT nFlags, CPoint point)
{
// TODO: Add your message handler code here and/or call default
if((nFlags & MK_LBUTTON) == MK_LBUTTON)
{
_outp(0x0378,0xCC);
Sleep(50);
_outp(0x0378,0xC3);
Sleep(50);
_outp(0x0378,0x33);
Sleep(50);
_outp(0x0378,0x3C);
Sleep(50);
}
else if((nFlags & MK_RBUTTON) == MK_RBUTTON)
{
_outp(0x0378,0xCC);
Sleep(50);
_outp(0x0378,0x3C);
Sleep(50);
_outp(0x0378,0x33);
Sleep(50);
_outp(0x0378,0xC3);
Sleep(50);
}
CDialog::OnMouseMove(nFlags, point);
}
After attaching this function wherever (on program screen) you press left mouse button and scroll (move) the the mouse by holding it down motor will rotate in clockwise direction. Moving the mouse by holding down right mouse button will rotate the motor in anticlockwise direction. Stop moving mouse will stop the motor.
After finishing all these build and run the application. See the working of all the buttons. Prepare hardware circuit as shown in article. Connect it with LPT port of computer. Switch on the power supply. Now click forward or reverse button and see whether motor is running or not.
Project Source Code
###
Here is the to view how to write code for all above functions
void CStepDlg::OnInc()
{
// TODO: Add your control notification handler code here
UpdateData(TRUE);
x++;
if(t==0)
{
switch(x)
{
case 1:
_outp(0x0378,0x10);
break;
case 2:
_outp(0x0378,0x08);
break;
case 3:
_outp(0x0378,0x04);
break;
case 4:
_outp(0x0378,0x02);
break;
case 5:
_outp(0x0378,0x01);
break;
default: MessageBox("Over/under Speed");
}
}
else
{
switch(x)
{
case 1:
_outp(0x0378,0x30);
break;
case 2:
_outp(0x0378,0x28);
break;
case 3:
_outp(0x0378,0x24);
break;
case 4:
_outp(0x0378,0x22);
break;
case 5:
_outp(0x0378,0x21);
break;
default: MessageBox("Over/under Speed");
}
}
if(m_c == 30)
{
x=0;
MessageBox("Max Speed");
}
else
{
m_c+=5;
m_scnt.Format("%d",m_c);
}
UpdateData(FALSE);
}
void CStepDlg::OnDec()
{
// TODO: Add your control notification handler code here
UpdateData(TRUE);
x--;
if(t==0)
{
switch(x)
{
case 1:
_outp(0x0378,0x10);
break;
case 2:
_outp(0x0378,0x08);
break;
case 3:
_outp(0x0378,0x04);
break;
case 4:
_outp(0x0378,0x02);
break;
case 5:
_outp(0x0378,0x01);
break;
default: MessageBox("Over/under Speed");
}
}
else
{
switch(x)
{
case 1:
_outp(0x0378,0x30);
break;
case 2:
_outp(0x0378,0x28);
break;
case 3:
_outp(0x0378,0x24);
break;
case 4:
_outp(0x0378,0x22);
break;
case 5:
_outp(0x0378,0x21);
break;
default: MessageBox("Over/under Speed");
}
}
if(m_c == 10)
{
x=1;
MessageBox("Min Speed");
}
else
{
m_c-=5;
m_scnt.Format("%d",m_c);
}
UpdateData(FALSE);
}
void CStepDlg::OnStr()
{
// TODO: Add your control notification handler code here
SetTimer(IDC_CLK_TMR,1000,NULL);
}
void CStepDlg::OnTimer(UINT nIDEvent)
{
// TODO: Add your message handler code here and/or call default
int a =0;
UpdateData(TRUE);
if(c == m_itime)
{
c=0;a++;
if((a%2)==0)
{
switch(x)
{
case 1:
_outp(0x0378,0x10);
break;
case 2:
_outp(0x0378,0x08);
break;
case 3:
_outp(0x0378,0x04);
break;
case 4:
_outp(0x0378,0x02);
break;
case 5:
_outp(0x0378,0x01);
break;
}
}
else
{
switch(x)
{
case 1:
_outp(0x0378,0x10);
break;
case 2:
_outp(0x0378,0x08);
break;
case 3:
_outp(0x0378,0x04);
break;
case 4:
_outp(0x0378,0x02);
break;
case 5:
_outp(0x0378,0x01);
break;
}
}
}
else c++;
UpdateData(FALSE);
CDialog::OnTimer(nIDEvent);
}
void CStepDlg::OnStop()
{
// TODO: Add your control notification handler code here
KillTimer(IDC_CLK_TMR);
c = 0;
}
void CStepDlg::OnClk()
{
// TODO: Add your control notification handler code here
t=0;
}
void CStepDlg::OnAclk()
{
// TODO: Add your control notification handler code here
t=1;
}
void CStepDlg::OnStrt()
{
// TODO: Add your control notification handler code here
if(t==0)
{
_outp(0x0378,0x10);
Sleep(2000);
_outp(0x0378,0x08);
Sleep(2000);
_outp(0x0378,0x04);
Sleep(2000);
_outp(0x0378,0x02);
Sleep(2000);
_outp(0x0378,0x01);
//MessageBox("motor is running in clockwise direction");
}
else
{
//MessageBox("motor is running in anticlockwise direction");
_outp(0x0378,0x30);
Sleep(2000);
_outp(0x0378,0x28);
Sleep(2000);
_outp(0x0378,0x24);
Sleep(2000);
_outp(0x0378,0x22);
Sleep(2000);
_outp(0x0378,0x21);
}
}
void CStepDlg::OnStp()
{
// TODO: Add your control notification handler code here
_outp(0x0378,0x00);
}
###
Filed Under: Electronic Projects

Questions related to this article?
👉Ask and discuss on Electro-Tech-Online.com and EDAboard.com forums.
Tell Us What You Think!!
You must be logged in to post a comment.