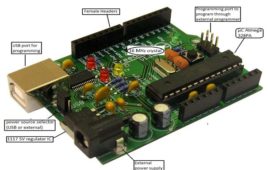
Servo is a special type of motor which converts electric signals in to shaft positions. Servos can be broadly classified as Industrial servos and Hobby grade [[wysiwyg_imageupload::]]servos.Industrial servos are generally heavy duty high power AC or DC servos widely used for precise robotic arms.Hobby grade servos are widely used in RC Hobbies like RC Plane, Cars Helicopters, Multirotors, Boats, hover craft, etc.They are mostly used to control the control surfaces (RC Planes) or for thrust vectoring mechanisms (hovercraft, boats, multirotors) or for steering mechanisms (RC Cars).Hobby grade servos are further classified as micro, standard, giant based on the torque they can provide, however their working principal is just the same.Based on speed of operation they are classified as Analog or Digital servos, Digital servos provide greater speed but consume more power.Speed of a servo motor is defined as time taken for shaft to move from 00 to 600 after the application of signal. In this article we will be using an ARDUINO clone board viz. FREEDUINO.
Unmanned Ground Vehicle (UGV) or Spycar
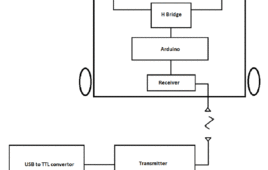
About this project I’ve developed Unmanned Ground Vehicle (UGV) – a radio controlled 4 wheeler, which have 6 different motions. In this 4 wheeler platform we can mount wireless camera and using the video feedback on a PC, we can drive the vehicle from a distant place. We can control the device through an attractive…
Displaying Regional Languages on LCD using Arduino
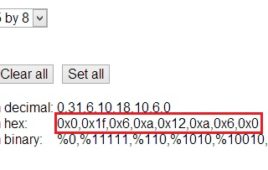
This project uses cheap Hitachi HD44780 based 16×2 LCD to display regional Indian language. These displays are designed for English text only, but they have [[wysiwyg_imageupload::]]provisions to display custom characters. On the LCD, each character is 8 pixels high by 5 pixels wide. Using a custom character designer, regional fonts were converted to hex codes, later to be used in the project. In order to understand the theory behind custom character generation we have to take a look at the memory mapping of HD44780.To display user information on regional language the characters need to be mapped onto a standard keyboard. In this case, the custom characters are mapped to a standard US-EN keyboard. When defining new character set, ASCII values of keys are assigned uniquely to each new custom character in ascending order [order is important as binary search is employed!]. Keep on reading to find out how the circuit is coded and how the connections are made.
Solar Tracker Using Arduino
We all know Sun is the best source of energy source and has been shining since the universe was created. We can harness solar energy by either converting it into electricity using Solar cell or using solar thermal energy by means of solar cooker, solar water heater or by using it to heat or cool a room using solar passive systems. Amongst these the most popular and best method to harness solar energy is by using Solar cell. We all know during summer heat is more intense because sun rays are perpendicular to the earth surface and hence the solar energy is concentrated over a small region.This can be applied to solar cell as well viz. the power output from a solar cell is directly proportional to sine of angle between the cell surface and light rays. So it’s clear that the power output from a solar cell will be maximum when it is facing the sun i.e. the angle between its surface and sun rays is 900.Thus the setup by which the above objective is achieved is known as solar tracker. Solar trackers are continually being employed in practice to get max efficiency. In this project we will design a simplest single axis solar tracker and its concept can be expanded to make a full fledged dual axis solar tracker. We are making single axis for sake of simplicity and better understanding.
Arduino : What is Arduino
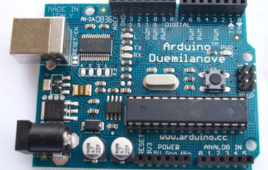
I was surprised to see a twelve year old boy giving life to his electronic gadgets. He was trying his hands on building his own creative toys which involved hard electronics and software skills. My zeal was on its peak to know the magical power inside the young chap. How did he understand the concepts of electronics so early? How did he develop the software? Anxiously I went down and asked him about the magic he was doing. The answer was Arduino. Arduino is an open source electronics platform accompanied with a hardware and software to design, develop and test complex electronics prototypes and products. The hardware consists of a microcontroller with other electronic components which can be programmed using the software to do almost any task. Learn more about open source hardware and open source software.


