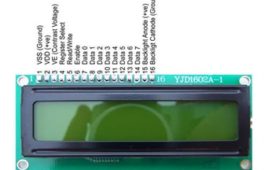
16×2 alphanumeric LCD can display 16 characters in each of its row, and it has two rows. To interface an LCD we need to know about its internal registers and pin functions. An LCD has two important registers namely command register and Data register. Both are 8-bit registers. The command register is written with various commands by the user. These commands are responsible for the functioning of LCD. 16×2 LCD is widely used in various embedded applications. The reason for this is its easy operation and it can display a large number of characters and symbols. In this tutorial we’ll interface LCD with ARM7 based microcontroller LPC2138.LCD can be interfaced in 8-bit as well as 4-bit mode (mode signifies Data bits sent at a time). In the 8-bit mode we require 8-pins of the microcontroller whereas in 4-bit mode the data is sent ‘nibble’ by ‘nibble’ (4 data lines used).
Interfacing 4026 with 7 segment display

CD4026 is a Johnson counter IC commonly used in digital display. It has a 5 stage Johnson decade counter with a decoder which converts the Johnson code to a 7 segment decoded output. To put it simply, it will convert the input into numeric display and can be seen on 7 segment display or with LED. It can be used for displaying analogue value such as temperature with pic microcontroller or for counting objects.There is various other applications like in 7 segment decimal display circuit, in clocks, timer etc. Advantages of 4026 counter are : It contains counters and 7 segment decoded in one package, It can be easily interfaced with 7 segment types, Ideal for low power display, Operated at wide range of temperature from 5V to 20V and the biggest advantage of the 4026B counter IC is that it can drive a 7-segment display without needing a decoder driver IC.
Interfacing Raspberry Pi With Arduino

We are working on RaspberryPi model B it is a credit-card-sized single-board computer developed in the UK by the RaspberryPi Foundation with the intention of promoting the teaching of basic computer science in schools The RaspberryPi has a Broadcom BCM2835 system on a chip (SoC), which includes an ARM1176JZF-S 700 MHz processor (The firmware includes a number of “Turbo” modes so that the user can attempt overclocking, up-to 1 GHz, without affecting the warranty),VideoCore IV GPU,and originally shipped with 256 megabytes of RAM, later upgraded to 512MB.It does not include a built-in hard disk or solid-state drive, but uses an SD card for booting and long-term storage.In this Project raspberry pi and Arduino UNO are Used. Raspberry Pi is used for sending control signals to Arduino and controlling all the activity of Arduino meanwhile the Ardunio is used for sensing the o/p of LM 35 and all the other sensors which is connected with it.
Introduction to ARM Microcontroller – LED Interfacing with LPC2138 (ARM7)
With the exponentially increasing modernization in Electronics Field, particularly in Embedded systems, it’s now a necessary step for Engineers, students and hobbyists to move along with Industry. There’s a need to grasp skills on recent industrial tools and systems. ARM Processors are one of such advancements in Embedded stream which serve as major platform for many of the modern systems. ARM stands for 32 bit Advanced RISC (Reduced Instruction Set Computer) Machines designed and licensed by British company ARM Holdings. As an IP core business, ARM Holdings itself does not manufacture its own electronic chips, but licenses its designs to other semiconductor manufacturers. ARM-based processors and systems on a chip include the Qualcomm Snapdragon, TI, etc. Using a RISC based approach to computer design, ARM processors require significantly fewer transistors than processors that would typically be found in a traditional computer.