This article explains about an interesting Arduino project mentioned on the website Arduino Arts. It demonstrates as to how a Wii Nunchuk controller can be used to operate two servos arranged in a pan-tilt assembly. Although there are loads of such projects available over the internet, this one is quite simple to comprehend. So the setup basically requires components like an Arduino Uno, Arduino Prototype shield, Nunchuk I2C connector, 2 servos, 5v power supply (for the servos), servo pan tilt brackets and a Wii Nunchuck controller.
Firstly, the two servos are assembled in the form of a pan-tilt arrangement with the help of the aluminium brackets in a way that one is on the x-axis and other is on the y-axis. Then the Arduino proto shield is mounted on the Arduino Uno board. One may also use a breadboard instead. The protosheild makes it easy to design custom circuits as it enables to combine the circuit and Arduino board into a single unit.
Now the three wires of the servo on the x-axis are soldered to the corresponding pins on the UNO board including GND, 5V and Pin 10.
Similarly for the y-axis, the GND, 5V and Pin 9 are soldered to the microcontroller board. Moving on, the Wii Nunchuck controller can be connected to the circuit in two ways. Either its wires can be stripped and soldered directly to the board or its cable end, which is otherwise connected to the Wiimote, can be connected through an I2C connector. This controller has 4 wires including GND (ground), 5V (power), SDA (Serial Data Line) and SCL (Serial Clock Line).
After linking the corresponding wires and establishing the required connection, the code is uploaded by connecting the setup to a computer or laptop using a USB cable. When the code is uploaded, it reads the nunchuk data and initializes the servos as well as the I2C. As a result, the servos are able to move as per the readings from the Nunchuk controller.
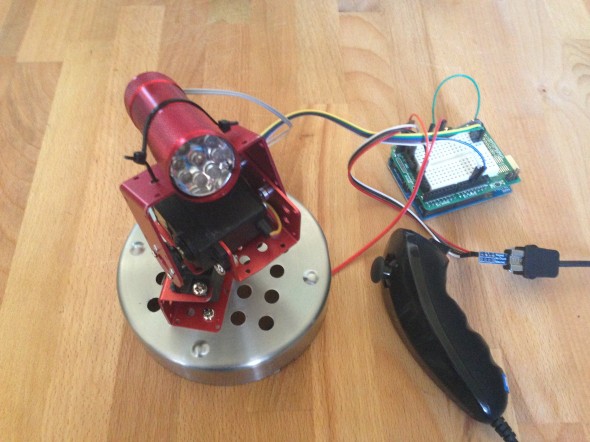
When the setup is arranged, the Wii controller is moved in different directions and accordingly a similar movement is observed in the pan tilt servo. The controller consists of a joystick and two buttons and each of them controls the movement of the servos. Here, a flashlight has been mounted onto the pan tilt assembly which gives a clear idea about the functionality of the setup. Given below is the link where you can find the video of the project’s demonstration along with the coding.
Filed Under: Reviews

Questions related to this article?
👉Ask and discuss on Electro-Tech-Online.com and EDAboard.com forums.
Tell Us What You Think!!
You must be logged in to post a comment.