AVR studio is an Integrated Development Environment (IDE) by ATMEL for developing applications based on 8-bit AVR microcontroller. Prior to installation of AVR Studio you have to install the compiler WinAVR. This will allow AVR Studio to detect the compiler.
Step 1:
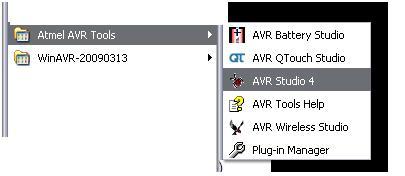
Fig. 1: Screenshot of Windows Start Menu navigating to AVR Studio 4
Step 2
Step 2:
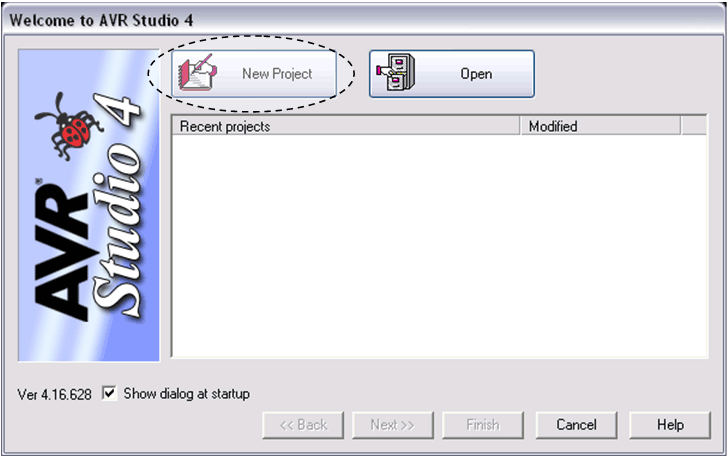
Fig. 2: Screenshot of New Project window in AVR Studio 4
Click on new project
Step 3
Step 3:
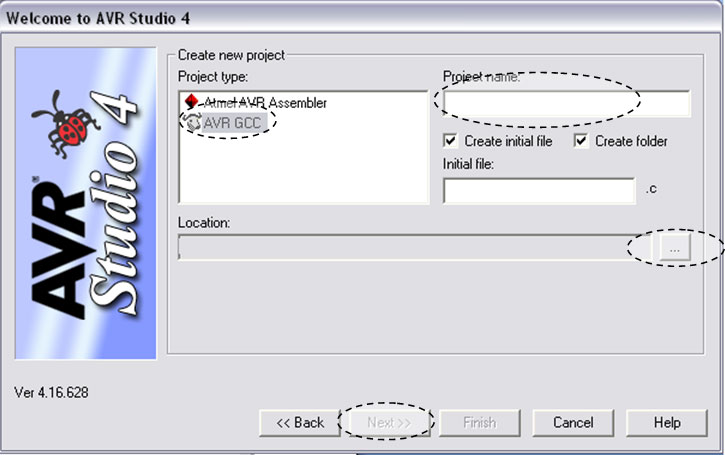
Fig. 3: Screenshot of creating new project in AVR Studio 4
Click on AVR GCC
Write the project name
Select your project location.
Click on Next>>
Step 4
Step 4:
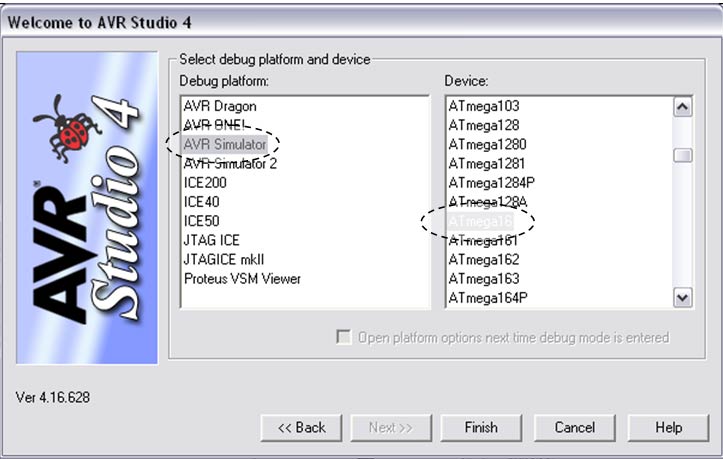
Fig. 4: Screenshot of selecting Debug Platform and Target Device in AVr Studio 4
Click on AVR Simulator in left block and then select your controller (e.g.: ATmega16).
Click on finish button
Step 5
Step5:
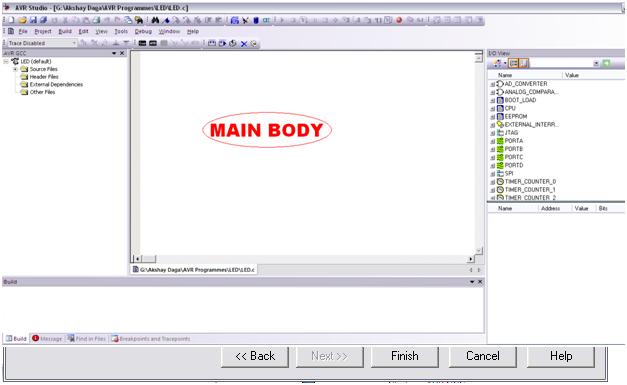
Fig. 5: Screenshot of main window of AVR Studio 4
Write the code in main body area.
Save the project file.
Step 6
Step6:

Fig. 6: Screenshot of Project Menu in AVR Studio 4
Go to PROJECT -> Configuration Options
Step 7
Step 7:
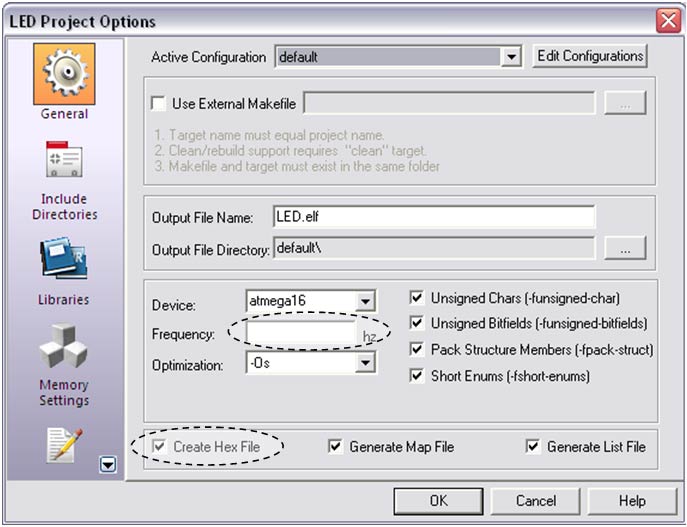
Fig. 7: Screenshot of Project Options in AVR Studio 4
Write the crystal frequency if you are using external crystal.
Check the checkbox corresponding to Create Hex File and then click on OK.
Save the project again.
Step 8
Step 8:
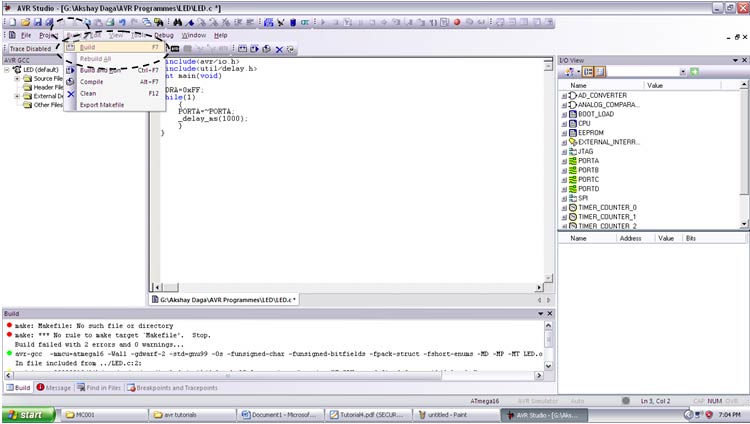
Fig. 8: Screenshot of Build Menu in AVR Studio 4
Go to BUILD -> Compile.
This will compile your code and generate error if any.
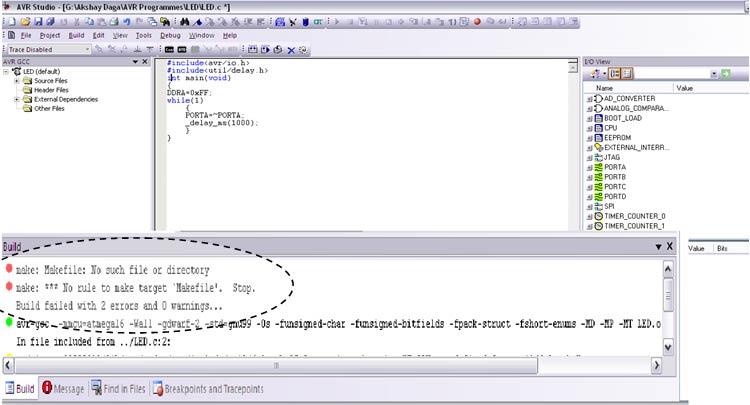
Fig. 9: Screenshot of building a project in AVR Studio 4
For the first time it will generate two errors, ignore them.
Step 9
Step 9:

Fig. 10: Screenshot of Build Menu in AVR Studio 4
Again go to BUILD and click on Build.
This will generate hex file of the code.
Use that Hex file to burn your microcontroller.
Where you will find Hex file?
Just go to the location which you selected at the starting. Open that folder you will find one more folder named Default. This is the default location of where the hex file is generated.
While working in real time if you want to change the code, make changes and build the file again. This will automatically update the previous hex file.
You may also like:
Filed Under: Tutorials



Questions related to this article?
👉Ask and discuss on Electro-Tech-Online.com and EDAboard.com forums.
Tell Us What You Think!!
You must be logged in to post a comment.