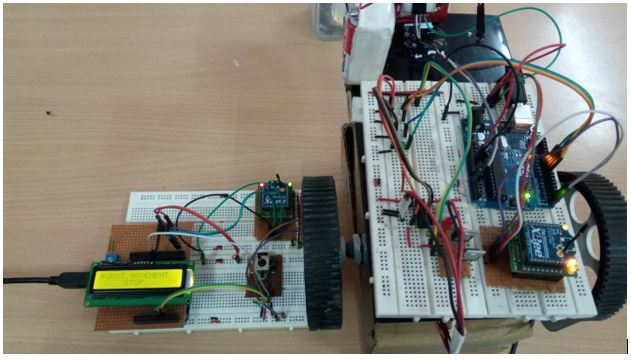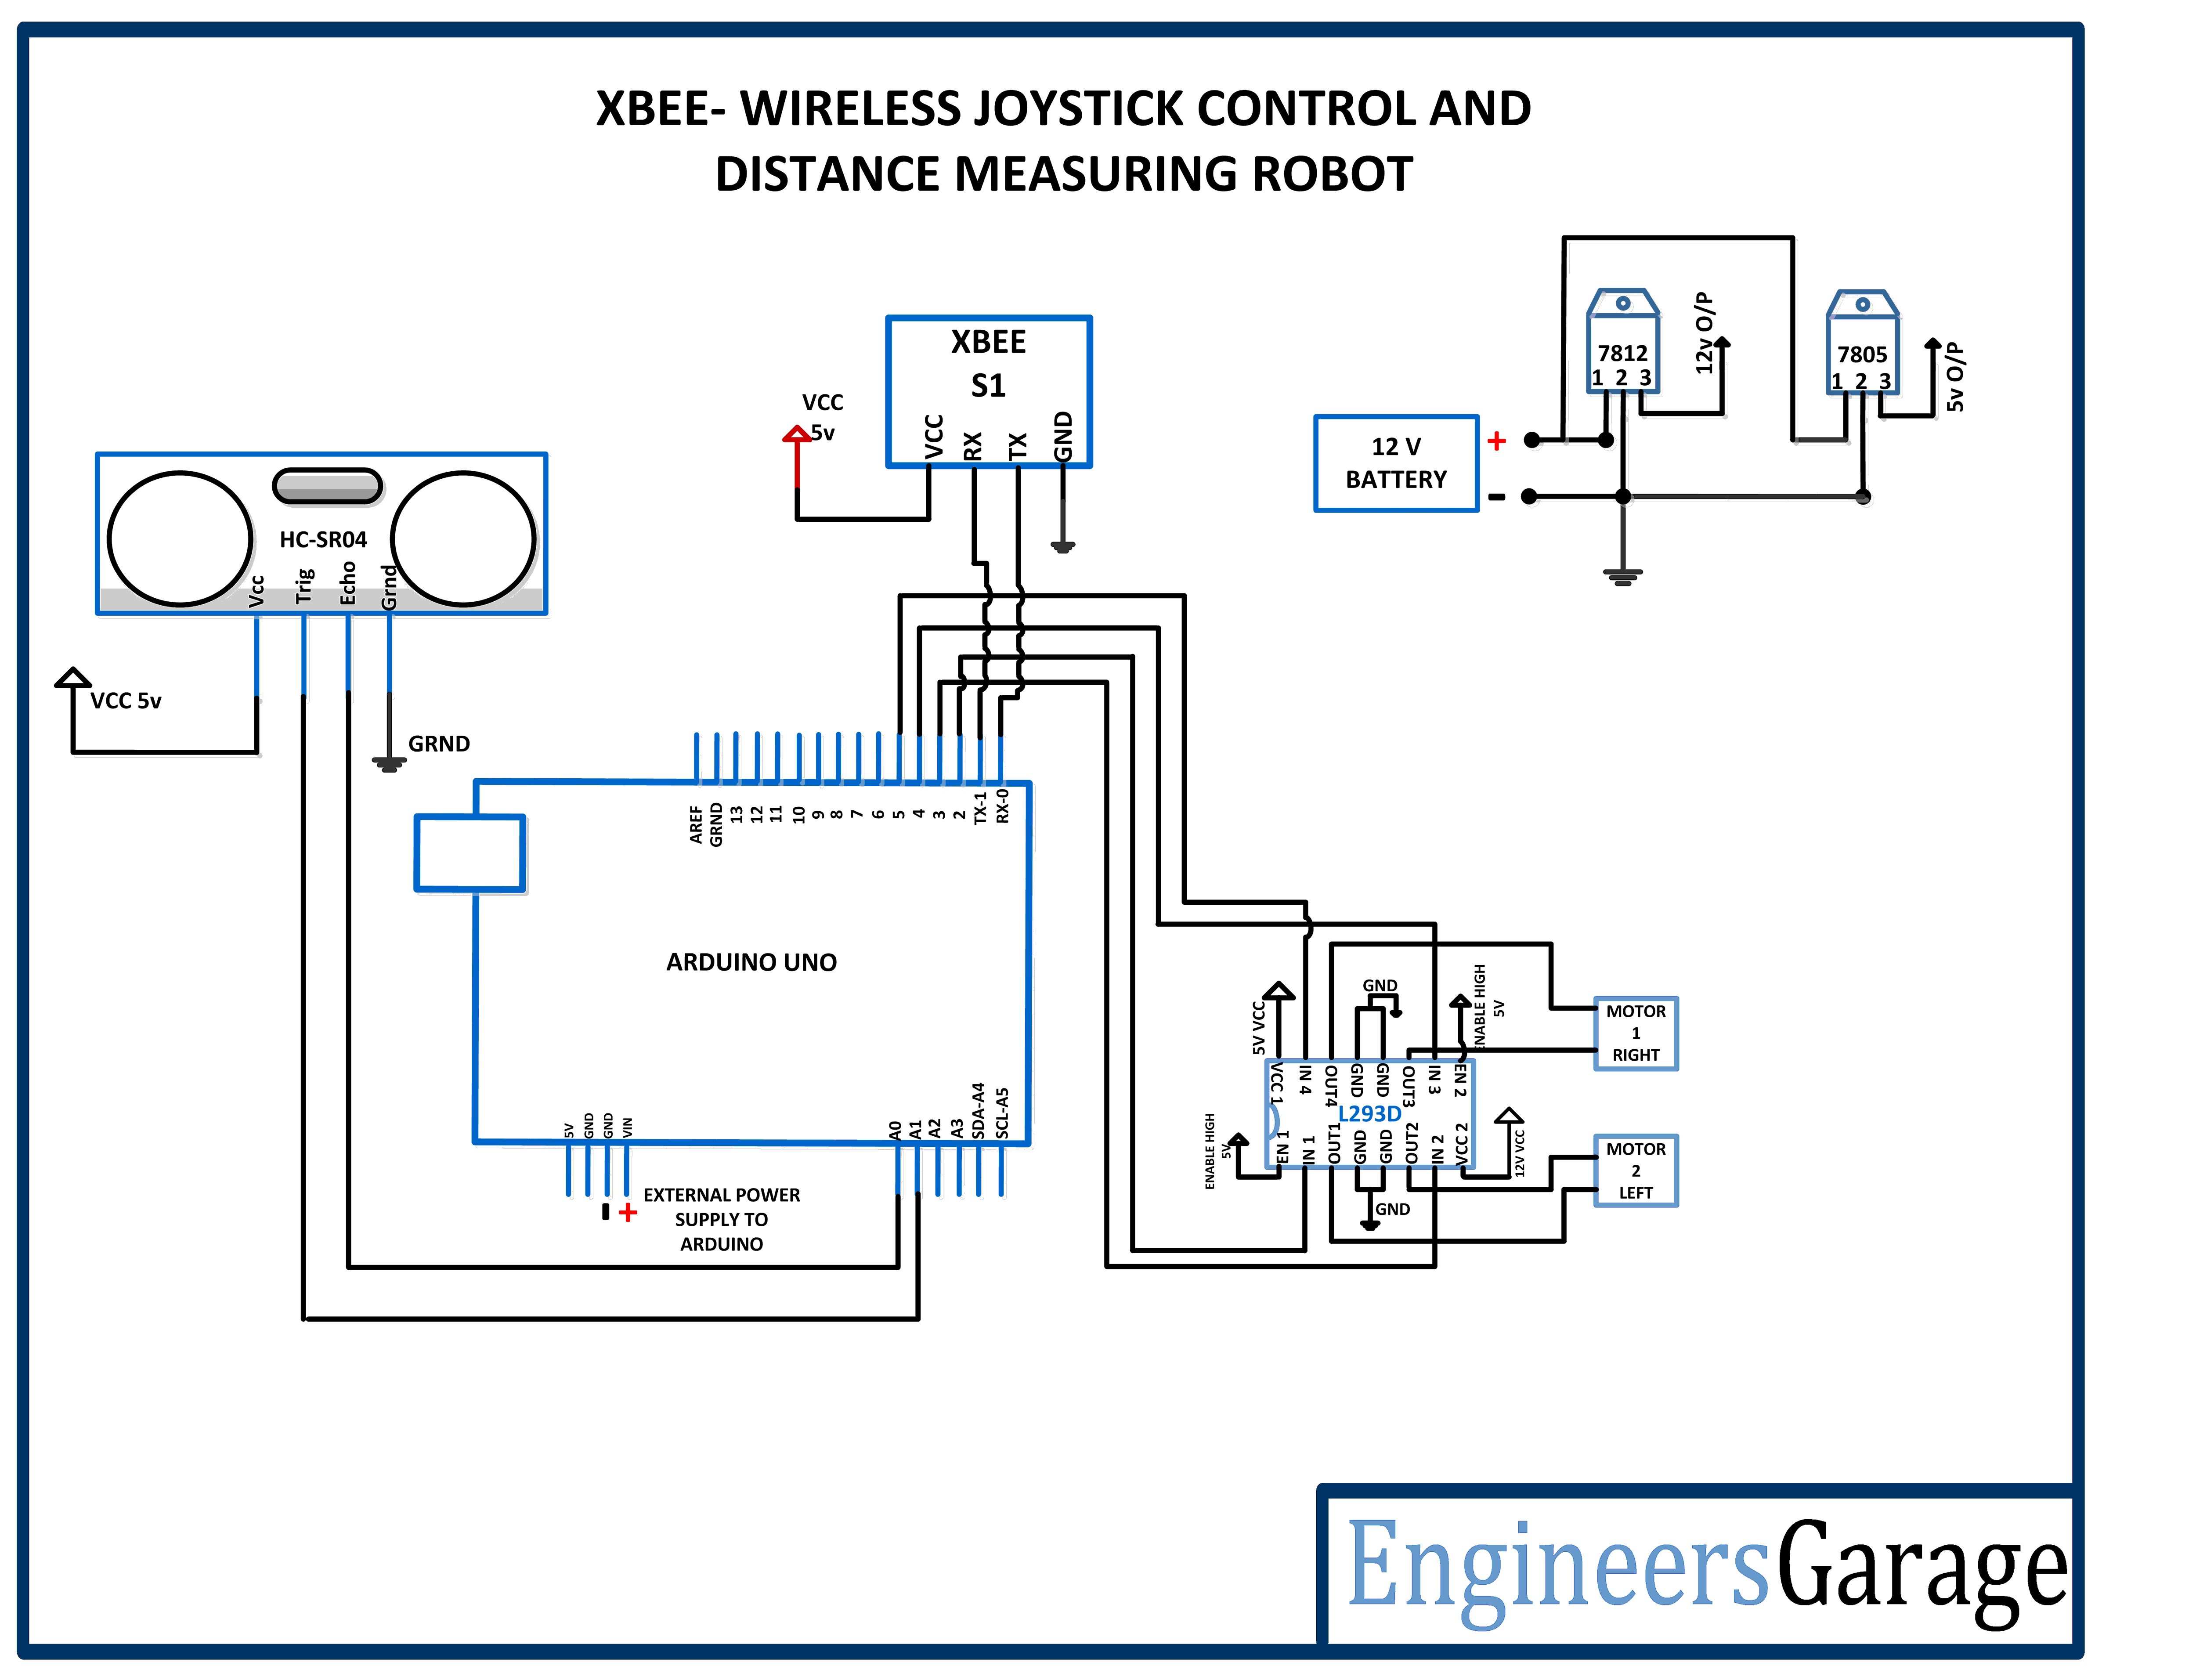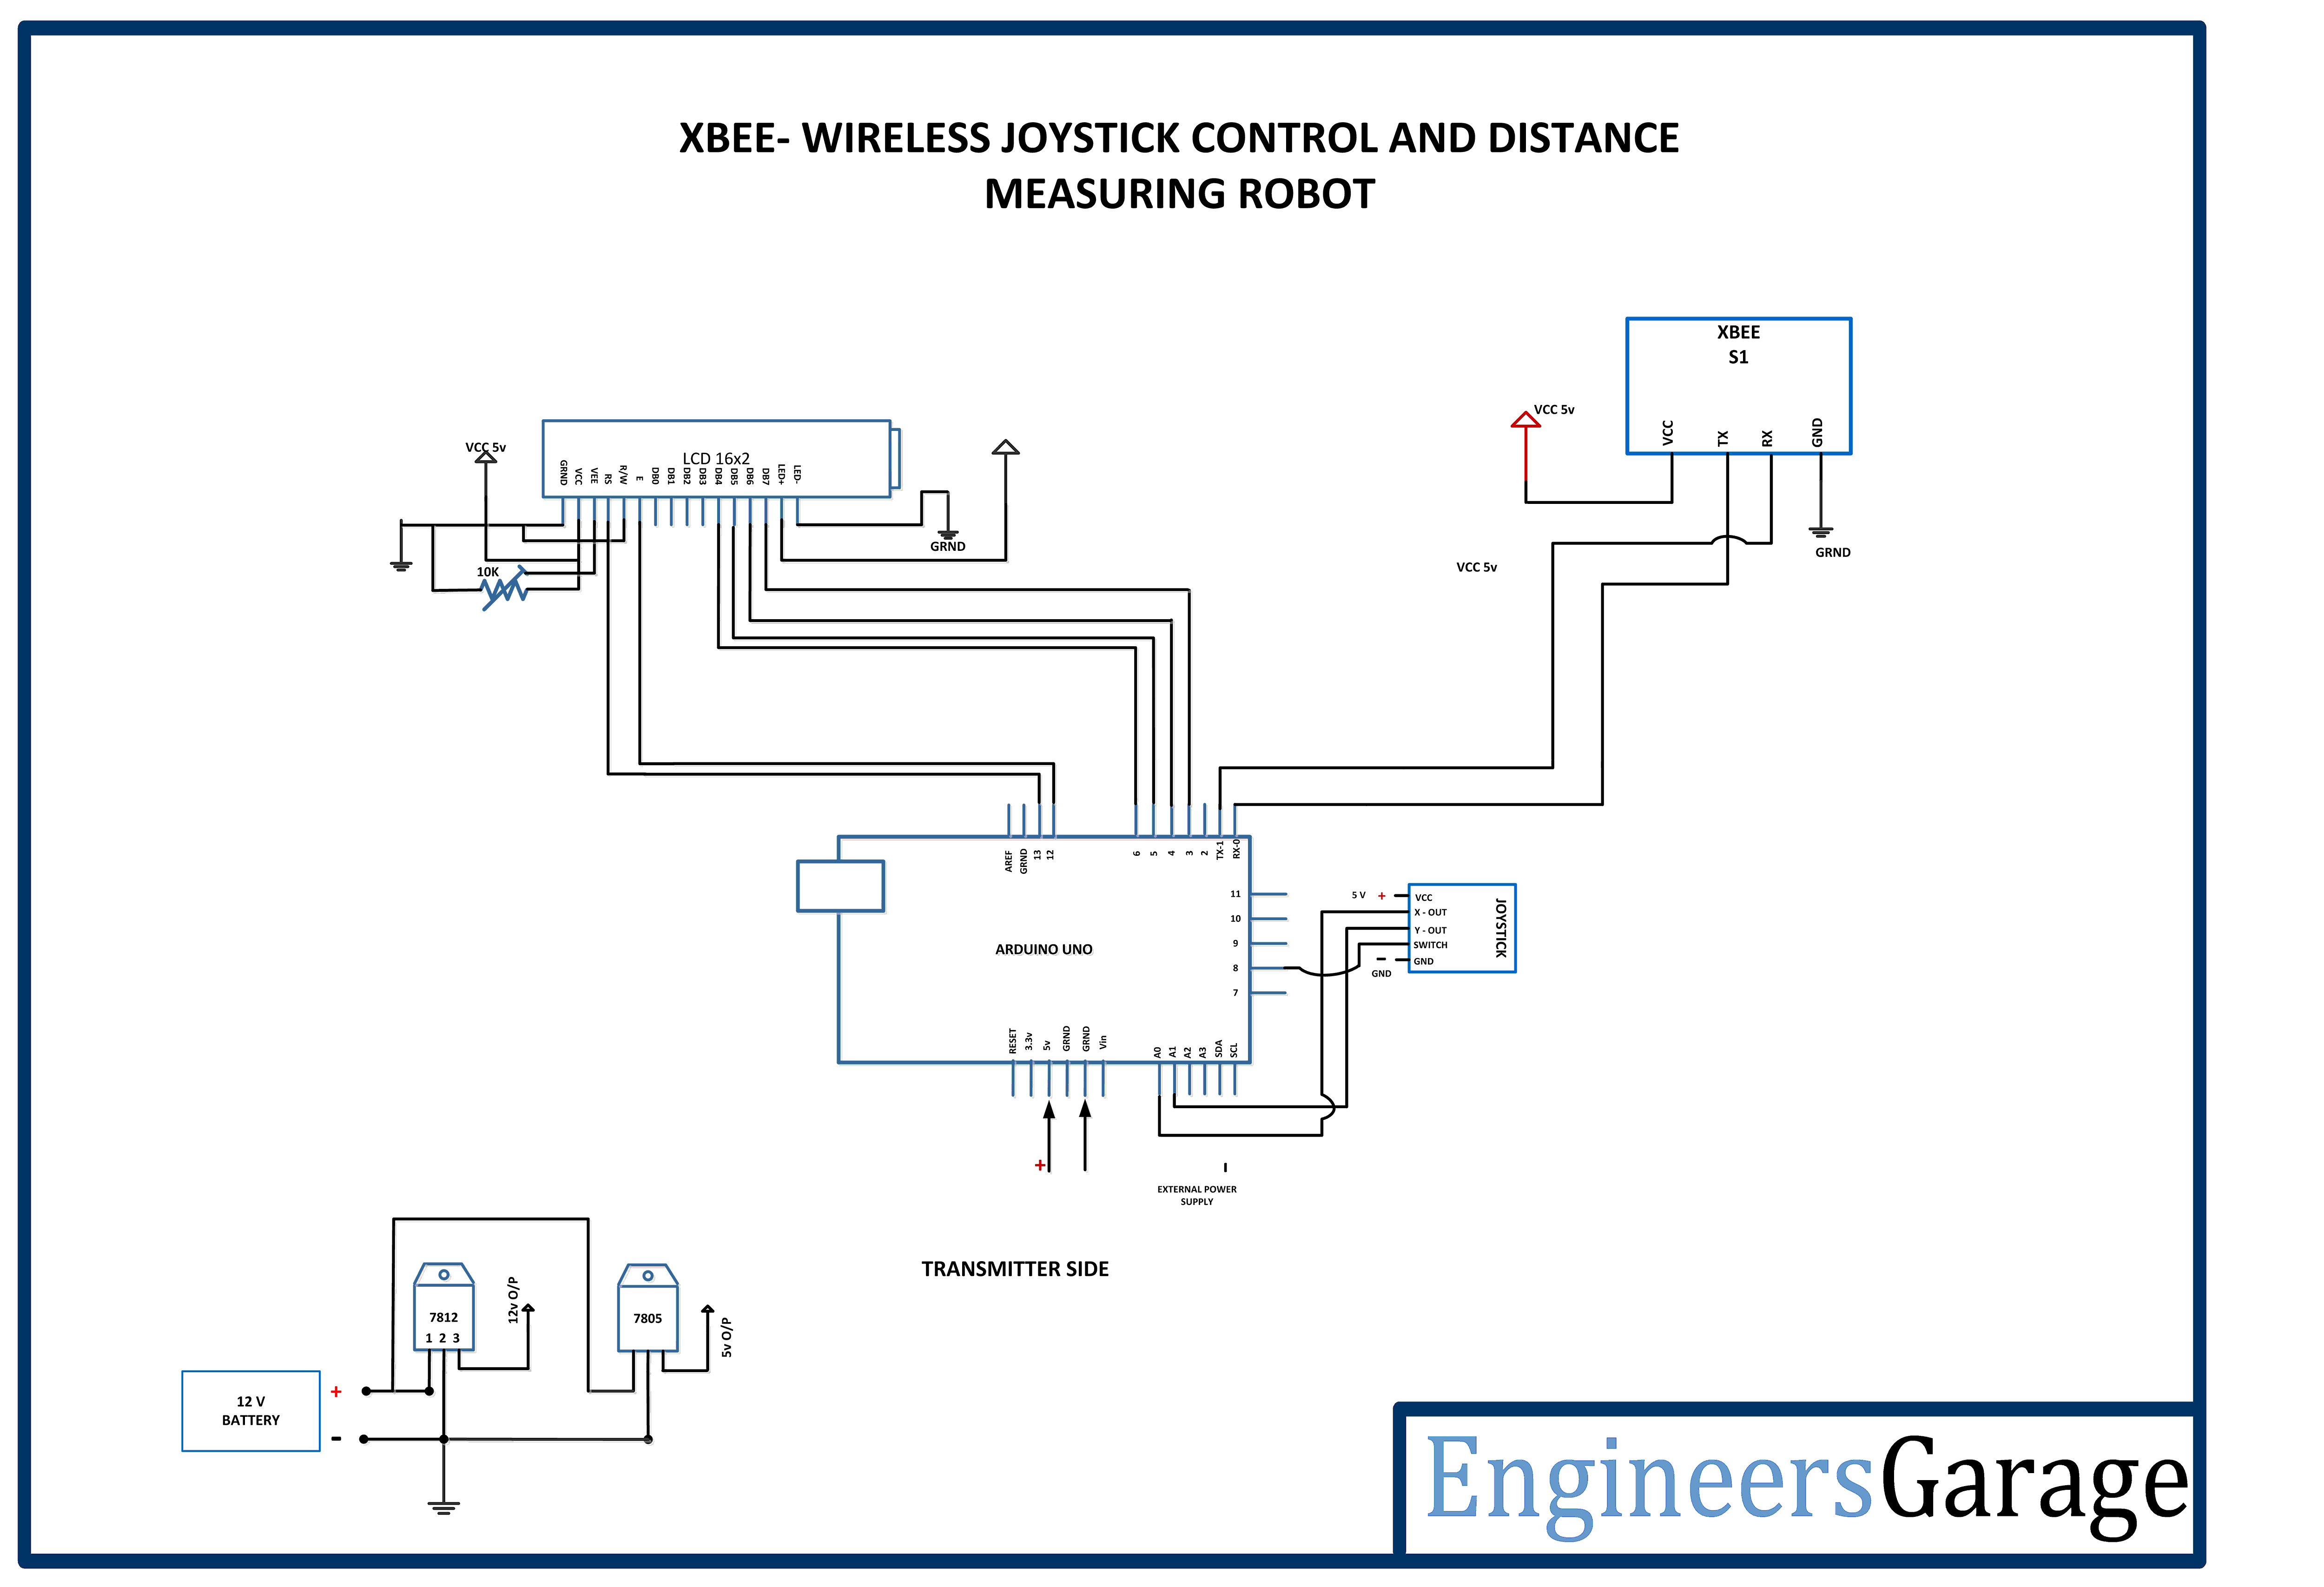


Make the circuit connections according to the circuit diagram and the description given. At first both the transmitter and the Receiver circuit setup are powered up. The LCD shows the Initial message and starts displaying the direction of the robot. The robot starts moving in direction with respect to the readings from the joystick module. The movement of joystick handle can control the movements of the robot as forward, backward, left and right. The according to values read by arduino the data’s are transmitted wirelessly through the xbee, where the data are received by xbee mounted on robot and the data is given to microcontroller to process and control the direction of robot by giving input to motor driver L293D IC from digital pins of microcontroller by making the pin high. As our main purpose is to measure the distance, so the robot is moved to particular place and stopped and as joystick switch is pressed the control signal sent instructs to measure the distance, The Ultrasonic Sensor sends out a high-frequency sound pulse and then times how long it takes for the echo of the sound to reflect back. The sensor has 2 openings on its front. One opening transmits ultrasonic waves, (like a tiny speaker), the other receives them, (like a tiny microphone).


Project Source Code
###
//Program to #include <LiquidCrystal.h> LiquidCrystal lcd(13, 12, 6, 5, 4, 3); // Arduino pin numbers const int SW_pin = 8; // digital pin connected to switch output const int X_pin = 1; // analog pin connected to X output const int Y_pin = 0; // analog pin connected to Y output int x_value = 0; int y_value = 0; int sw_value; void setup() { Serial.begin(9600); pinMode(SW_pin, INPUT); lcd.begin(16, 2); digitalWrite(SW_pin, HIGH); lcd.setCursor(0,0); lcd.print("Engineers Garage"); lcd.setCursor(0,1); lcd.print(" "); delay(3000); lcd.setCursor(0,0); lcd.print("DISTANCE MEASUREING"); lcd.setCursor(0,1); lcd.print(" WIRELESS ROBOT"); delay(3000); lcd.setCursor(0,1); lcd.print(" "); } void loop() { sw_value = digitalRead(SW_pin); x_value = analogRead(X_pin); y_value = analogRead(Y_pin); if(x_value > 900) { Serial.println("F"); lcd.setCursor(0,0); lcd.print("ROBOT MOVEMENT "); lcd.setCursor(0,1); lcd.print(" FORWARD"); } else if(x_value < 90) { Serial.println("B"); lcd.setCursor(0,0); lcd.print("ROBOT MOVEMENT "); lcd.setCursor(0,1); lcd.print(" BACKWARD"); } else if(y_value > 900) { Serial.println("R"); lcd.setCursor(0,0); lcd.print("ROBOT MOVEMENT "); lcd.setCursor(0,1); lcd.print(" RIGHT"); } else if(y_value < 80) { Serial.println("L"); lcd.setCursor(0,0); lcd.print("ROBOT MOVEMENT "); lcd.setCursor(0,1); lcd.print(" LEFT"); } else if(sw_value == 0) { //Sending the data M to enable measuring Serial.println("M"); //Buffer space for incoming serial data char buffer[] = {' ',' ',' ',' ',' '}; while (!Serial.available()); //when serial is available read the data till newline and store to buffer Serial.readBytesUntil('n', buffer, 7); //converting the charcter to integer int incomingValue = atoi(buffer); Serial.println(incomingValue); //commands for clearing lcd, setting the lcd cursor and to display the distance lcd.clear(); lcd.setCursor(0, 0); lcd.print("Dist. Measured"); lcd.setCursor(0, 1); lcd.print(incomingValue); delay(1000); } else { Serial.println("S"); lcd.setCursor(0,0); lcd.print("ROBOT MOVEMENT "); lcd.setCursor(0,1); lcd.print(" STOP"); } }###
Circuit Diagrams
| Circuit-Diagram-Joystick-Remote-Control-Distance-Measuring-Robot |  |
| Circuit-Diagram-Xbee-Wireless-Distance-Measuring-Wireless-Robot |  |
Project Video
Filed Under: Electronic Projects
Filed Under: Electronic Projects


Questions related to this article?
👉Ask and discuss on Electro-Tech-Online.com and EDAboard.com forums.
Tell Us What You Think!!
You must be logged in to post a comment.