19. Double click on ucf file

Fig. 1: Screenshot of ucf File on Xilinx
New Window Appears
20.A window will appear
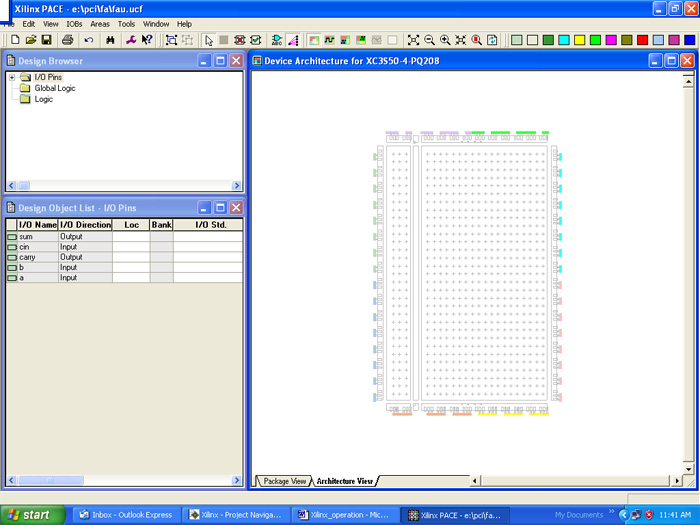
Fig. 2: Screenshot of Design Architecture Window in Xilinx
Assign Pins
21. Now assign pins correspondingly
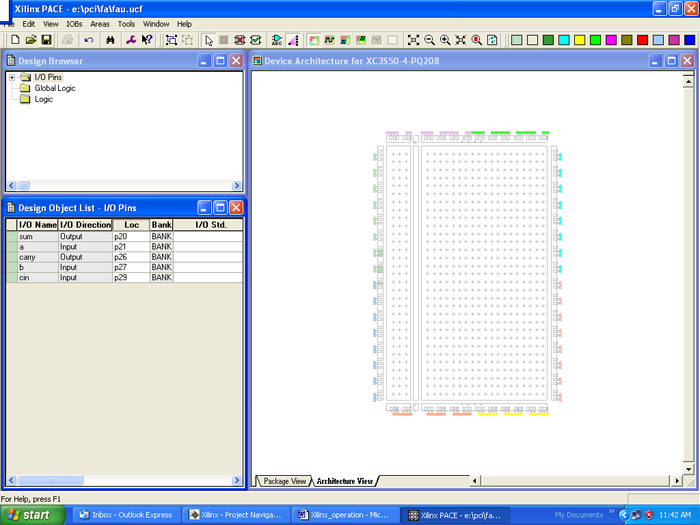
Fig. 3: Screenshot of Assigning Pins in Xilinx
Save & Close
22. After saving ucf , close it

Fig. 3: Screenshot of Saving ucf File in Xilinx
Implement Design
23. Implement your design

Fig. 4: Screenshot of Implementing a Design in Xilinx
Generate programming file
24. Generate programming file

Fig. 5: Screenshot of Generating Programming File in Xilinx
Run Generate Prom
25. Now run generate PROM

Fig. 6: Screenshot of Generating PROM in Xilinx
Select prom file and name it
26. Select PROM option

Fig. 7: Screenshot of Preparing Configuration File in Xilinx
27. Next, give a name to prom file, and select a location from browse( default ).

Fig. 8: Screenshot of Naming PROM in Xilinx
Contd…
28.Next
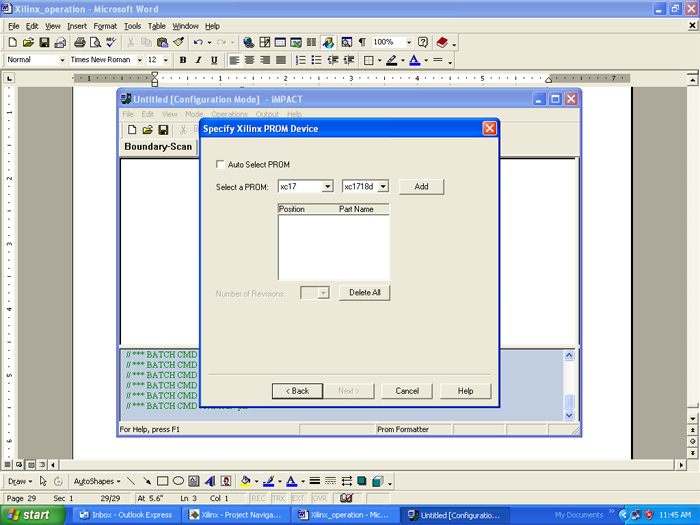
Fig. 9: Screenshot of Specifying Xilinx PROM device
Select xcf and add it
29. Select xcf

Fig. 10: Screenshot of Selecting xcf in Xilinx
30. After selecting xcf, add it
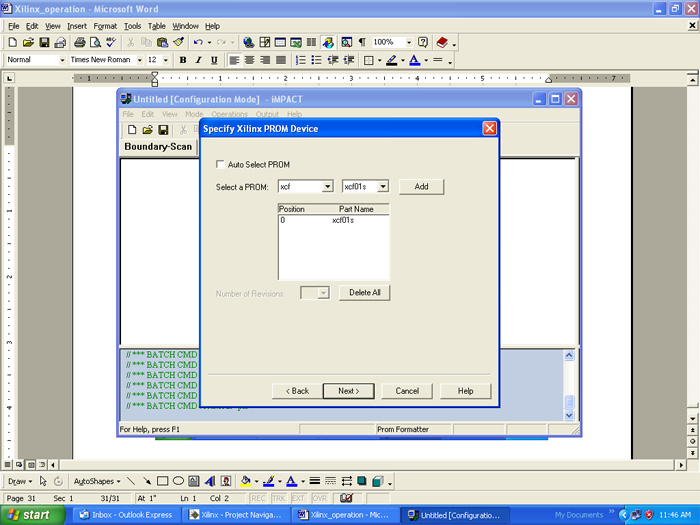
Fig. 11: Screenshot of Adding xcf in Xilinx
Contd…
31. Next
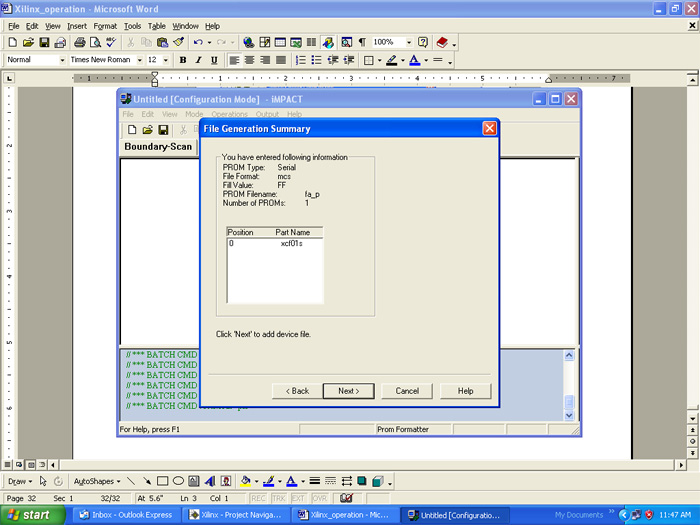
Fig. 12: Screenshot of xcf File Generation Summary in Xilinx
Add file
32. Add file
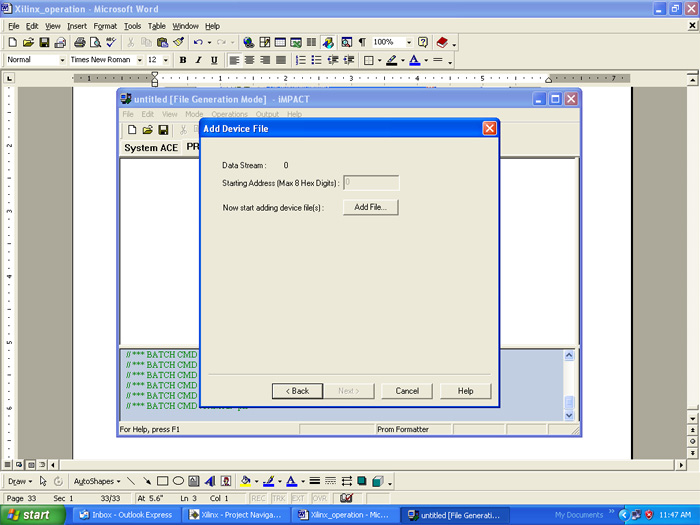
Fig. 13: Screenshot of Adding Device File in Xilinx
Select .bit file and add it
33. Select .bit file , and add it
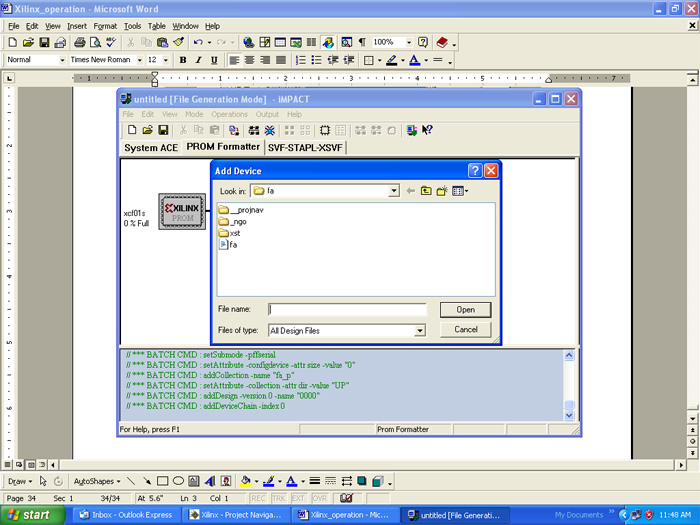
Fig. 14: Screenshot of Selecting .bit File in Xilinx
Select & open
34. Select and open
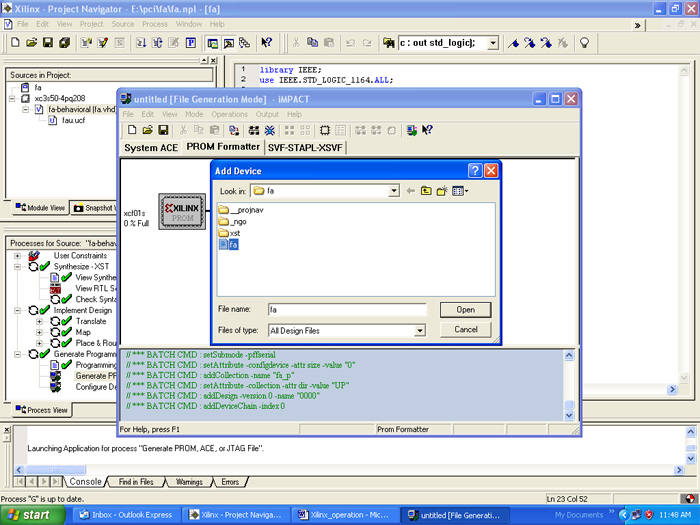
Fig. 15: Screenshot of Opening .bit file in Xilinx
Filed Under: Tutorials


Questions related to this article?
👉Ask and discuss on Electro-Tech-Online.com and EDAboard.com forums.
Tell Us What You Think!!
You must be logged in to post a comment.