35. Select no
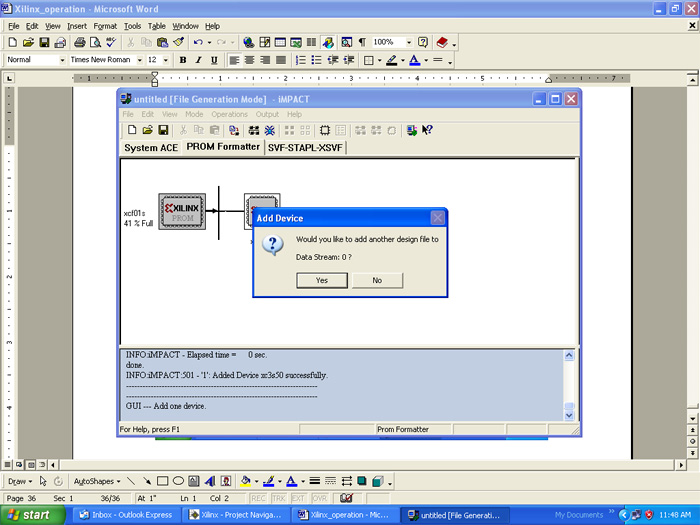
Fig. 1: Screenshot of Add Device Window
36. Select finish
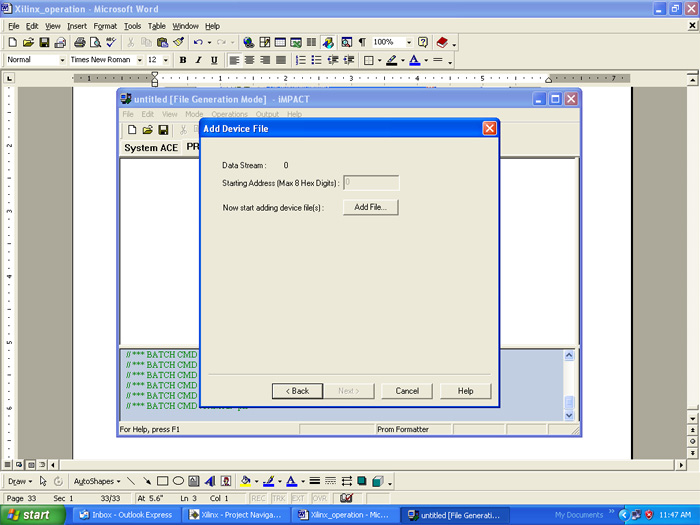
Fig. 2: Screenshot of Adding Device File in Xilinx
Select yes and generate prom file
37. Select yes.
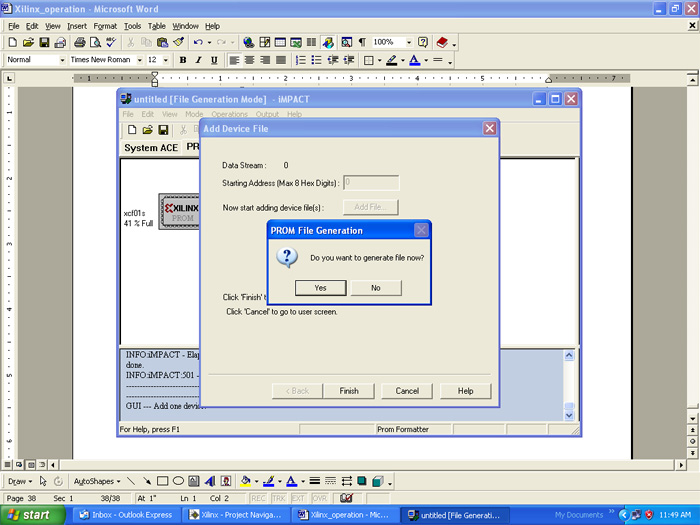
Fig. 3: Screenshot of PROM File Generation Window in Xilinx
38. Prom file generation succeeded
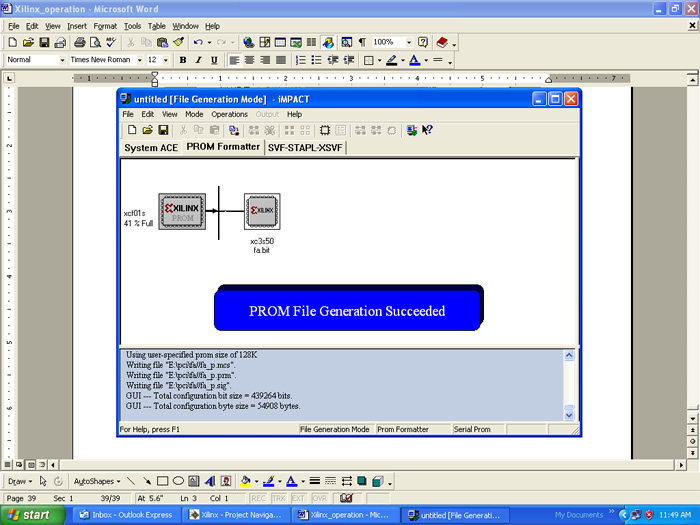
Fig. 4: Screenshot of Message on Successful PROm File Generation in Xilinx
Run configure and select boundary scan mode
39. Run configure device impact
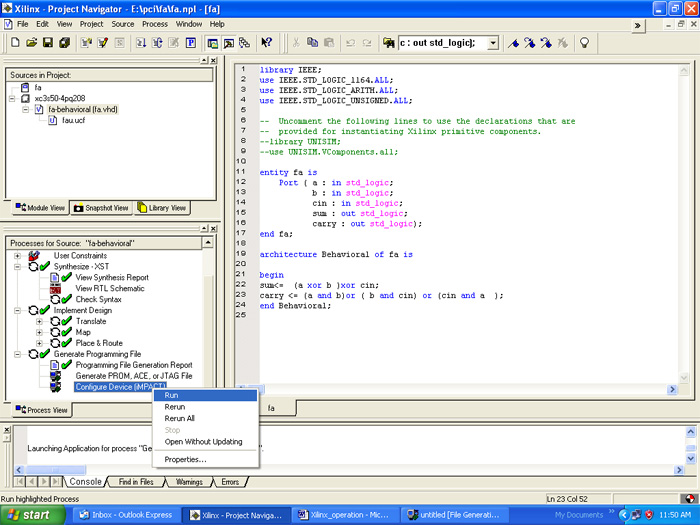
Fig. 5: Screenshot of Configure Device Impact Window in Xilinx
40. Select boundary scan mode
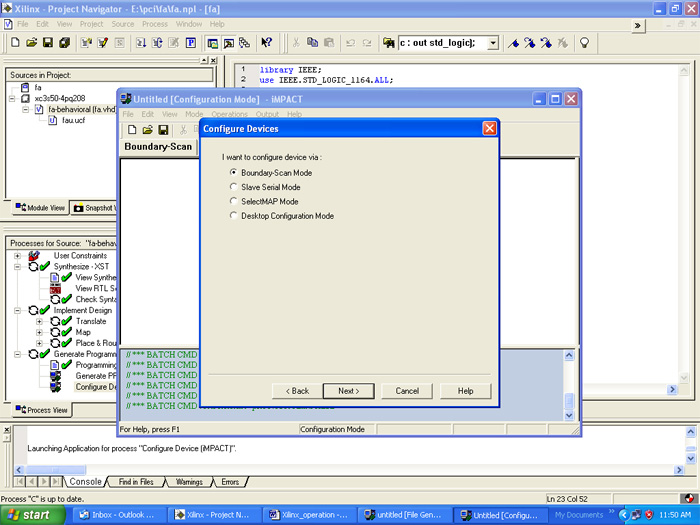
Fig. 6: Screenshot of Configure Devices Window in Xilinx
Follow the steps
41. Do the following
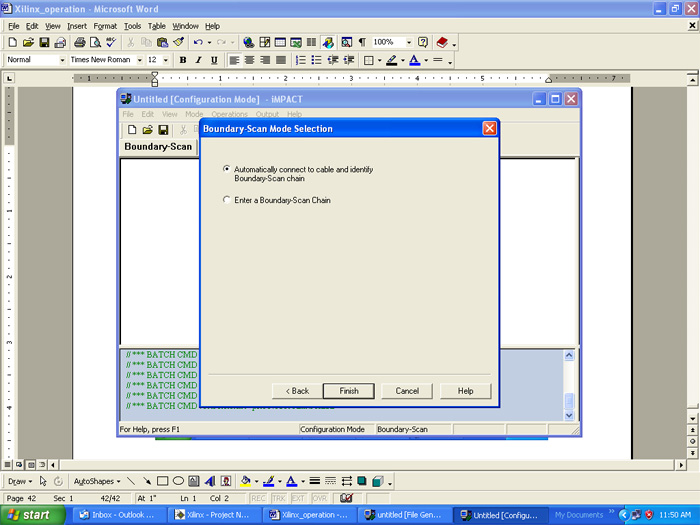
Fig. 7: Screenshot of Boundary Scan Mode Selection Window in Xilinx
Contd…
42. Select ok
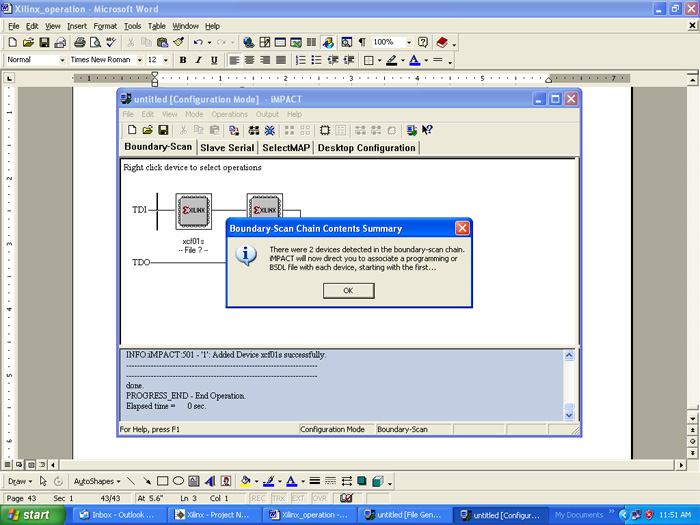
Fig. 8: Screenshot of Boundary-Scan Chain Contents Summary in Xilinx
Select .mcs file
43.Select .mcs file
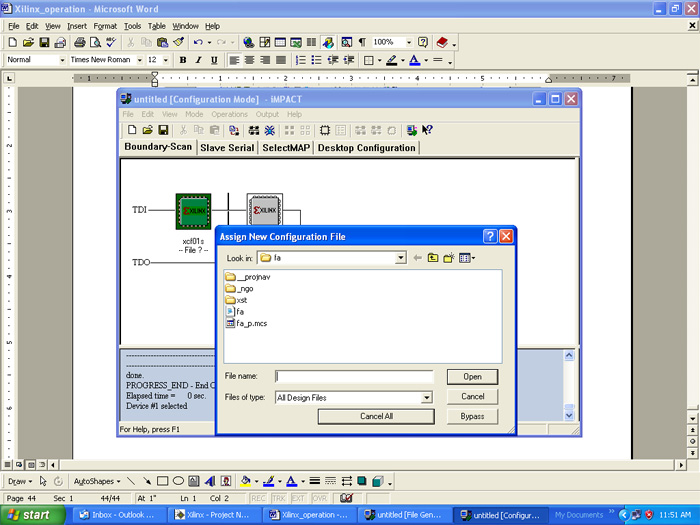
Fig. 9: Screenshot of Selecting .mcs File in Xilinx
Contd…
44.As follows
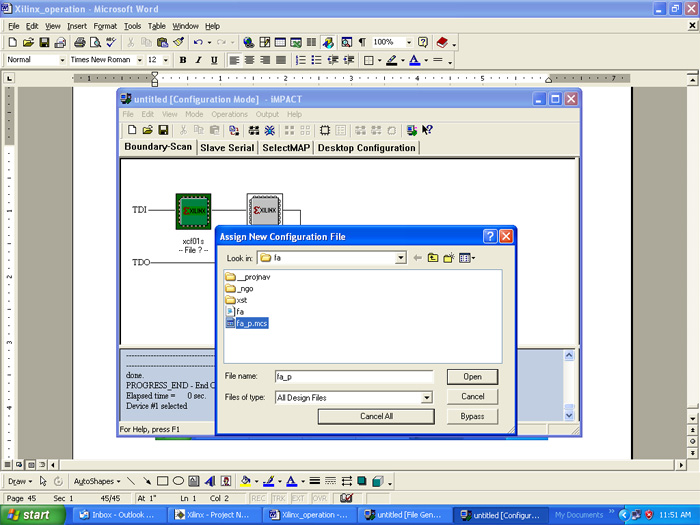
Fig. 10: Screenshot of Adding .mcs File in Xilinx
Select ok
45.Select ok
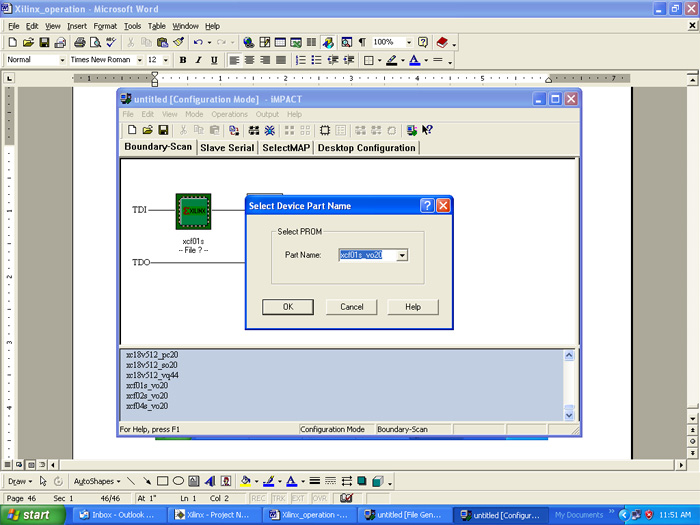
Fig. 11: Screenshot of Select Device Part Name Window in Xilinx
Select yes
46. Select yes
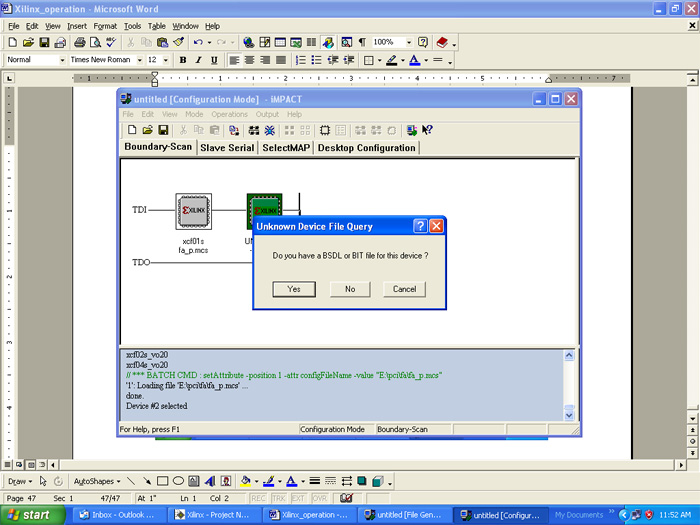
Fig. 12: Screenshot of Unknown Device File Query Message
Select .bit file and open
47.Select .bit file
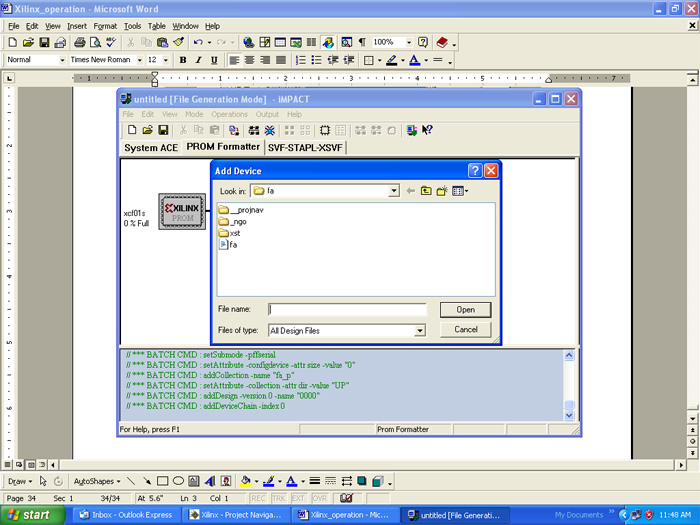
Fig. 13: Screenshot of Selecting .bit File in Xilinx
48. Select and open
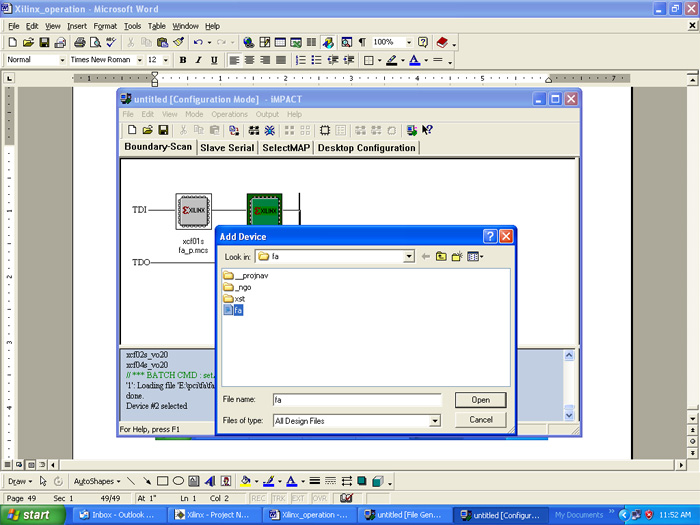
Fig. 14: Screenshot of Adding .bit File in Xilinx
Select ok
49. Select ok
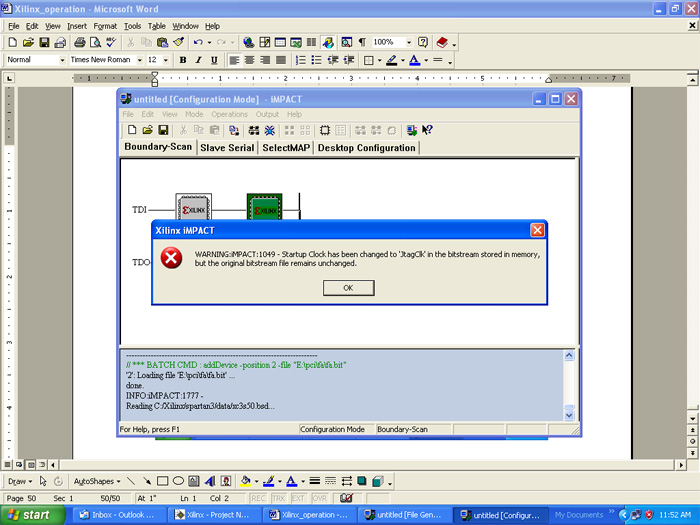
Fig. 15: Screenshot of Warning Message on Adding .bit File
50. A window will appear
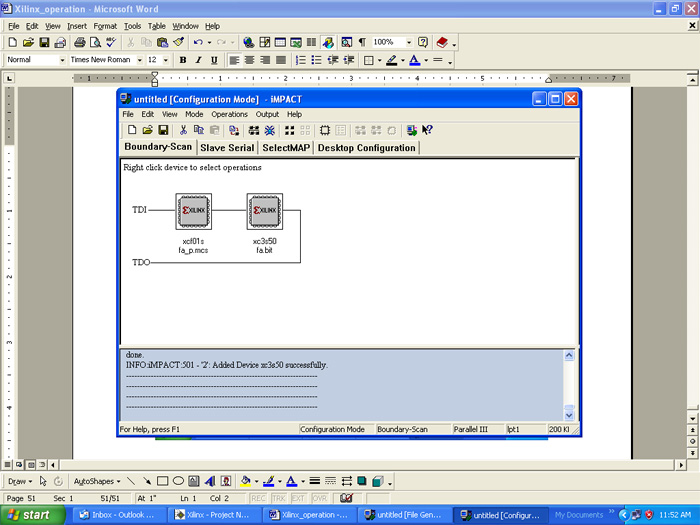
Fig. 16: Screenshot of Device Impact Window in Xilinx
Right click and program
51. Right click on device, and program it
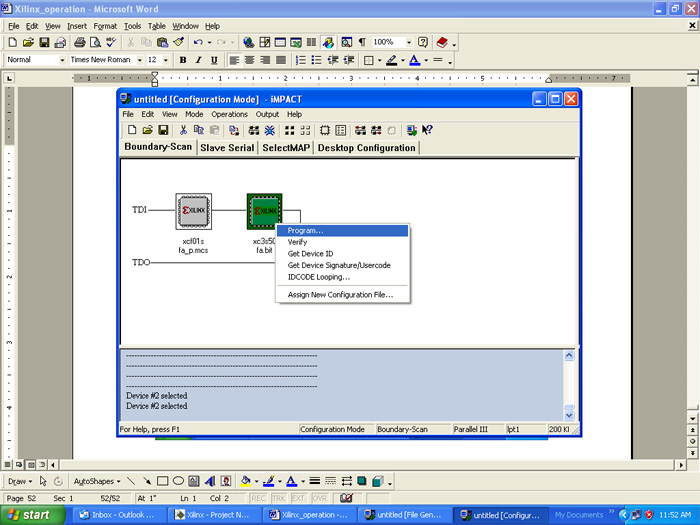
Fig. 17: Screenshot of Programming a Device on Xilinx
Select ok
52. Select ok
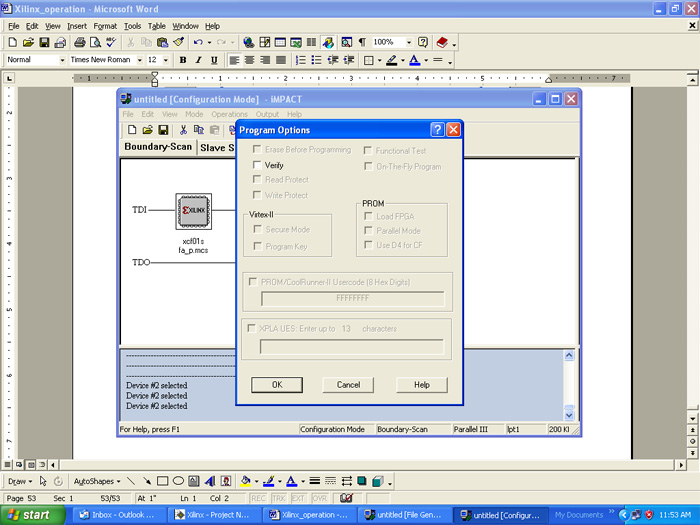
Fig. 18: Screenshot of Program Options in Xilinx
Output
53. Programming succeeded, now device is ready for use.
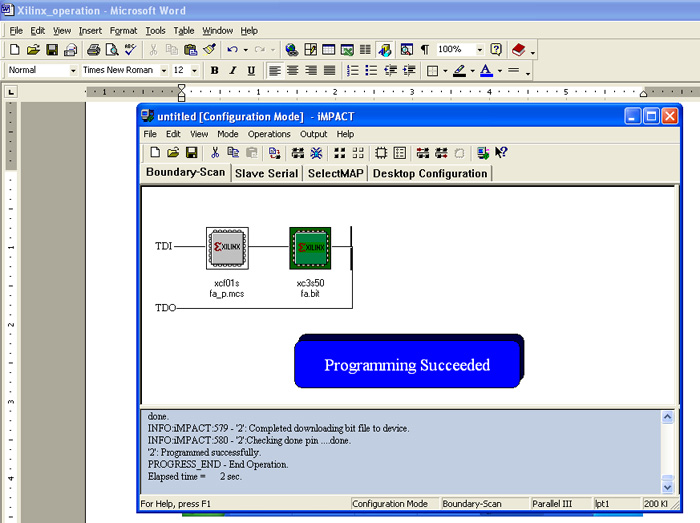
Fig. 19: Screenshot of Message on Successful Programming of a Device in Xilinx
Filed Under: Tutorials


Questions related to this article?
👉Ask and discuss on Electro-Tech-Online.com and EDAboard.com forums.
Tell Us What You Think!!
You must be logged in to post a comment.