Generally, Arduino boards do not operate as USB hosts; they lack the peripheral as well as RAM to do so . However, it is possible to convert Arduino boards like UNO and Mega2560 to a USB host by using an Arduino USB host shield. With a USB host shield, we can connect almost any USB peripheral with Arduino—think of navigating an Arduino robot with a USB mouse. Connecting a mouse to Arduino can be a great advantage in many applications.
In this project, we will illustrate getting input from a USB mouse on Arduino using the USB host shield. The movement of the mouse’s left button and right button vents are detected by Arduino and prompted on Arduino IDE’s Serial Monitor. The code presented in this project can be reused and expanded to build any other application using a USB mouse as an input device.
Components required
- Arduino UNO/Arduino Mega x1
- Arduino USB Host Shield x1
- USB Mouse x1
- Micro USB Cable (for connecting Arduino and computer) x1
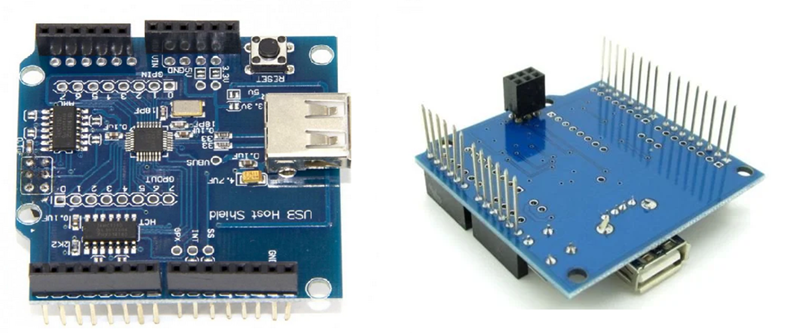
Arduino USB host shield
The Arduino USB host shield is open-source hardware that allows full-speed implementation of a USB peripheral or USB host on Arduino boards in compliance with USB 2.0. The shield can be used with Arduino UNO and Arduino Mega. The shield is based on a USB peripheral/host controller, the MAX3421E IC. Arduino communicates with MAX3421E on the shield via the SPI bus available through the ICSP header. The SPI bus on Arduino UNO is present on pins GPIO10, GPIO11, GPIO12, and GPIO13. On Arduino Mega, the SPI bus is present on pins GPIO 0, GPIO50, GPIO51, and GPIO52. The pins GPIO7, GPIO8, and GPIO9 on both boards are used for GPX, INT, and RES, respectively.
Example of Arduino USB host shield
The shield can be used to connect HID devices to Arduino, like USB keyboards, a USB Mouse, and a USB joystick. It can be used to interface game controllers with Arduino, such as the PS4, Xbox360, and Nintendo Wii. It can be utilized to connect digital cameras and mass storage devices like pen drives, external hard disks, or memory card readers with Arduino. Even Bluetooth dongles can be connected to Arduino v a USB host shield. ADK-capable android smartphones and tablets can be connected to Arduino via the shield. The shield can also be used to connect USB to Serial converters with Arduino. The shield let you connect, add or utilize many useful devices with your embedded Arduino device.
Arduino library for USB host shield
The library required to work with Arduino USB Host Shield is called the “USB Host Library for Arduino”. The source code for this open-source Arduino library is available on GitHub. To install the library on Arduino IDE, navigate to Tools-> Manage Libraries. Search for “USB host”. Scroll down to “USB Host Shield Library 2.0”, and click install. Try installing the latest version of the library.
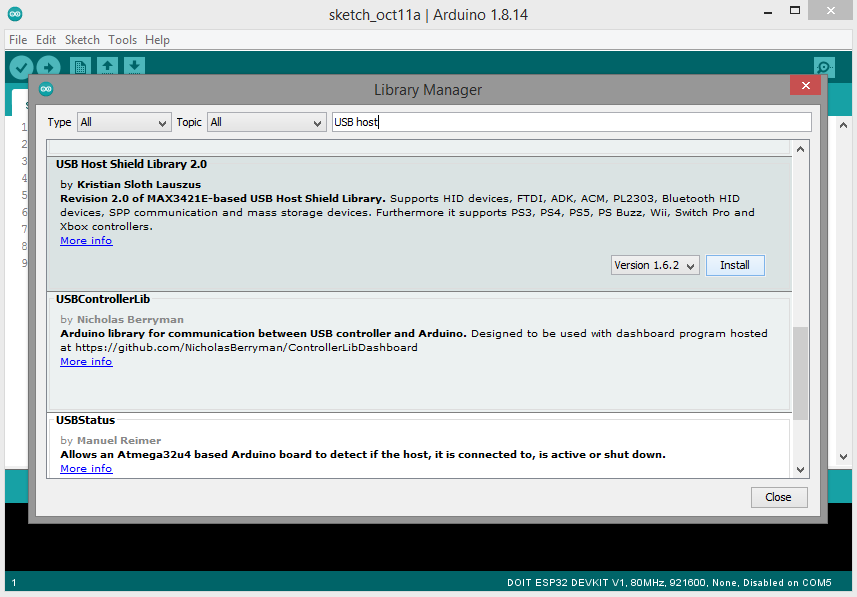
Installing Arduino library for USB host shield
Circuit connections
Insert the USB host shield on the top of the Arduino UNO or Arduino Mega, as shown in the image below.
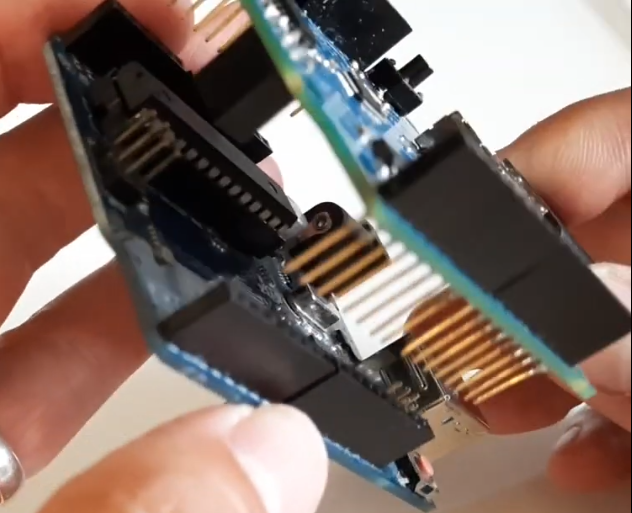
Connecting USB mouse with Arduino UNO via USB host shield
Insert the USB mouse into the shield and connect Arduino to the computer via a Micro-USB cable. The Arduino setup with USB host shield and mouse will look as follows.
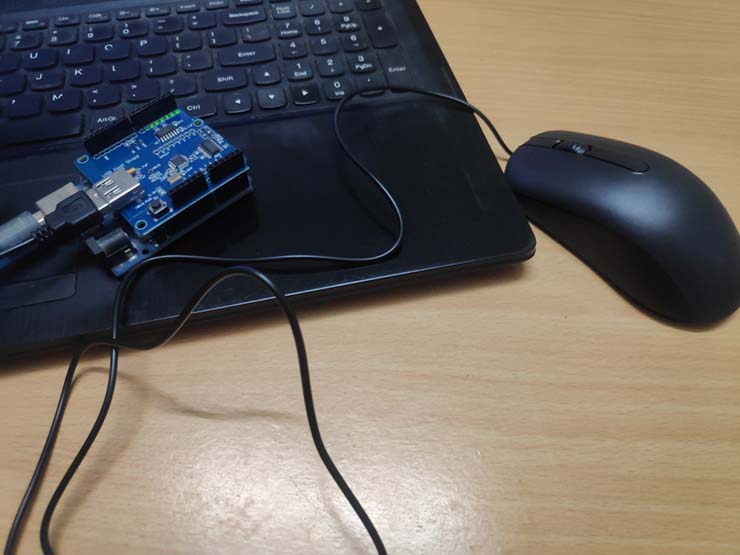
Connecting USB mouse with Arduino UNO via USB host shield
Arduino sketch
How the project works
Libraries hidboot.h and usbhub.h are required when working with a USB mouse. The hidboot.h is responsible for parsing USB HID devices like keyboards and a mouse. The library is utilized to detect mouse events on Arduino UNO or Arduino Mega. The sketch uploaded to Arduino detects movement of the mouse, left button press, right button press, left button release, and right button release. The mouse events are logged to the Serial Monitor. When detecting the movement of the mouse, the change in its x and y coordinates is logged to the Serial Monitor.
The code
The sketch begins with importing libraries hidboot.h and usbhub.h. The library hidboot.h is used for parsing input from USB HID devices like keyboards and a mouse. The library usbhub.h is useful if the mouse is connected to the shield via some USB hub. Next, the SPI library is imported as the shield communicates with Arduino via the SPI port.
Some global variables are declared LeftBtn, RightBtn, LeftBtnRls, RightBtnRls, MouseMoved, x and y to the status of the left button pressed, right button pressed, left button released, right button released, mouse movement, change in position of the mouse along x-axis and change in position of the mouse along the y-axis.
A class MouseRptParser is defined as a child of class MouseReportParser from hidboot.h. The methods OnMouseMove, OnLeftButtonUp, OnLeftButto Down, OnRightButtonUp, and OnRightButtonDown are imported from the super class MouseReportParser. These methods are overridden in the sketch. The OnMouseMove method is overridden to store the change in the x-y positions of the mouse to global variables x and y, respectively. The method also sets the boolean MouseMoved to true. The OnLeftButtonUp method is overridden to set the boolean MouseMoved LeftBtn to true when the mouse left button is pressed. The OnLeftButtonDown method is overridden to set the boolean LeftBtnRls to true when the mouse left button is released. The OnRightButtonUp method is overridden to set the boolean RightBtn to true when the mouse right button is pressed. The OnRightButtonDown method is overridden to set bo lean RightBtnRls to true when the mouse right button is released.
An object of class USB is defined along with objects of HIDBoot and the user-defined class MouseRptParser. In the setup() function, the baud rate for serial communication with Arduino IDE’s Serial Monitor is set to 115200, and if serial communication is established between Arduino and computer, a message “start” is printed to the Serial Monitor.
Next, code checks for the detection of the USB device via the USB host shield. If not detected, it prints a message ” OSC did not s art. ” to the Serial Monitor. The method SetReportParser( is called on the HidMouse object with the object of MouseRptParser class passed as an argument.
In the loop() function, the task() method is called on the USB object. The boolean variables indicating the status of each mouse event are checked using if statements, and the variables are reset to false.
It should be noted that the sensitivity of the mouse can be adjusted by increasing or decreasing the delay in the if statement checking the status of the boolean MouseMoved.
Result
In this project, we have detected mouse events using Arduino. The movement of the left button of the mouse and right button click is detected and logged. The events can be utilized to control a robot, scroll a display screen, or control other embedded tasks.
You may also like:


Filed Under: Electronic Projects

Questions related to this article?
👉Ask and discuss on EDAboard.com and Electro-Tech-Online.com forums.
Tell Us What You Think!!
You must be logged in to post a comment.