IFTTT plays a significant role in the Internet of Things (IoT) ecosystem. As IoT involves the interconnection of various devices and platforms, IFTTT provides a simple and user-friendly platform for devices to integrate together and automate embedded applications. IFTTT provides a cross-platform integration of among a multitude of platforms, brands, and standards, bridging the “things” together. It is a straightforward solution for setting up automation. It can be used for integrating IoT devices with web services, data logging, notifications and alerts, personalized interactions within IoT applications, or enhancing the functionality of IoT devices.
In this project, we will use the IFTTT platform to trigger email alerts or notifications from the ESP8266 or ESP32 board. Both are WiFi development boards, and both are easily installed within any WiFi-based IoT network.
What is IFTTT?
IFTTT stands for “If This Then That”. It is a web-based service that allows users to create custom, conditional automation between various online services, apps, and devices. Essentially, it lets you connect different online platforms in simple and complex ways by using what are called “Applets”.
How IFTTT works?
IFTTT functions with the help of applets. An IFTTT Applet is a predefined set of instructions or rules that automates actions between two or more services or devices using the IFTTT platform. An Applet has essentially two parts – Trigger and Action. A trigger is an event that initiates the Applet. It’s a condition or an occurrence within a service or device. For example, “If I post a new photo on Instagram” is a trigger. Action is a resulting task or event that the Applet automates in response to the trigger. Using the above example, “…then save that photo to my Dropbox account” is an action. Each Applet connects a specific “Trigger” from one service or device with an “Action” in another. In essence, it’s the realization of the “If This, Then That” statement for which IFTTT is named.
Setting up IFTTT for email notifications
In this project, we will use the IFTTT platform to send email notifications from the ESP8266 or ESP32 board to a valid email ID. First of all, we need to sign in and login to an account on the IFTTT platform. For this, open a browser and visit the IFTTT website.

Click on the Get Started button. Next, you can sign in IFTTT platform through Apple, Facebook, or Google account.

Login and navigate to the IFTTT home page. On the home page, click on the “Create” button to start creating an applet.

To create an applet, you first need to configure the Trigger part of the applet. Click on the “If This” button to start creating the trigger.

Next, search for webhooks among the services and click on the “Webhooks” button.

Next, select “Receive a web request”.

Next, click on the “Connect” button.

Next, name the event like “send_email_from_arduino” and click on the “Create trigger” button. This completes the trigger part of the applet.

Next, you need to create the Action part of the applet. So, click the “Then That” button.

Search for email among the services and select “Email”.

Next, select “Send me an email”.

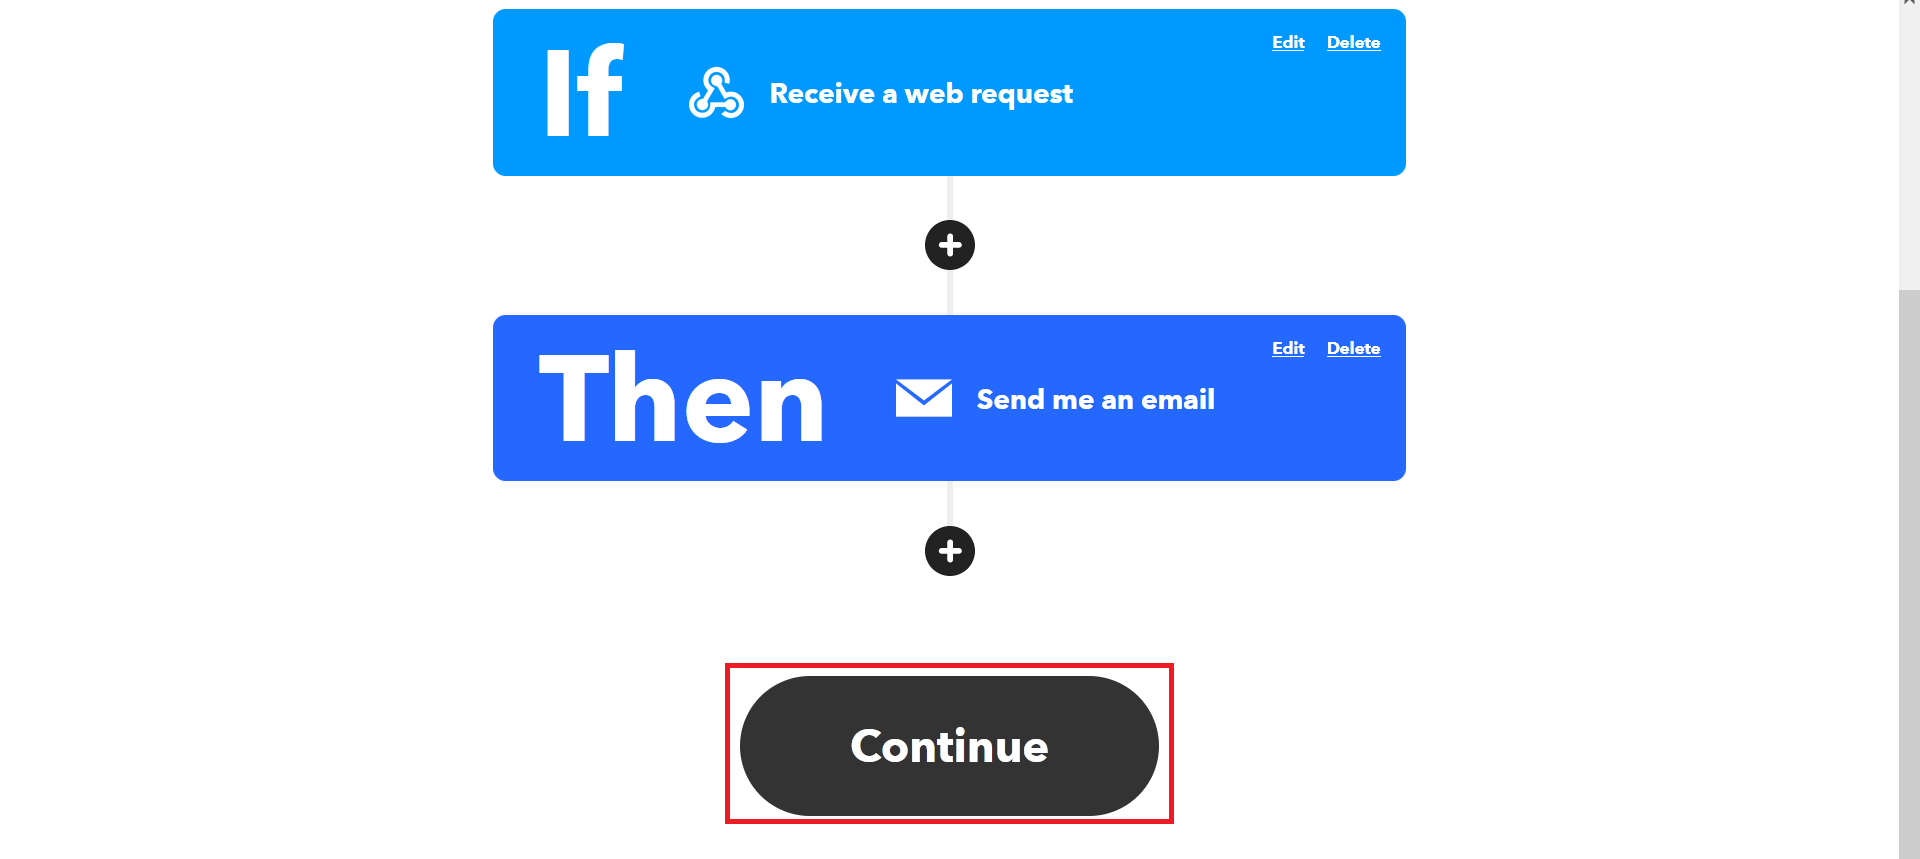
Next, customize the email subject and body as you want. Click on the ‘Create Action” button.

Next, click on the “Continue” button.
Next, Click on the “Finish” button.

This completes the action part of the applet. Now, you need to access the key for the webhooks service. Open the applet and click on the trigger part of the applet.

Next, click on the “Documentation” button.
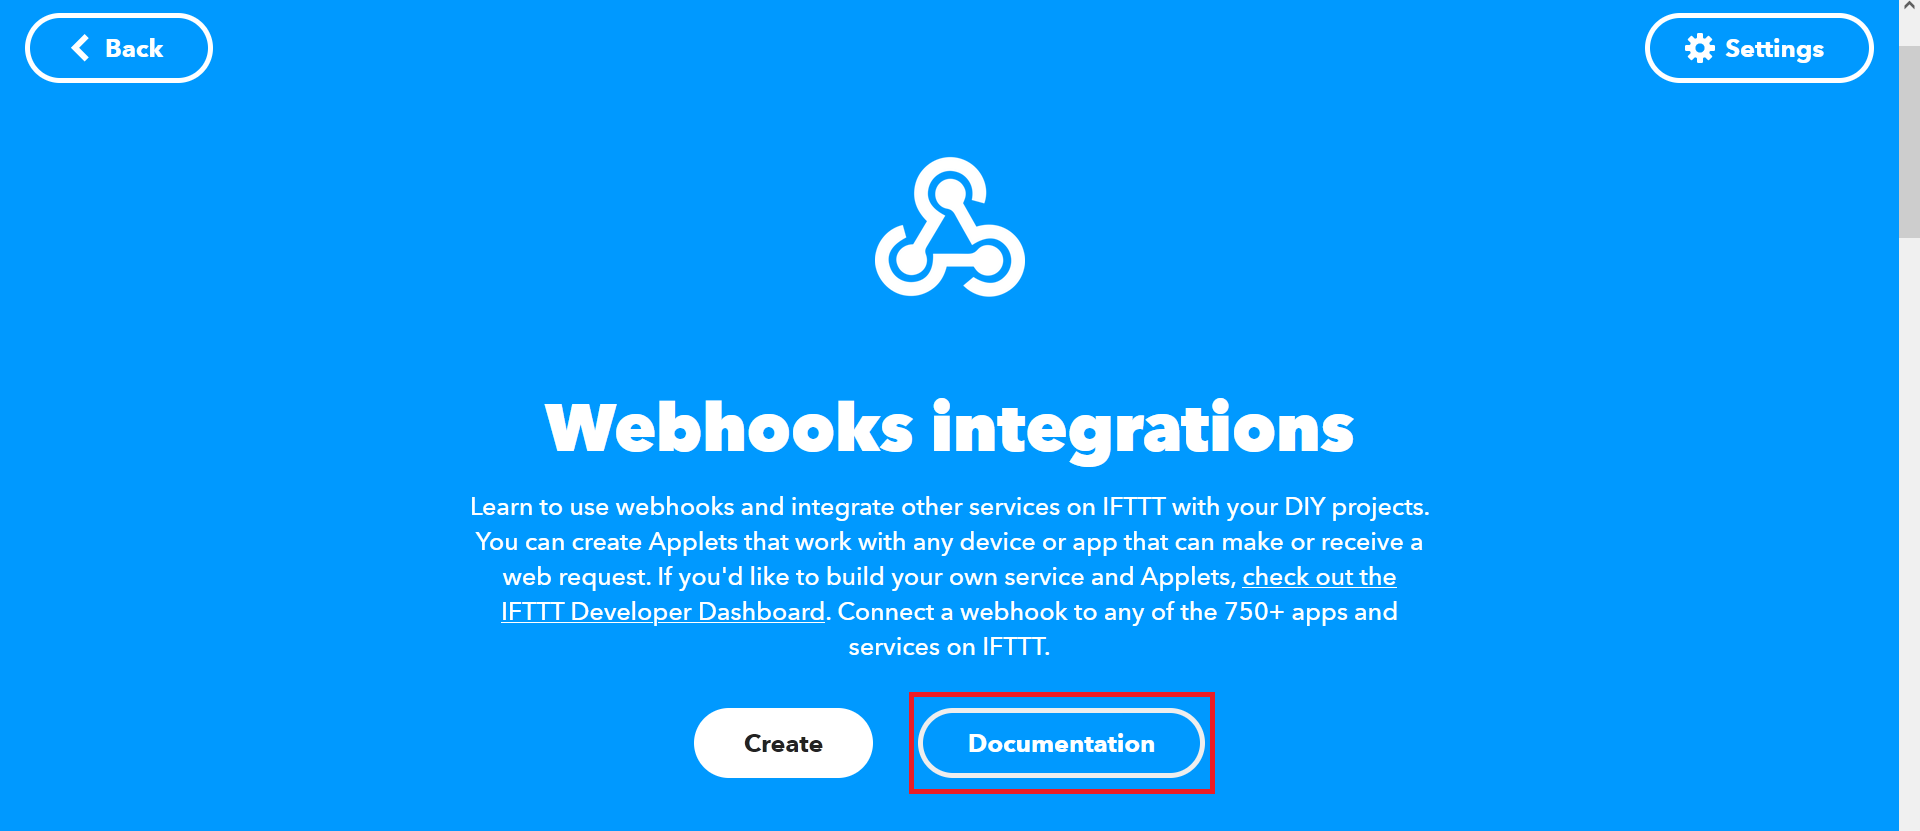
From the documentation, note down the key.

Both trigger and action parts of the applet are created, and we have the key for the webhooks service.
Circuit connections
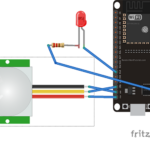
We can trigger an email alert from ESP boards for any event on the microcontroller. Here, in this project, we trigger an email alert, when a push button is pressed on the ESP8266/ESP32. So, interface a push button with ESP8266/ESP32. Here, we have interfaced a pushbutton at pin 5 of ESP8266. Then, connect the ESP board with a computer through a Micro-USB cable. The circuit diagram for this is shown below.

Preparing ESP board
Next, we need to upload the sketch to the ESP board that connects the ESP8266/ESP32 with the IFTTT platform.
Arduino sketch
How it works
When the button interfaced to pin 5 of ESP8266 is pressed, an email notification is sent through the ESP board with the help of the IFTTT platform. The ESP board connects with the IFTTT platform through a local WiFi network.
The code
The sketch begins with importing the WiFi library for the ESP8266 board. Next variables are declared to store the SSID and network key of the WiFi network. Then, variables are declared to store the IFTTT server, key, and event name. The pin used to interface the push button is defined. An object of WiFiclient is initiated.
In the setup() function, WiFi is initialized and functions are called to connect the ESP board with the local WiFi network. The user-defined function somethingTriggered() is defined to detect an event at the ESP board. This could be anything. Here, we are pressing a push button to trigger an email notification. The user-defined function sendIFTTTEmail() drafts the email notification and sends to the registered email account through the IFTTT service. In the loop() function, the event is polled by calling the somethingTriggered() function, and if even has occurred like a button is pressed, the sendIFTTTEmail() function is called to send the email notification.
Result
On pressing the pushbutton interfaced at pin 5 of ESP8266, the following email is received.

You may also like:


Filed Under: Arduino., Electronic Projects, ESP8266.

Questions related to this article?
👉Ask and discuss on Electro-Tech-Online.com and EDAboard.com forums.
Tell Us What You Think!!
You must be logged in to post a comment.