Fire alarms are critical in homes and buildings, mitigating fire risks and ensuring safety. These alarms aim to safeguard lives and property, providing a warning and initiating emergency procedures.
In this project, we’ll build a fire alarm system using ESP32, a flame sensor, and an MQ2 gas sensor. This device will trigger a buzzer and flash an LED if it detects smoke or any sign of fire. It will immediately send an SMS and a WhatsApp notification to the user.
Components required
- ESP32 x1
- Flame sensor x1
- MQ-2 gas sensor x1
- Buzzer x1
- LED x1
- 330Ω resistors x2
- Push button x1
Circuit connections
To build this fire alarm device, we’ll interface the flame sensor and MQ2 gas sensor with ESP32. The flame sensor detects smoke and fire and the MQ2 gas sensor detects flammable gases. We’ll use the DOIT ESP32 DevKit V1 as the ESP32.
Let’s get started.
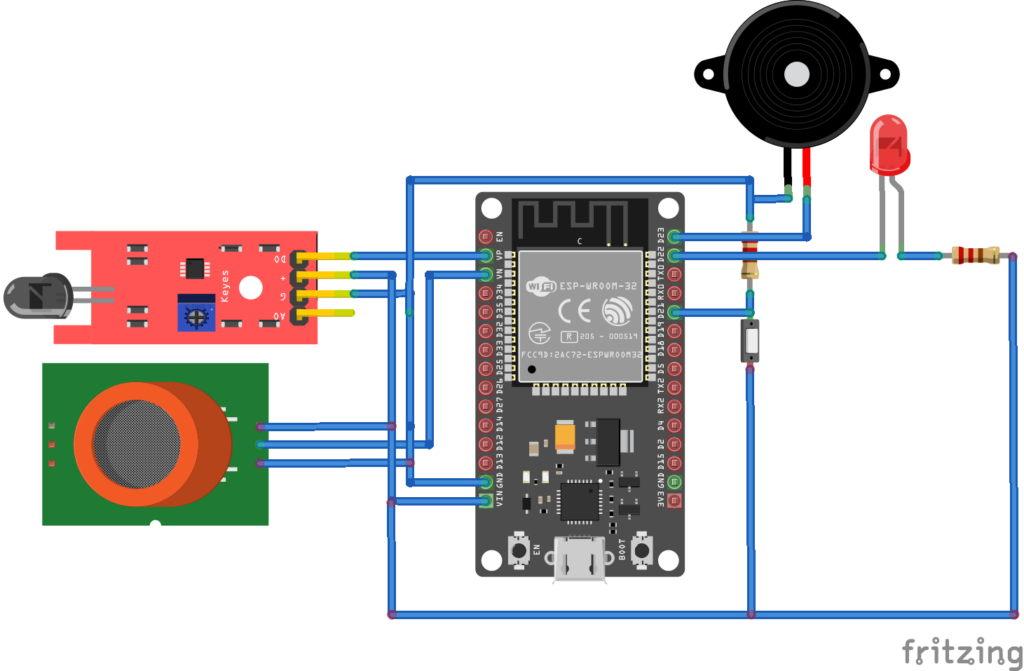
- To interface the flame sensor, connect its out pin with ESP32’s GPIO36.
- To interface the MQ2 gas sensor, connect its digital output pin with ESP32’s GPIO39.
- Next, connect both sensors’ supply and ground pins with ESP32’s 3V3 and GND pins, respectively.
- Note: the MQ2 sensor’s analog output pin remains unconnected.
- Connect the buzzer to ESP32’s GPIO23.
- Connect the LED’s anode with ESP32’s GPIO22 and the cathode with ESP32’s 3.3V via the series resistor.
- Connect a push button with ESP32’s GPIO21.
Since ESP32 has built-in WiFi functionality, there’s no need to interface any Internet-enabling components.
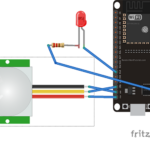
Here’s the circuit diagram of the ESP32-based fire alarm and warning system.
 Whatabot API
We’ll use Whatabot API to send a warning of a fire hazard via WhatsApp. Check out this project to learn how to use Whatabot API with ESP32.
Twilio API
We’ll use Twilio API to send an SMS alert of a fire hazard. Check out this project to learn how to use Twilio API with ESP32.
Arduino sketch
How it works
This alarm uses a flame sensor to detect fire and an MQ2 gas sensor to detect flammable gases. The gas sensor must be calibrated by adjusting the pot in its breakout board. This ensures it outputs a signal as soon it detects a specific concentration of flammable gases.
Both sensors have a digital output and output a LOW signal if fire or gas is detected. The MQ2 gas sensor also has an analog output, but it’s not used for this project.
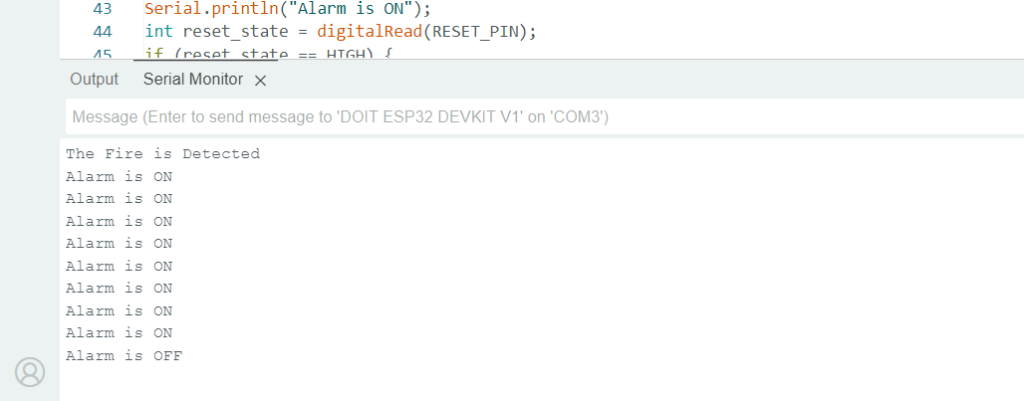
When the fire alarm is powered ON, it reads signals from the flame and smoke sensors. If either sensor’s output is read as LOW, the fire alarm is triggered. The buzzer is switched ON, and the LED blinks. SMS and WhatsApp notifications about the fire hazard are sent to the user. The buzzer and LED remain ON until the push button is pressed to turn off the alarm.
The code
The sketch begins by importing the WiFi.h, HTTPClient.h, UrlEncode.h, and twilio.hpp libraries.
- The WiFi.h library is required to connect with the WiFi access point.
- The HTTPClient.h is required to process the HTTP GET request.
- The UrlEncode.h is required to encode the URL according to the Web standards.
- The twilio library provides access to the functions required to send SMS messages through HTTP requests.
The variables are declared to store the SSID and WiFi access point password. Variables are also declared to store the mobile number for the WhatsApp and API keys (received by registering the mobile number to Whatabot).
For work with Twilio API, the variables must be declared for the account SID, authentication token, sender number (with country code), and receiver number (with country code). This application uses the same mobile number to send and receive an SMS alert.
Next, variables are declared for the pin assignments for the flame and gas sensors, the buzzer, the LED, and the push button. A variable is also declared to store the alarm’s status.
In the setup() function, the pins connecting the flame and gas sensors and the push button are configured as digital inputs. The pins connecting the buzzer and LED are configured as digital outputs.
The buzzer and LED are turned OFF by sending a HIGH signal. The baud rate is set to 115200 bps for sending debug messages to the console. The ESP32 is connected to WiFi via the user’s credentials.
In the loop() function, ESP32 reads the flame and smoke sensors’ signals. If a LOW reading is received from either sensor, the alarm is raised via the raiseAlarm() function. The user-defined function, send_whatsapp_message() controls the notifications sent to the user’s WhatsApp number via the Whatabot API. The user-defined function, send_sms_alert, controls the SMS alerts sent to the user’s mobile number via Twilio API. These notifications are only sent if the fire alarm is set off.
Results
Here are the console messages…
Here’s a video demonstration of the operating fire alarm.
You may also like:
Filed Under: Electronic Projects, ESP8266., Video





Questions related to this article?
👉Ask and discuss on Electro-Tech-Online.com and EDAboard.com forums.
Tell Us What You Think!!
You must be logged in to post a comment.