Soon after building a web controlled home surveillance rover, a Mumbai based Engineer named Samir Sogay, realized that there were a lot of issues with the system in form of increased cost, complicated circuits, need for high power, lack of control, difficulty in navigation and so on. As a result, he decided to change the configuration to minimize the number of tools by using components like Arduino Yun and iframes, thereby fixing the issues. This led to the development of an improved version of the rover with a considerable decline in the cost.
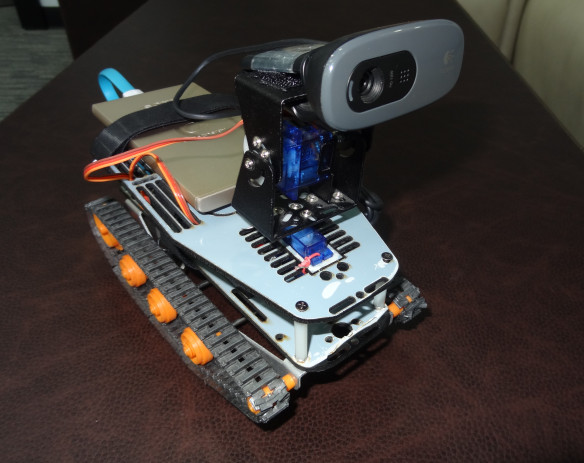
This modified installment of Samir’s DIY home surveillance rover combines an Arduino YUN and Arduino motor shield with a rover kit in way that it can be controlled through a web interface. The end product would move as per the given instructions with the webcam serving as the eyes which are arranged in a pan-tilt assembly.
The latest iteration of the surveillance rover makes use of the following tools:
• DFRobotShop Rover Chassis Kit: It contains twin motor gearbox, track and wheel set, lexan plate, metal brackets, mounting hardwares and some motors.
• DFRobotShop Rover Expansion Plate
• Brushed DC Motor 6V, 11500rpm
• Arduino YUN
• Arduino Motor Shield
• Logitech HD Webcam
• Dagu Mini Pan-Tilt Kit
First and foremost, the rover kit is assembled by arranging the gearbox in configuration C with the DC motor plugged inside it and then the plate is connected to the chassis with the help of metal brackets. Then 2 equal sets of tracks are fitted on each side and are aligned with the wheels so that they don’t come off.
Moving on to the electrical components, the Arduino YUN is fitted onto the chassis with the motor shield on top of it. The motor shield is powered by a set of 6 chargeable batteries while a power bank is used for supplying energy to the YUN. However at this stage, the vin pin of the motor shield has to be bent in order to make sure that the power of motor shield doesn’t travel back to the YUN. Further, two servo motors are connected to the pins A2 and A4 whereas the webcam is connected to the USB port of YUN.
After dealing with the hardware assembly, the software comes into picture. The next step is to make the Yun webpage accessible on the internet via Yaler service so that the instructions could be given through the web interface. After this the sketch and HTML are needed to be uploaded using Wi-Fi.
So this gives out a tweaked version of the surveillance rover made of an Arduino YUN and Arduino motor shield that can be navigated in different directions via a webcam. As compared to the first model, this system is quite superior due to the fact that it uses just 2 circuit boards, less power, handles AJAX requests efficiently and enables to operate the viewfinder and controls from the same page.
Filed Under: Reviews

Questions related to this article?
👉Ask and discuss on Electro-Tech-Online.com and EDAboard.com forums.
Tell Us What You Think!!
You must be logged in to post a comment.