From the previous project, it has been already learned to configure control parameters of a Bluetooth Module. In this project, it will be demonstrated that how two Bluetooth modules can be paired together and allowed to share data between them. For pairing of two Bluetooth modules, one of them needs to be configured to Master role and other needs to be configured to Slave role. Apart from this, both modules should be in Order Response Work Mode so that AT commands can be passed to them. The baud rate of the two modules also need to be same and SPP and INQ must be initiated in both the modules. In order start sharing data between the modules, both the modules should have communication mode enabled by setting CMODE parameter set to 1.
In this project, two Bluetooth modules are used. The Bluetooth modules are interfaced to different Arduino Pro Mini boards which are connected to different computers running Arduino Serial Monitor application. Any hyper terminal application can be used for passing AT commands and data to be shared between the modules. The Arduino sketch used in this project is designed to exchange commands and data in an uninterrupted fashion. The Arduino code is written on Arduino IDE and burnt to the boards using AVR Dude.
Components Required –
1. Arduino Pro Mini – 2
2. HC-05 Bluetooth Module – 2
3. Desktop Computer or Laptop – 2
4. USB Cable – 2
Software Tools Required –
1. Arduino IDE
2. Any Hyper Terminal Desktop Application like Arduino Serial Monitor
Circuit Connections –
Fig. 1: Prototype of Arduino based Bluetooth Pairing
The Arduino Pro Mini boards manage the exchange of data between the serial application on the desktop computer and the respective Bluetooth module. The circuit on both the master and slave sides is assembled the same way in the following manner –
Power Supply – The circuit is powered by the battery which directly supplies to the Arduino board and the Bluetooth module.
HC-05 Bluetooth Module – HC-05 Bluetooth module is serial port protocol module. It operates on ISM band 2.4GHz with V2.0+EDR (Enhanced data rate). It can work in both Master and slave modes. The Bluetooth module has six pins – Enable, VCC, Ground, Transmit Data (TxD), Receive Data (RxD) and State. The Enable and State pin are unused and so not connected in the circuit. The VCC and Ground pins are connected to the common VCC and Ground. The TxD and RxD pins of the module are connected to the pins 3 and 2 of the Arduino Pro Mini respectively. These connections are summarized in the table below –
Fig. 2: Table listing circuit connections between HC-05 Bluetooth Module and Arduino Pro Mini
Apart from these connections, the 34th pin of the module is wired to the pin 9 of the Arduino Pro Mini.
Desktop Computer – The computer is connected to the Arduino board through USB cable and transfers serial data to the board through Virtual serial communication using a hyper terminal application.
How the project works –
Both the modules receive the user entered AT commands from the hyper terminal application on the respective computers. The commands are serially read over virtual serial communication and passed to the Bluetooth modules. The Bluetooth modules respond to the AT commands and the responses are again serially read and transferred to the desktop application.
First one of the modules needs to be configured to Master role for which following steps need to be executed –
Step1: Enter into the AT command mode.
Step2: initiate SPP.
Step3: Inquire the devices available.
Step4: if Address available in the list, Pair it.
Step5: After pairing establish a communication link.
Step6: Send data to share.
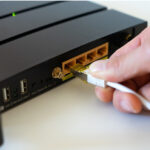
Fig. 3: Image of Arduino based Bluetooth Pairing
These steps can be implemented by running the AT commands and changing the following configuration parameters –
Fig. 4: Table listing AT commands of HC-05 Bluetooth Module
The other module needs to be configured as a slave. For configuring the other module as slave, following steps need to be taken –
Step1: Enter into the AT command mode.
Step2: initiate SPP.
Step3: Inquire the devices available.
Step4: Check the status paired or not.
Step5: After Establishing communication link Receive data from the master and if needed, send data to share.
Fig. 5: Image of Arduino based Slave Bluetooth Module
These steps can be implemented by running the AT commands and changing the following configuration parameters –
Fig. 6: Table listing AT commands and their configuration parameters
Therefore for pairing the two modules following configuration parameters must be changed and taken note of.
– Both the modules should be in AT command mode.
– The name, password and address of the modules should be uniquely set and well known. The baud rate of both the modules should be same which is set 9600, 0, 0 in the project demonstration.
– The SPP mode should be initialized on both the modules using AT+STATE command.
– One of the module should be made master while the other should be set slave. For setting a module to master role, the AT+ROLE should be set to 1 in one of the module. The default role a is slave with value 0 which need not be changed in the other module.
– The communication mode should be enabled on both the modules by setting CMODE to 1.
– In the master module inquiry mode should be set to 0, 5, 5 where the first parameter is enquiry access mode which if set to 0 configures to inquiry_mode_standard and if set to 1 configures to inquiry_mode_rssi, second parameter is number Bluetooth device response allowed and third parameter is maximum limited inquiry time in seconds.
– The module configured as the slave should be free for which RMAAD command should be passed. Now the slave module will be free to pair with the master module.
– The master module should be set to inquire the available devices for pairing by setting the inquiry mode and if slave address is shown available, the name of the slave module should be verified by RNAM command.
– If the name of the available slave device is same as of the configured slave module, it can be paired by sending AT+PAIR= <slave address> command. On successful pairing with the slave module, the master module will respond with OK. The status of the pairing can be verified by passing AT+STATE? command on both the modules.
– The link between the modules can be set by passing AT+LINK? command.
– If both the modules send an OK response, the modules will be ready to share data.
– If the two modules are not pairing, the SPP & INQ initialization at slave could have been neglected or the slave module might not be in the AT mode. The baud rate of both the modules may not be same or wrong PIN may have been entered. There can also be a possibility that the slave module may not have configured to slave role and may have set the role parameter set to 1 by mistake. These settings should have been checked before trying to pair the devices.
So configure both the modules with proper settings, initiate pairing and try sharing some data.
Programming Guide –
The Arduino sketch manages the data communication between the computer and the Bluetooth module. After pairing the Bluetooth modules will be able to share data. On the master device, for enabling virtual serial communication, SoftwareSerial.h needs to be imported. An object of Software serial type is instantiated and mapped to Arduino pins 2 and 3. A variable to store data to be shared is declared.
#include <SoftwareSerial.h>0
SoftwareSerial BTserial(2, 3); // RX | TX
char c = ‘ ‘;
The setup() function is called in which the baud rate for communication with the PC is set to 9600 bits per second. Some initial messages are sent serially to the hyper terminal application and baud rate of the software serial port is set to 38400 bits per second for communication with the Bluetooth module.
The loop() function is called in which the data from slave module is checked for availability and if available is read and written to the serial port. Similarly, if any data from the computer is checked for availability and if available is stored in the variable and passed to the Master module for transmission.
This completes the Arduino Sketch for the Master side.
On the slave side, again SoftwareSerial.h needs to be imported. An object of Software serial type is instantiated and mapped to Arduino pins 2 and 3.
The setup() function is called in which the baud rate for communication with the PC is set to 9600 bits per second. Some initial messages are sent serially to the hyper terminal application and baud rate of the software serial port is set to 38400 bits per second for communication with the Bluetooth module.
The loop() function is called in which the data from master module is checked for availability and if available is read and written to the serial port. Similarly, if any data from the computer is checked for availability and if available is passed to the slave module for transmission.
This completes the Arduino Sketch for the Slave side. You can get the complete programming details in the code section.
You may also like:


Project Source Code
###
//Program to#include0 SoftwareSerial BTserial(2, 3); // RX | TX char c = ' '; void setup() { Serial.begin(9600); Serial.println("__________Engineers Garage______________"); Serial.println("---------------Master------------------"); // HC-05 default serial speed for AT mode is 38400 BTserial.begin(38400); } void loop() { // Keep reading from HC-05 and send to Arduino Serial Monitor if (BTserial.available()) { c = BTserial.read(); Serial.write(c); } // Keep reading from Arduino Serial Monitor and send to HC-05 if (Serial.available()) { c = Serial.read(); BTserial.write(c); } } #include SoftwareSerial BTSerial(2, 3); // RX | TX void setup() { Serial.begin(9600); Serial.println("__________Engineers Garage______________"); Serial.println("---------------Slave------------------"); // HC-05 default serial speed for AT mode is 38400 BTserial.begin(38400); } void loop() { // Keep reading from HC-06 and send to Arduino Serial Monitor if (BTSerial.available()) Serial.write(BTSerial.read()); // Keep reading from Arduino Serial Monitor and send to HC-06 if (Serial.available()) BTSerial.write(Serial.read()); } ###
Project Video
Filed Under: Electronic Projects
Filed Under: Electronic Projects

Questions related to this article?
👉Ask and discuss on Electro-Tech-Online.com and EDAboard.com forums.
Tell Us What You Think!!
You must be logged in to post a comment.