This is a digital era where everything is becoming technical and handy in nature, suiting our needs as per our requirements. Among many up gradation, raspberry Pi-powered calendar wall is the new member to this digital family. Ozua has taken smart calendars to next level enabling Raspberry Pi-powered calendar and notification center. The modern version of the wall mounted calendar perform same function as the traditional one like marking a monthly agenda, syncing of family members activities etc. The features about this new calendar is a step further. It not only includes family agenda, weather forecasts, local events and live transport information but it also keeps track of the family members’ activities, as well as upcoming events

Equipment required
The Raspberry Pi-integrated system is turned into a web server to run a custom homepage to run the clock. The homepage has inbuilt facilities to further update live data about the weather, public transportation, etc. that anyone in house can access. All you need for the DIY calendar is Raspberry Pi 2, USB Wi-Fi dongle, LCD laptop screen, piece of wood, custom-made homepage, foam core, glue etc.
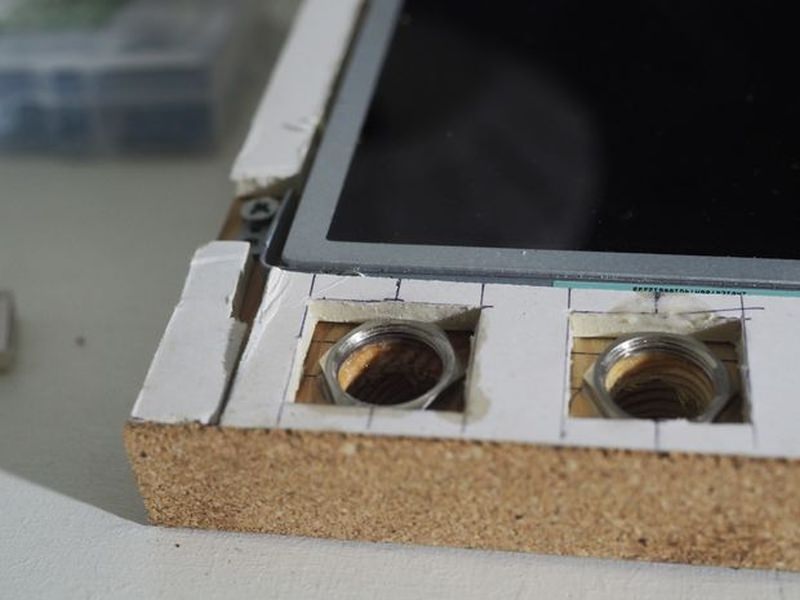
For hardware set up, a LCD laptop screen is required. Then craft a piece of wood of suitable height that can fit the electronics inside. Use a mounting frame from the laptop and fasten the laptop screen. Then cut out foamcore with equal thickness and glue it on wooden slabs. Mount the push button using a large drill and connect the electronics.

For the software setup, turn the Raspberry Pi into a kiosk. The OS will auto start a website in full screen mode and the Push Buttons will control the information at the website. The setup will start by Installing Raspbain on Raspberry Pi and then sign up for a Google Calendar.
Working of the calendar
Add any upcoming event and ask for access to your family member’s calendar. You can also create a “family calendar” and give the rest of the family access to it. You can make your calendar more dynamic by adding external calendars. You can add anything like Facebook events, public holidays etc.

Now, set up a webpage and a webserver. After installing a web browser, customize the calendar design and then set up the push buttons. Creating a webpage and webserver is important as webpage is the canvas the Raspberry Pi will display. The canvas is something where you will fill any information. Next install a web browser to customize the calendar design. Make sure to have web browser that fulfils three requirements that is it can handle the modern version of google calendar, has a full screen mode and can run a local CSS. The local CSS is used to change the appearances of the google calendar. One more thing, redesign can’t be done at the webpage, because the CSS are embedded from another server.
The final step is to set up the push buttons. It is used to browse forward and backwards in the calendar month view. By default this is done by pressing “p” and “n” at a keyboard. First, you have to create a python script to make the push buttons and then download and install python-uinput, a python API to create virtual keyboards.
And it is done.
You can update it by the number of possible commands in the python code. The system can be modified once mounted on a wall, to suit your needs and keep yourself updated every day without even relying on your smartphone. Best thing about this calendar is that you don’t have to spend much for construction and only requires little technical knowledge
Filed Under: Reviews


Questions related to this article?
👉Ask and discuss on EDAboard.com and Electro-Tech-Online.com forums.
Tell Us What You Think!!
You must be logged in to post a comment.