In the previous article, we discussed the role of an operating system. We explored how Linux, as an open-source operating system, can be modified and used for mobile, desktop, server, cloud, mainframe, supercomputer, cluster, and embedded computing.
Raspbian, the official OS for the Raspberry Pi (PRi), is based on Debian. This is a Linux distribution, which includes a package of Linux Kernel, GNU utilities, shell, desktop environment, and default application programs. Although using RPi as a Linux machine is common, other types of distributions can also be used. RPi can also run Windows 10 IoT and Android on Raspberry Pi.
Open Source Software (OSS) developers typically generate revenues by selling hardware that runs the software, selling closed-source software that runs on OSS, and/or providing customer support. Now consider how the Raspberry Pi Foundation generates revenues.
RPi as a Linux machine
For this project, we’ll use Raspberry Pi as a Linux machine. Several Linux distributions can run on RPi without challenges, such as Ubuntu Mate, Ubuntu Core, Ubuntu Server, Kali Linux, and Centos, etc.
However, we’ll use Raspbian, a Debian-based Linux distribution, and the official OS for Raspberry Pi. Bash Shell is its default shell and desktop environment. The latest version of Raspbian (released in September 2019) is based on Linux Kernel 4.19.
Since Python programming will be used to control the electronics, we simply need to set up RPi as a Linux machine that can code, test, and run Python applications. Python is the official programming language for RPi, which comes with an integrated development environment (IDLE) by default.
There are two versions of Python that can run on RPi: version 2.7 and version 3.x. Only Python has and integrated development environment (IDE) although it’s possible to install it and code applications in Python 2.7. But note: both versions are incompatible with one another, which can be a source of confusion. For this reason, we’ll stick to Python 3.5.
The RPi desktop
First set up the Raspberry Pi Linux computer. Setting up the RPi desktop is similar to doing so for any desktop computer except that you don’t need to assemble the CPU. RPi is a single-board computer with an on-board RAM, processor, input/output, and network interfaces.
To set up the Raspberry Pi desktop, these hardware components are required:
1. Raspberry Pi 3B/4B
2. Power adaptor for Raspberry Pi 3B/4B
3. LCD/LED monitor
4. HDMI cable
5. USB keyboard
6. USB mouse
7. MicroSD card
The layout of Raspberry Pi 3B and 4B:
Instructions:
- Connect the LCD/LED monitor with Raspberry Pi (3B/4B) via an HDMI cable.
- Plug in a USB keyboard and mouse to the USB ports of RPi
- Pug-in the power adapter to the micro-USB power
As we will frequently use a GPIO header with breadboards, it’s best to connect female-to-male jumper wires on the 40-pin GPIO like this:
Next, it’s necessary to load Raspbian on a MicroSD card. To do so, download the latest version of Raspbian from the official website of Raspberry Pi. Extract the ZIP folder and copy the image files to the MicroSD card.
If the MicroSD card used is 32 GB or less, it must be formatted to FAT32 (file system) before copying the image files. If the MicroSD card is more than 32 GB, it should be formatted to exFAT before copying the image files. You’ll need a MicroSD card reader to transfer the image files from your laptop or desktop.
Now, insert the card in the MicroSD slot of the RPi. Connect the power adaptor and power on RPi and the display monitor. The monitor will display a window with a choice of operating systems. Select Raspbian and click “Install.”
This may take a few minutes to mount the partitions and install Raspbian on the SD card. The red LED on Raspberry Pi will blink continuously but, after the installation and boot process is complete, a green LED will glow on the RPi.
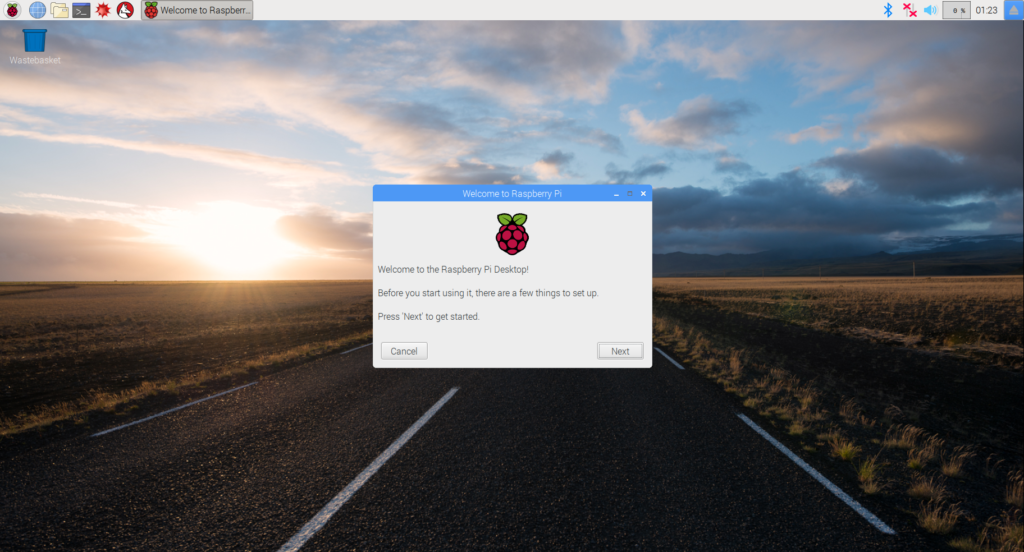
This welcome window will also pop up:
Click “Next” and set the country, language, and time zone in the next window:
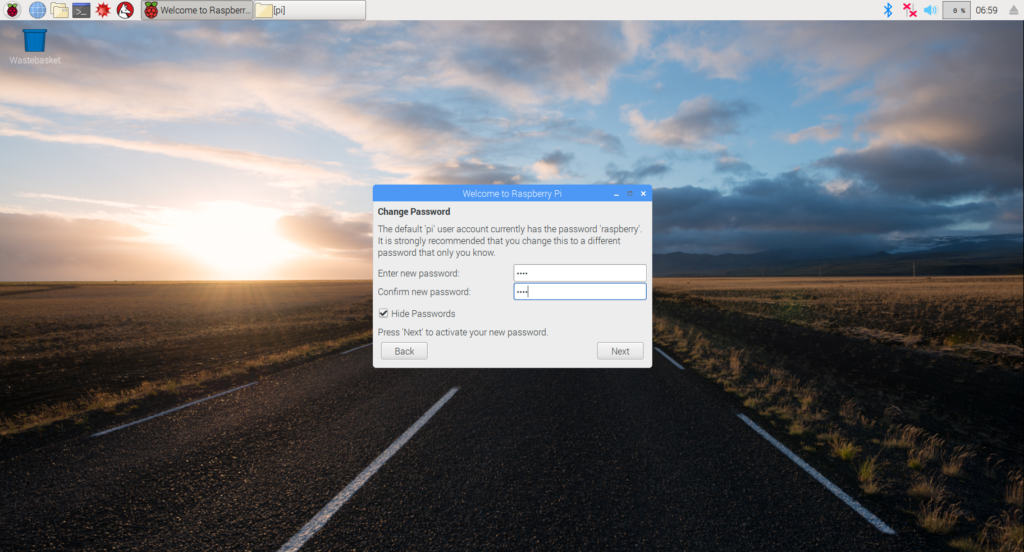
Click “Next” and set a password for the root user. The default username is pi, and the password is raspberry. Set the password of your choice.
Click “Next” and connect to a Wi-Fi network if available.
Lastly, reboot Raspberry Pi.
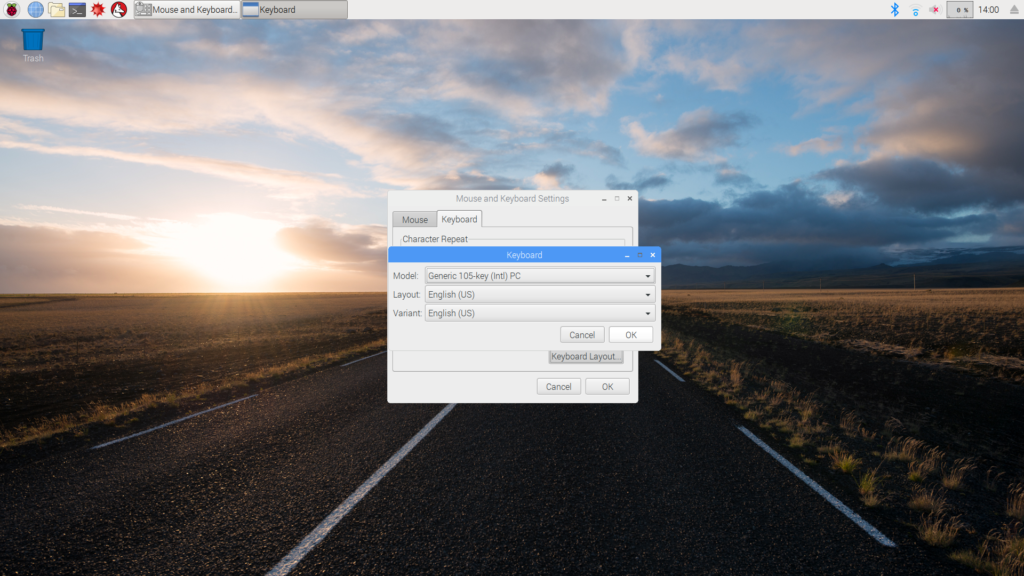
It’s important to set the keyboard layout after completing the installation. The default keyboard layout in Raspbian is English (UK) or the language of the country specified in the welcome window. If you are using a U.S. keyboard (which is most common), navigate to:
Preferences -> Keyboard and Mouse
This is a critical step because with an improper keyboard layout, the wrong characters will type on the screen. This can be inconvenient and confusing.
Connecting to the Internet
Raspberry Pi can be connected to a network through Ethernet or Wi-Fi, which can be done on the first boot. However, if necessary, this can also be done later by navigating to the “Network & Internet Settings” icon on the taskbar. But an Internet connection will be required to update Raspbian, install additional packages, upgrade installed applications, and allow browsing through chromium or other web browsers.
Accessing shell
Every Linux distribution comes with an interactive utility, called Shell. This utility is used for entering system commands and executing them on the Linux kernel.
The shell opens up as a command prompt, either as a virtual console (Linux console) or a graphical terminal emulator where the user can type and execute shell commands. These are system commands used to direct Linux to perform OS-related tasks, such as managing files or file systems, handling programs, and managing processes.
There are many shell utilities available for Linux distributions. The default shell in Linux Kernel (and Raspbian) is Bash Shell. Other popular shell utilities available for Linux include Tcsh/Csh shell, Ash Shell, Zsh Shell, Korn Shell, and Fish Shell.
In early versions of Linux, a user can only work on it through the Shell. Linux programmers, system users, and system administrators used to enter shell commands through a command-line interface (virtual console).
When Linux boots up in most distributions, it creates five or six virtual consoles though some may have more. These virtual consoles are terminal sessions that run in the Linux system memory. The terminal sessions are identified by the term, “teletypewriter,” and are abbreviated as “tty.” Different terminal sessions are identified by the term tty followed by a number. For example, tty2 denotes terminal session 2 or teletypewriter 2. The virtual consoles can be seen as command-line interfaces outside the Linux GUI.
In Raspbian, there are five virtual consoles or terminal sessions running after the boot. These virtual consoles are loaded by pressing keys Ctrl + Alt + F2 to Ctrl + Alt + F6. For example, by pressing Ctrl + Alt + F2, the virtual terminal 2 (identified by tty2 on the terminal window) is loaded.
When loading a virtual console, the command-line interface for the respective terminal session occupies the entire screen, and the user is prompted to enter their root login and password. As noted, the default login (user) on Raspbian is pi and the default password is raspberry (unless it’s changed in the welcome window).
When typing passwords in virtual consoles, nothing shows up on the screen. This is unlike graphical interfaces where an asterisk (*) typically indicates each character of the password. Once the correct root login and password are entered, the terminal session is initiated and the shell commands can be written and executed. This command-line interface is called the Linux Console.
A user can return to the graphical interface on Raspbian by pressing Ctrl + Alt + F7.
With the development of desktop environments for Linux, virtual consoles essentially became hidden beneath the graphical interface. The command-line interface for a terminal session is started through Graphical Terminal Emulators. These are CLI interfaces within the Linux GUI. They’re generally non-login console terminals so it’s unnecessary for a user to enter a login name and password.
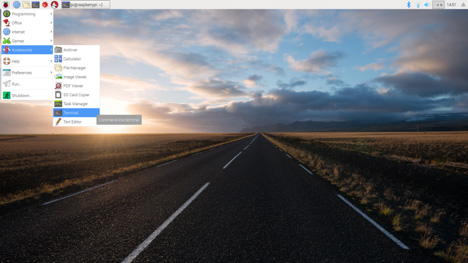
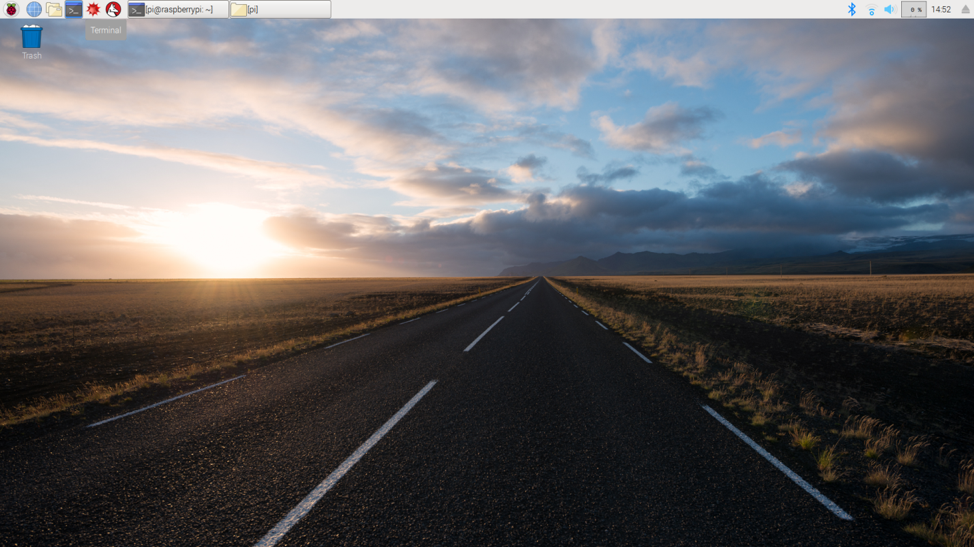
Raspbian has LXterminal as the default graphical terminal emulator that can be launched by navigating to Accessories -> Terminal, or by clicking on the Terminal icon on the taskbar.
Other popular graphical terminal emulator packages, which can also be installed, include Eterm, Final Term, Guake, GNOME terminal, Konsole Terminal, LillyTerm, mrxvt, rxvt, rxvt-unicode, ROXTerm, Sakura, Terminology, Terminator, tilda, Wterm, UXterm, xterm, xfce4 Terminal, Yakuake, and more.
Shell commands can be used to start, stop, or change a program execution. They can also be grouped into files, called shell scripts, which are simple text files that can be easily accessed and viewed by a system administrator (user). These scripts are also portable and can be transferred to any UNIX or UNIX-like system.
High-level languages like Python, C or Java are useful for manipulating data, developing applications, and invoking system calls. But the shell scripts can be used for several tasks, including:
- Executing programs on boot
- Automating services and functions
- Accessing and using the system administration
- Managing processes, system tasks, files, directories, databases, network, and other OS-level tasks
Updating and upgrading RPi
After you’ve completed the setup of your Raspberry Pi Linux computer, it’s time to update and upgrade Raspbian. We’ll use the shell commands to do so and you’ll need an Internet connection.
Open LxTerminal by navigating to Accessories -> Terminal or by clicking on the Terminal icon on the taskbar. The Advanced Packaging Tool (APT) tool can be used to update and upgrade Raspbian.
In the terminal window, type in this shell command:
sudo apt update
Then, press “Enter” to update Raspbian. To upgrade to the latest version of each of the installed packages, type:
sudo apt full-upgrade
Then, press “Enter.” Unlike the upgrade command, the “full-upgrade” command picks up all of the dependency changes. However, it’s wise to first check the available disk space by running this shell command:
df –h
The downloaded package files are kept in /var/cache/apt/archives. The following shell command can remove these files:
sudo apt clean
This will free up some space for upgrading packages. Raspbian can also be upgraded using third-party solutions or Mender, an end-to-end open-source update manager.
RPi configurations
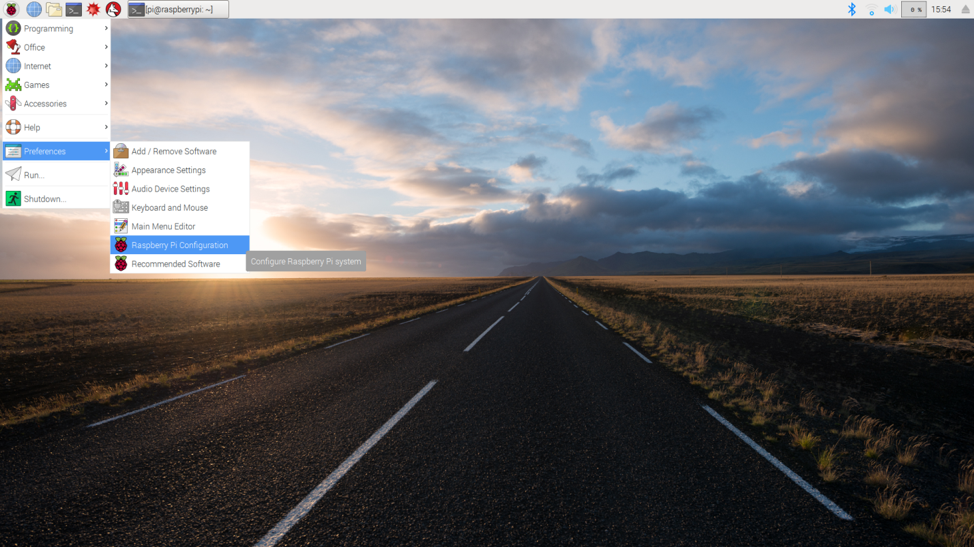
Raspberry Pi configuration settings can be accessed by navigating to Preferences-> Raspberry Pi Configuration or by running this command in the terminal window:
sudo raspi-config
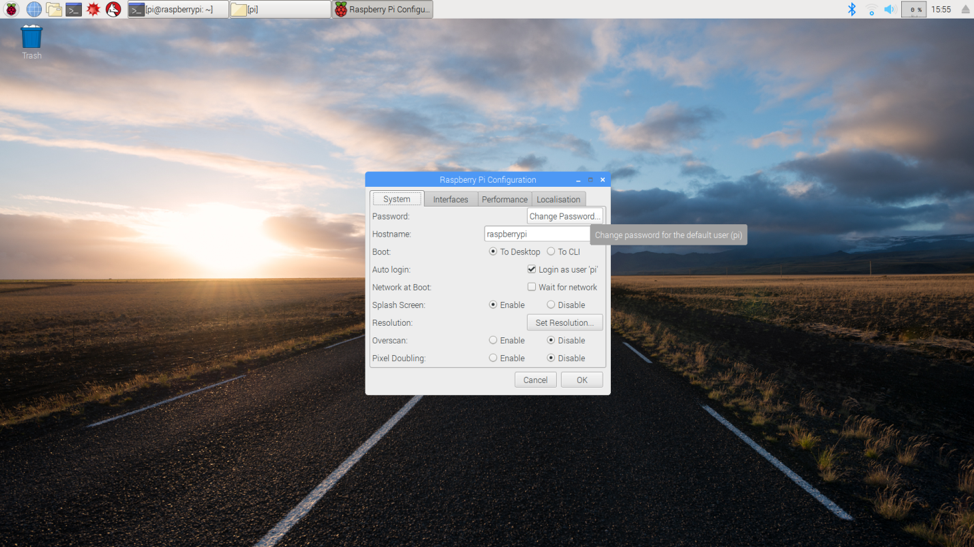
Under the “System” tab in the graphical configuration window, you can change the password for the default user and hostname. Additionally, you can:
- Select a boot option (between the graphical and command-line interface)
- Pick auto-login for quick access
- Choose a set screen resolution
- Enable or disable the “Overscan” and “Pixel doubling” options
If you have not yet changed the default password in the welcome window, it’s highly recommended to do so from the configuration settings. If your screen does not fill the entire display monitor, disable the “Overscan” option. Also, set the highest possible resolution supported by your display monitor to get the best desktop experience.
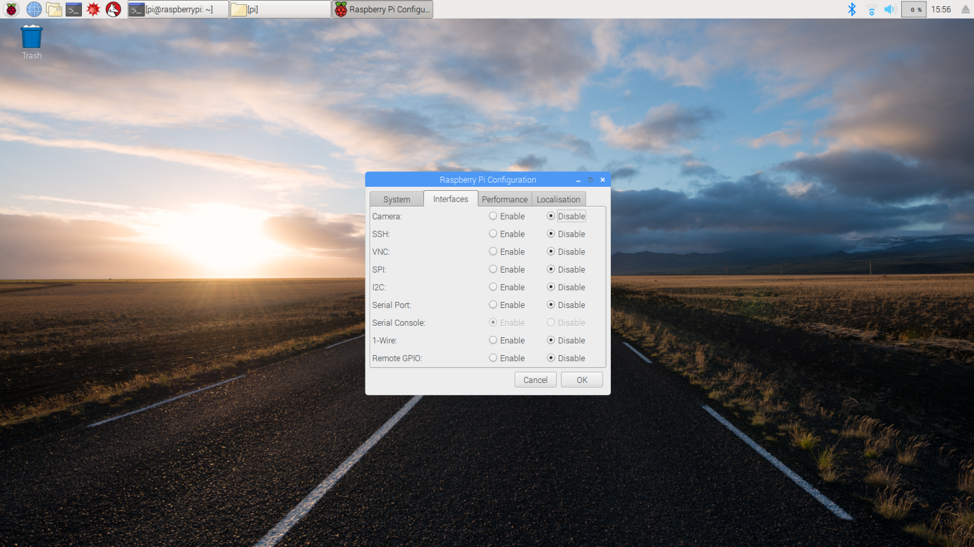
Under the “Interfaces” tab, you can enable or disable the input/output and network interfaces, such as the Camera, SSH, VNC, SPI, I2C, Serial Port, Serial Console, 1-Wire, and Remote GPIO. We’ll enable these options as needed to control the electronic circuits in our Python scripts.
Under the “Localisation” tab, you can change settings for the language, timezone, keyboard layout, and Wi-Fi.
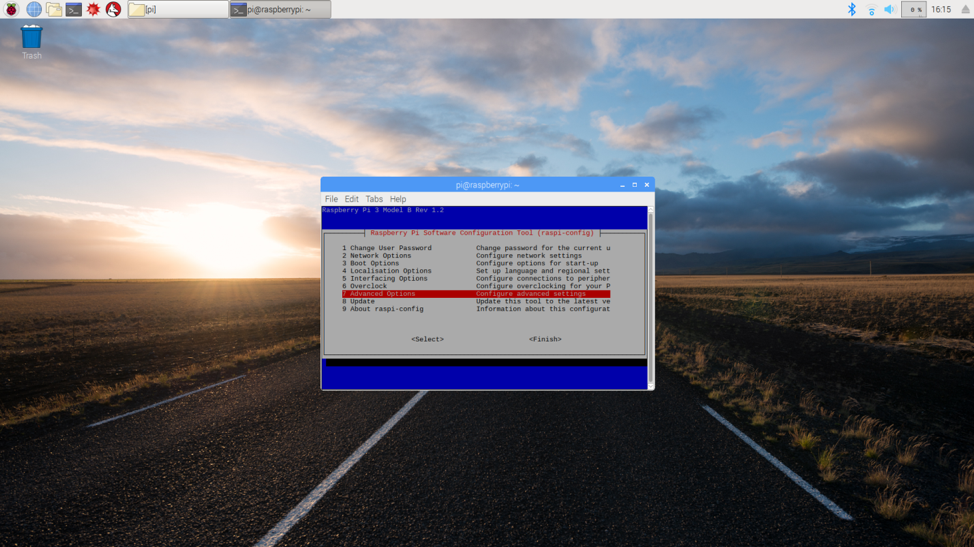
If you’ve installed Raspbian through an iso image (instead of copying the extracted image files to the SD card as mentioned above), it might not be using the entire space available on the card. To maximize the SD card, you my need to expand Raspbian‘s file system. This can be done by accessing the RPi configuration settings through the terminal.
In the terminal, run following shell command to access the RPi configuration settings:
sudo raspi-config
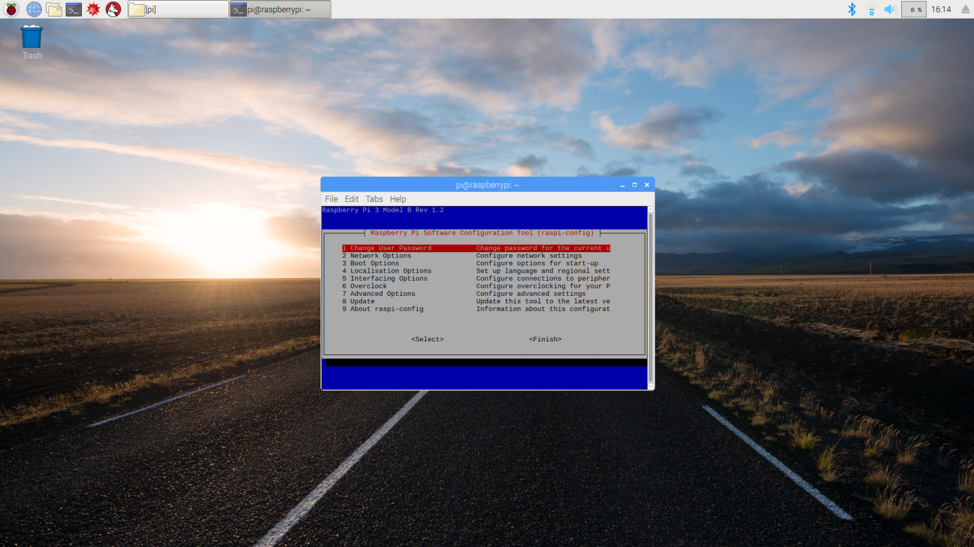
The files under the Iinterfaces” tab in the Raspberry Pi Configuration settings on Raspbian desktop.
Next, navigate to the “Advanced Options” and select the “Expand Filesystem.”
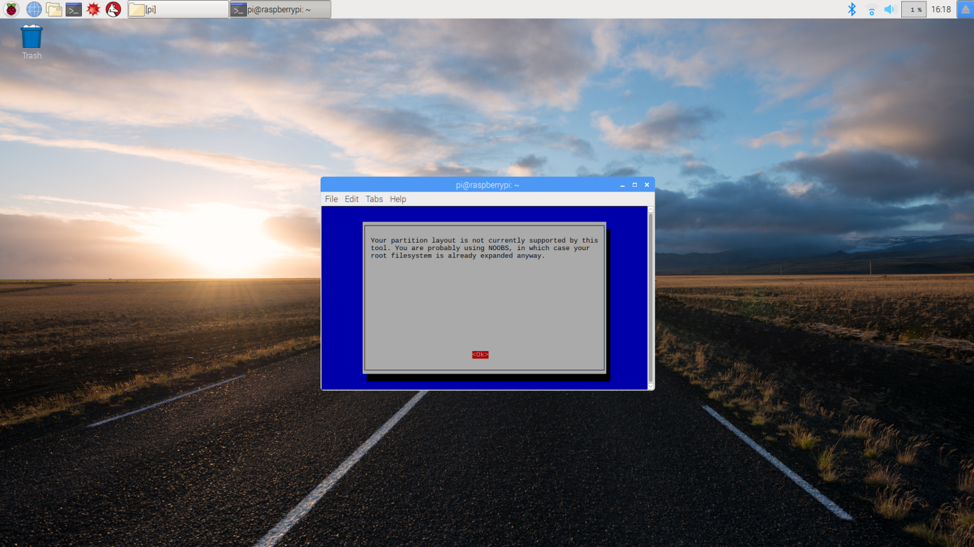
If you’ve installed Raspbian by copying the extracted image files to the SD card, the file system will already be expanded — which means it’s using the entire disk space available on the card. If this is the case, the following message will pop up when prompting Raspbian to expand its file system.
To save any changes, navigate back and select “Finish.”
Installing other packages
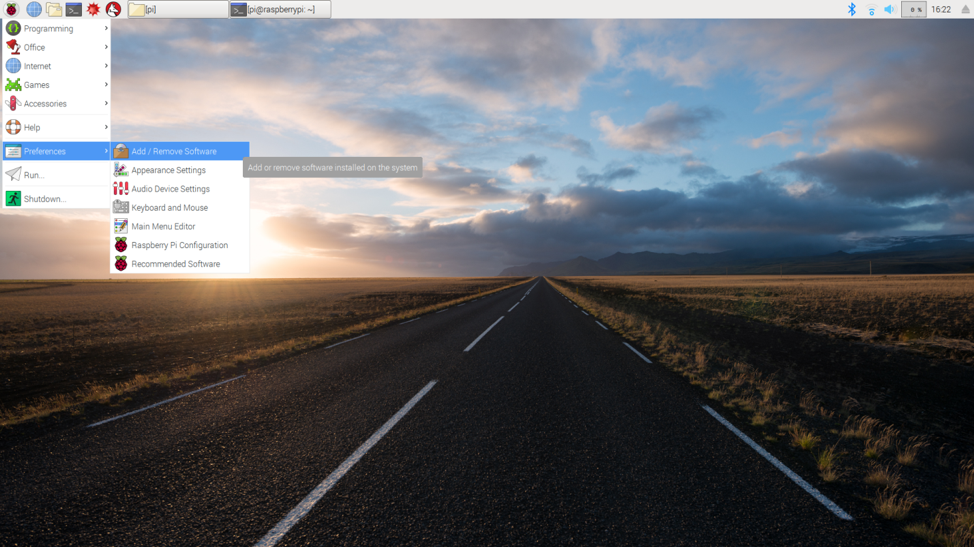
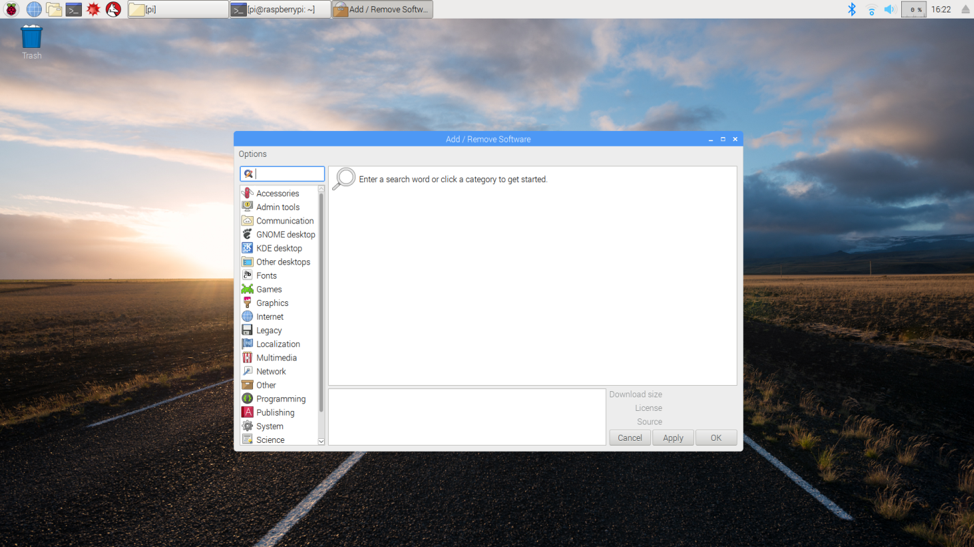
Raspbian offers several default packages, which can be installed on by using the sudo apt—get command. An easy way to explore the available packages and install them is through the “Add/Remove Software” settings.
These settings can be accessed by navigating to Preferences -> Add/Remove Software.
A window will open so it’s possible to browse the packages of different categories.
Select the desired application and click “OK” to install it.
Personalize your RPi desktop with your favorite application programs by installing the office application(s), media player, and browser of your choice. Now your Raspberry Pi computer is all set!
In this series, we intend to use RPi for controlling electronics and using Python, which can program embedded applications — including games, 3D graphics, network programming, IoT, web development, artificial intelligence, machine learning, and much more.
In the next tutorial, we’ll learn more about Python.
Filed Under: Featured Contributions







Questions related to this article?
👉Ask and discuss on Electro-Tech-Online.com and EDAboard.com forums.
Tell Us What You Think!!
You must be logged in to post a comment.