Transparent sprites are fundamental elements in computer graphics and animation. A sprite is a two-dimensional bitmap image or animation displayed as part of a larger scene, such as a video game or digital interface. Because sprites are stored as rectangular bitmaps, transparency is needed to prevent the unused background area from appearing around the visible…
DigiKey and Arduino launch edge AI project challenge

DigiKey and Arduino have launched the Dream Lab Challenge, inviting U.S.-based makers, engineers, students and innovators to submit projects using the Arduino UNO Q microcontroller board by September 30, 2026. The UNO Q is a hybrid single-board computer and microcontroller development board designed for applications such as robotics, AI-powered vision systems, smart automation, local LLMs,…
Arduino compatible coding 01: Arduino MCU family
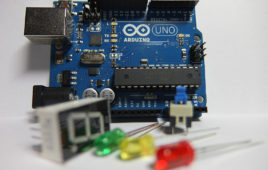
Embedded electronics are in a countless number of devices and appliances, with microcontrollers at the heart of the operation. A microcontroller is a compact integrated circuit that controls a specific operation in an embedded system. There was a time when only BASIC stamp microcontrollers, with a simple interpreter, were available for designing, prototyping, and testing…
Arduino compatible coding 02: Getting started with Arduino
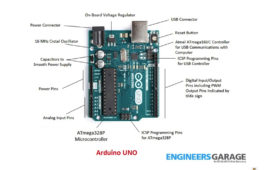
Arduino are single-board microcontrollers that are easily programmable through a USB connection. They are used with electronics to design embedded system prototypes, the Internet-of-Things (IoT), and electronic gadgets. Much like other microcontrollers, Arduino provides software-backed computing and embedded control to basic electronics applications. That means getting started with Arduino is no different than with other…
Arduino compatible coding 03: Basics of Arduino sketches and Embedded C
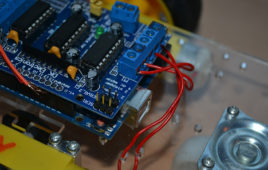
The previous tutorial included a discussion about the tools and components necessary to get started with Arduino. However, before starting with Arduino UNO (or any other Arduino board) — and experimenting with hardware projects on various sensors, actuators, and modules — it’s important to get through the basics of Arduino sketches and the embedded C…
Arduino compatible coding 04: Interfacing and driving LED by digital output
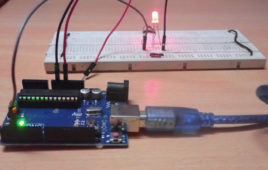
In the previous tutorial, we discussed the basics about Arduino sketches, with a a quick Arduino language reference. Now, it’s time to get our hands dirty. Interfacing LED and driving digital output from a source is the “Hello World” of embedded systems. As discussed in the previous tutorial, a microcontroller interfaces and interacts with other…
Arduino compatible coding 05: Interfacing buttons for digital input
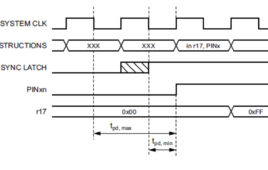
In the previous tutorial, we discussed digital output from Arduino to drive an LED. A controller can interface and interact with other devices in five ways: digital output, digital input, analog output, analog input, and serial communication. In this tutorial, we will use digital input from Arduino to read the state of a tactile switch…
Arduino compatible coding 06: Analog output (PWM) on Arduino and LED fading
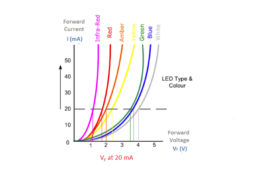
In the previous tutorial, we discussed the digital input process for using Arduino. We also explained push buttons (momentary type buttons) and how to use them for data or command input via a digital input. Any controller can interface and interact with other electronic devices in five ways: digital output, digital input, analog output, analog input,…
How to create an RFID-based locker system using Arduino

Need somewhere to secure a few items? No problem! In this project, we’ll design an RFID-based locker system that offers a reliable and convenient solution for securing objects using radio frequency identification (RFID) technology. Working operation: The RFID locker system The RFID reader scans a unique tag, and if it matches a pre-registered one, the…
How to design an Arduino-based traffic light system

Traffic light systems are important signaling devices that regulate the flow of vehicles and pedestrians at intersections, crosswalks, and other critical areas. These systems use three primary lights — red, yellow (amber), and green — to manage traffic effectively and ensure safety. In this project, we’ll create a traffic light system for a four-way intersection…
Arduino audio player

This tutorial is about building a DIY audio player using Arduino. Today audio players can commonly be found across many electronic products. Almost every mobile has an audio player. Audio technology gets a drastic improvement with rapid development in silicon technology. Previously audio data was stored on tape devices and CDs. But now, Flash memories…
Arduino-based token display board controller

You must have noticed token display boards at many places like food stores, hospitals, banks, various takeaways, etc. Token display systems are used to display token numbers. As these display boards show numeric information, these are easily designed using 7-segment LEDs. The commercial models use large 7-segment LEDs to display token numbers. It is even…
Non-invasive current sensor with Arduino
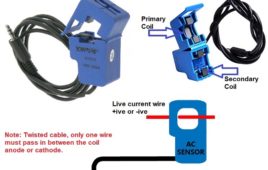
The idea of noninvasive current measurement is not new. Commercial devices are available which can measure current without any physical contact. However, the topic was not popular among the DIY community because of the complexity and nonexistence of the compact non-invasive sensors, which could be studied at low power. Luckily, we have small and reliable…
Arduino home security system using Sim900 Gsm module, Pir motion detector and magnetic door contact switch

In this tutorial i am going to make an arduino home security system. One can install this diy arduino security system project on his home main door. The diy arduino security system checks two things. First it checks if some one approached the door? Second it checks if door is opened by the person? When the…
Arduino uno automatic car head light on/off battery and temperature monitoring system

A simple diy project on how to monitor car battery, engine temperature and automatically control the headlights of car with arduino uno. I have pretty old vehicle, which does not have any fancy items/mechanics in it. So i decided to make this project and make my car look a little bit fancy by my self.…
How to optimize Arduino for low power design

Power consumption of the embedded controller is a primary concern in low power design. Arduino boards are often used in devices that rely on battery or solar charging. Such devices often deploy far from the power line to have periodic battery replacement or are mobile devices designed for periodic charging cycles. In such a case,…
How to design pick-and-place robot using Arduino
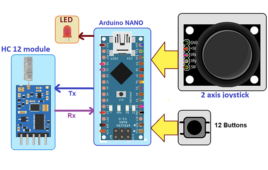
In this project, we’ll design an omnidirectional, moving pick-and-place robot. First, let’s cover how the robot is built. The robot’s build As shown in Figure 1, the robot consists of two sections: An omnidirectional moving platform A robotic arm The omnidirectional platform The robot is built using one circular wooden plate, three dc gear motors,…
How to use the TCS230/TCS3200 color-recognition sensor with Arduino
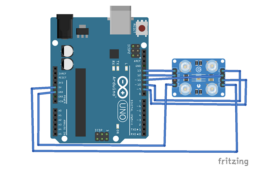
Color detection is the process of identifying and distinguishing colors within an image, video, scene, or object. Many embedded and robotic applications require this feature, as it’s useful for sorting, selection, test strip reading, path determination, and more. Two standard sensors used for color detection include TCS230 or TCS3200. TCS3200 recognizes various colors based on…
Sensor value (data) display on TFT LCD using Arduino – Part III

Contactless body temperature measurement using MLX90614 sensor In the previous two articles of this tutorial series, I demonstrated how to display analog sensor data (like POT, LM35, soil moisture sensor, etc.) or smart digital sensor (DHT11) data on TFT LCD. In this third article, I will explain how to display body temperature on TFT LCD. It…
Arduino piezo buzzer alarm with LDR(light dependent resistor)/photoresistor
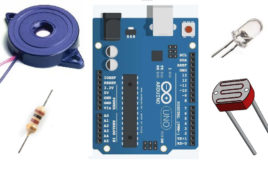
This is a simple project on arduino, ldr(light dependent resistor)/photoresistor sensor and piezo buzzer. Piezo buzzer output sound level will variate by arduino depending on the intensity of light thrown on ldr/light sensor. An led will also fade by arduino depending on the intensity of light thrown on photoresistor. The diy project is same like…