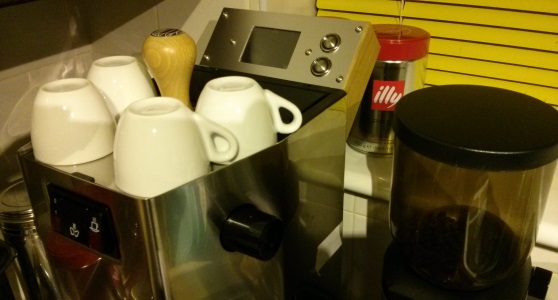
Controlling Espresso machine with a Raspberry Pi is an innovative idea to bring some fun in coffee machine. It starts with the simple idea of improving the temperature stability, which grows into a more elaborate controller with an LCD screen, water level sensing and pump control.
Here, the machine automatically gets boots up when powered on and regulates coffee temperature and displays current temperature, pressure and water level on an LCD.

The two push buttons on the front panel automatically dispenses a measured shot which can be interrupted by pushing the same button again. The lower button on the other hand performs two functions including a short push that toggle the boiler power off or on and a long push causing it to safely shut down the system. It also has a “shot timer” showing elapsed time during a shot.
The boiler has two heating elements that are controlled by a pair of thermostats and are wired in series with the element. The steam button is turned on, then only the steam thermostat can interrupt power to the boiler.
The boiler when controlled with a Raspberry Pi needs power at about 1300W and also PWM (Pulse Width Modulation) to allow proportional control of boiler power. The best solution is to use a Solid State Relay (SSR), which allows us to efficiently switch power to the boiler.
For daily use in the kitchen, two stainless steel buttons were added. One of the buttons is used to pour a shot, and other to turn off the boiler and halt the Pi which can be programmed in software for desired function.
The headers here are soldered to a humble pi board, along with pull-up resistors and potential dividers and all the wiring between the headers and the GPIO connector is underneath the Humble Pi board. Here Raspberry Pi model A is used as Ethernet is not required and its ability to use less power. The Humble Pi is mounted over the Pi in the enclosed space but there is no issue of overheating.
The complete C++ source code for the project is available on Github. Further, the wild oscillation of original thermostat as compared to the more stable temperature control was achieved with the PID. Hence the PID target temperature can be optimized for further performance.
You can read the blog of James who has described minute details on this project, if properly followed, you can also make a raspberry pi coffee machine at home.
Filed Under: Reviews


Questions related to this article?
👉Ask and discuss on EDAboard.com and Electro-Tech-Online.com forums.
Tell Us What You Think!!
You must be logged in to post a comment.