In this tutorial, we’ll learn how to develop a graphical user interface (GUI) application for Raspberry Pi (RPi) using Python. This is not an easy task, particularly for a system that has limited resources (memory, CPU, RAM, cache, etc.).
Granted, the latest version, RPi 4.0, offers 8GB of RAM, which allows for rendering and for video games. But its central processing unit (CPU) and cache still lag behind compared to desktop PC GUI applications. Nevertheless, RPi offers several packages for GUI development. Tkinter is its default GUI development package.
Tkinter contains a few widgets (such as a button, text box, scroll bar, etc.) that can be imported into a project and actions can be set against each one. But Tkinter has no GUI interface where, ideally, each widget would be placed at the desired position in a window. This means users have to manually set the coordinates and functions for each widget.
GTK+ is RPi’s package, where a user interface can be developed manually by dragging and dropping the widgets in a window. This is done by using the Glade user interface development tool. Additional parameters for widgets can also be set by using this tool.
Glade generates an XML file of the user interface, where all of the widgets are present. From there, it’s possible to import the widgets from the XML file to the main window.
GTK is a cross platform, meaning we can develop applications in C or Python by using it. For this project, we used Python 3. To follow our lead, you’ll need to install python3, GTK, and Glade on your RPi. An easy way to do so is by simply using the RPi console.
For python3, enter these commands in the console:
sudo apt update
sudo apt install python3
For GTK, enter this command:
sudo apt-get install libgtk-3-dev
And for Glade, enter this command:
sudo apt-get install glade
After successful installation, you’ll find Glade in the menu bar. Now, let’s add a button and a text box in the Glade window. Then, open Glade.
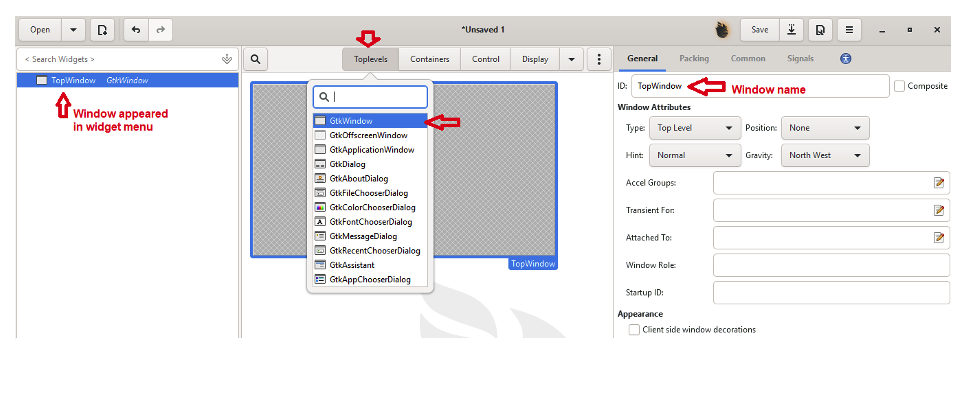
From the top level, select a window widget. The window is where we’ll place all of the widgets. Widgets inside a window are called, the “child widgets” of the top level of the main window. Several main top-level windows are available in GTK.
For this project, we selected the GTKWindow, which is at the very top. Give your window a name (we used, TopWindow). Below, you can see the window widget in the selected widget menu.
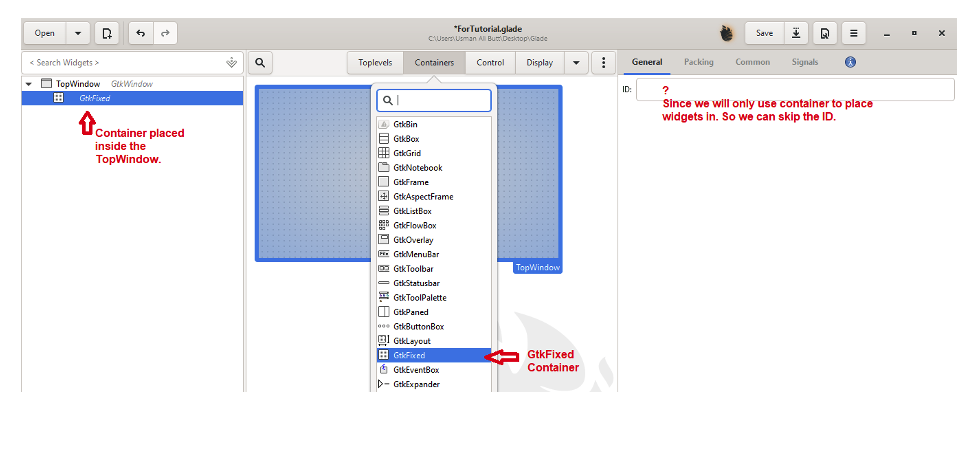
After selecting a window, you’ll also need to choose a container for it. Containers are an ideal way to put and arrange any child widgets (either in a horizontal or vertical arrangement). Additional containers can be added inside a container.
We added a single GTKFixed container in the window. It will be a child widget that appears under the TopWindow.
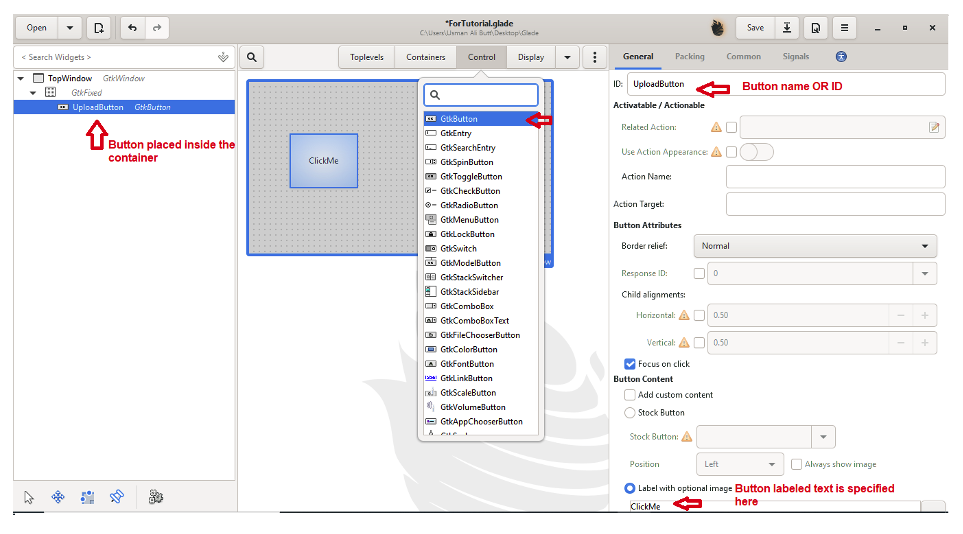
Next, let’s add a button. Go to the control and from the dropdown menu, choose the GTKButton. A button will appear under the container, which is called the “child of the container.” To set actions or to use it in the code, you’ll have to name it.
We named ours, UploadButton. You’ll note, the default button label can also be set by inputting text in the label box.
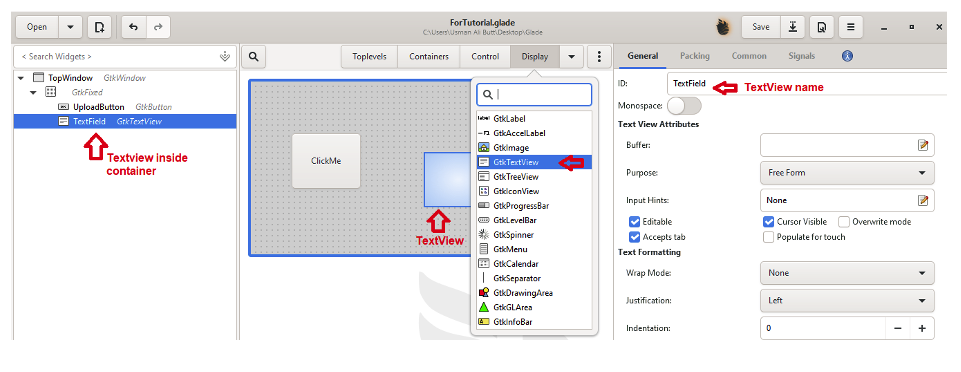
The text view is in the display menu. Select it and it will appear under the container as a child widget. You’ll also have to name it so to use it in the code. The default text can also be set up by using the label (we didn’t set any default text when using Glade).
Our test GUI XML file is ready. As soon as you close the glade application, the XML code file will appear in the working directory.
Import note: Plenty of other parameters and options — such as the height, width, label, position, alignment, or actions, etc. — can be set by using Glade. We highlighted a few in the above example.
The code
The GitHub code is available here.
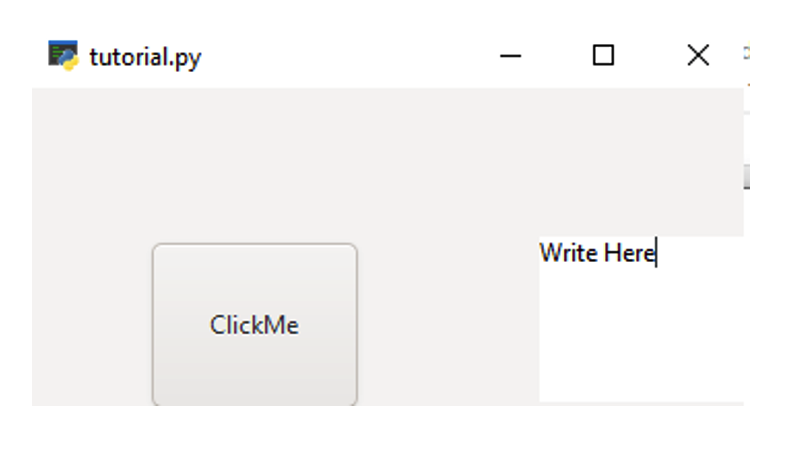
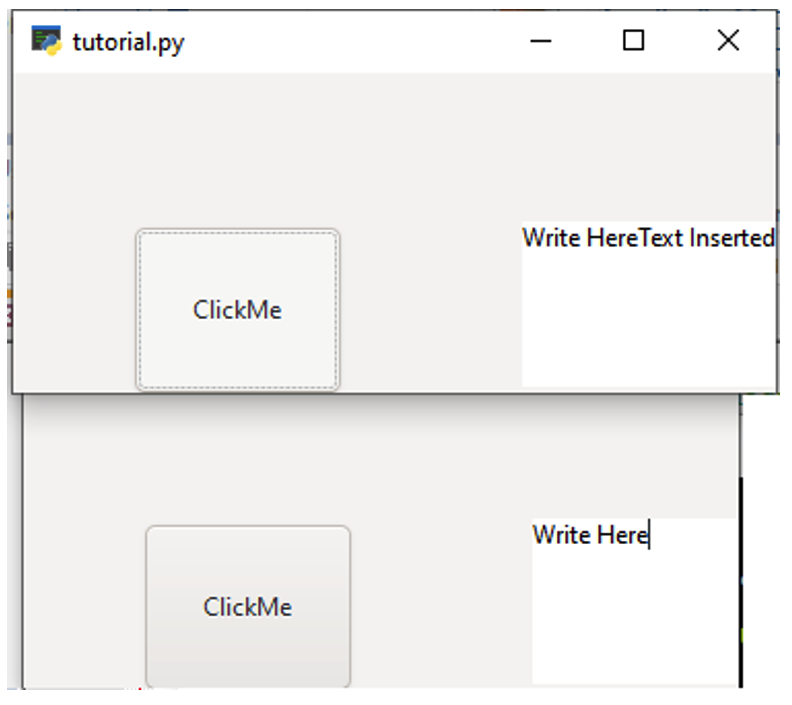
Essentially, the code is commented against each statement. We used Thony IDE to compile and run the Python code. Upon execution, you’ll see the GUI window contains a button and a text view pane. The button’s name and the default text in this text view can be seen below.
The event that we set on the button click copies the text already present in the text view and appends it with the “Text Inserted.” Below is a screenshot of what happens when we press the button.
If we the press the button repeatedly, the “Text Inserted” will be appended in the text view.
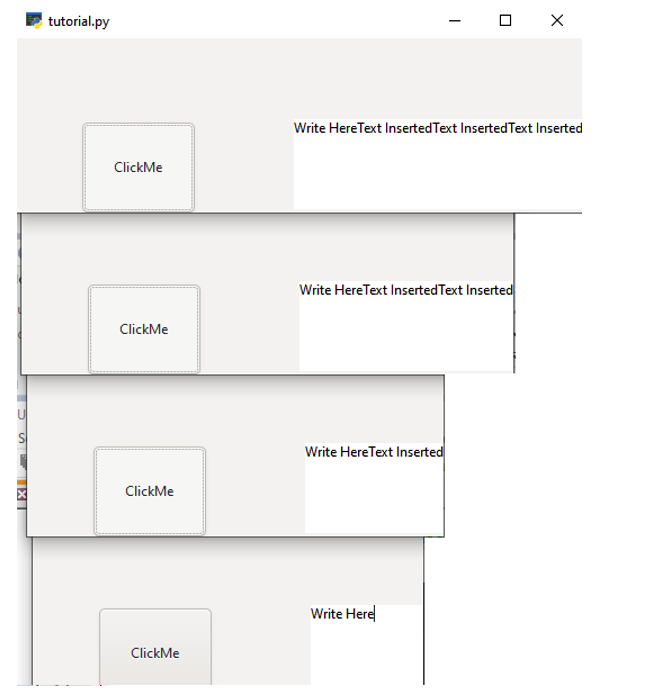
As you can see here, the four windows are technically one window that’s stacked, based on the number of clicks (three button clicks). As a result, the window resizes on each text amendment. It’s also possible to fix the window and text view size when using Glade.
Your turn…try building the RPi GUI application by using GTK.
Where to purchase Raspberry Pi? Mouse
You may also like:
Filed Under: Microcontroller Projects

Questions related to this article?
👉Ask and discuss on EDAboard.com and Electro-Tech-Online.com forums.
Tell Us What You Think!!
You must be logged in to post a comment.