A vehicle tracking system is a technology that tracks and monitors a vehicle’s location in real time. It uses the Global Navigation Satellite System (GNSS) — typically, the Global Positioning System (GPS) — to accurately determine a vehicle’s location. The GPS monitors and relays data to a server through a cellular or satellite network.
In this project, we’ll design a vehicle tracking system using Arduino, SIM900A GSM/GPRS modem, and the Neo 6M GPS module. The device will transmit a vehicle’s real-time location using the ThingSpeak server. ThingSpeak is a popular Internet-of-Things (IoT) development platform.
The Neo-6M GPS module tracks the vehicle’s location and transmits it to the ThingSpeak server via an HTTP post using GPRS communication over the SIM900A modem.
Components
- Arduino Mega x1
- SIM900A GSM/GPRS Modem x1
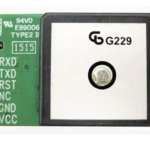
- Neo-6M GPS module
- SIM card
- Connecting wires or Jumper wires
Circuit connections
To build this vehicle tracking device, we must interface the SIM900A GSM/GPRS modem and Neo-6M GPS module with Arduino. We use Arduino Mega because it has multiple hardware UART (universal asynchronous receiver/transmitter) ports, but any Arduino board will work. Depending on the board, you might have to use the software serial.
To interface the GPS module with Arduino Mega:
- Connect the GPS’s VCC and ground pins with Arduino’s 5V out and ground pins.
- Connect the GPS’s TX and RX with Arduino’s RX1 and TX1, respectively.
To interface the GSM/GPRS modem with Arduino:
- Connect the GSM/GPRS’s GND, TX, and RX pins with Arduino’s GND, RX2, and Tx2 pins, respectively.
Then, power the GSM-GPRS modem through an adaptor. Note: a regulated battery supply can power the complete circuit.
![]() Create a ThingSpeak account
Create a ThingSpeak account
We’ll use the ThingSpeak server to communicate data with Arduino. ThingSpeak is an open-source IoT analytics platform service. First, you must create an account on the platform by going to ThingSpeak.com. Click on the user icon at the top right corner and then click on the ‘Create One’ link. Fill out the form and verify your email ID to complete the account.
Create a ThingSpeak channel
Now, we must create a channel to communicate with the ThingSpeak server. Channels are where applications store and retrieve data on the ThingSpeak server.
To create a channel, click the ‘New Channel’ button and fill in the form. Enter a name for your channel, such as ‘GSM-GPS-Vehicle-Tracking.’ Next, create two fields:
1. ‘Latitude’ to store the latitude of the vehicle’s location.
2. ‘Longitude’ to store the longitude of the vehicle’s location.
Click on the ‘Save Channel’ button to create the channel.
After creating the channel, navigate to ‘Channel Settings’ and write down the channel ID. Also, click on the ‘API Keys’ tab and note down the ‘Write API Key.’ We’ll be using them in the Arduino sketch.
Arduino sketch
Upload the following sketch to Arduino. Remember to replace your write API key in the sketch.
<ADD CODE HERE>
How it works
Arduino retrieves a vehicle’s current location using the GPS module. The board stores the latitude and longitude of the current location and transmits them to the ThingSpeak server using the GSM network via the SIM900A modem. The modem generates an HTTP post for the address of the ThingSpeak server to transmit the vehicle’s location data. It’s uniquely identified by the write API key.
The code
The sketch begins by importing the TinyGPSPlus library, which works with the GPS module. An object of the TinyGPSPlus class is instantiated. Variables are declared to store the latitude and longitude of the vehicle’s location, to transmit a message to the ThingSpeak server, and to format the vehicle’s latitude and longitude values.
The setup() function sets the baud rate for Serial, Serial1, and Serial2 UART channels to 9600 bps. The Serial port is used to debug the console. Serial1 communicates with the GPS module, and Serial2 communicates with the GSM-GPRS modem.
The user-defined function SendATCommand() transmits the AT commands to the SIM900A GSM modem. The user-defined function UpdateLocation() sends the vehicle’s location data to the ThingSpeak server through GPRS technology.
Note that the APN used in this function is airtelgprs.com as we’re using an Airtel SIM. If you use a different network provider, its APN will be different. Also, remember to replace the API key in the code for your ThingSpeak channel.
In the loop() function, Arduino retrieves the latitude and longitude of vehicle’s current location by calling the gps.location.lat() and gps.location.lng() methods. The latitude and longitude values are formatted using the dtostrf() function. The values are updated into the global variables, ‘lat’ and ‘lng’, which are transmitted to the ThingSpeak server using the UpdateLocation() function.
Results
Here’s a screenshot of the console messages of Arduino’s Serial Monitor retrieving the location data and transmitting it to the ThingSpeak server.
The following screenshot is of live vehicle location data on the ThingSpeak server.
You may also like:
Filed Under: Electronic Projects


Questions related to this article?
👉Ask and discuss on Electro-Tech-Online.com and EDAboard.com forums.
Tell Us What You Think!!
You must be logged in to post a comment.