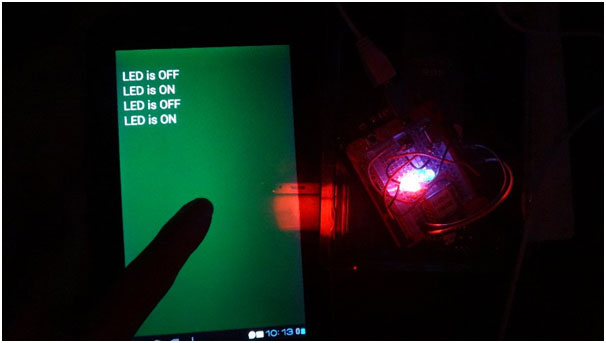
Fig. 1: Prototype of Android controlled Arduino LED Controller
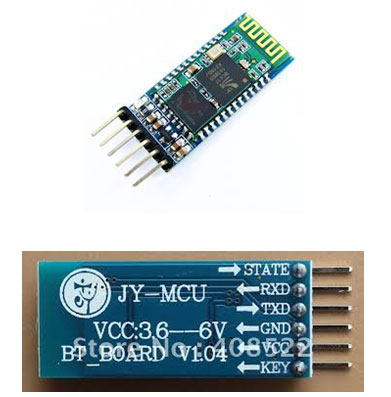
Fig. 2: Typical Image of HC-05 Bluetooth Module
For connecting the module with Arduino, we need to use the Serial (Tx and Rx) pins provided on the board.ard.
Making Connections with HC-05:
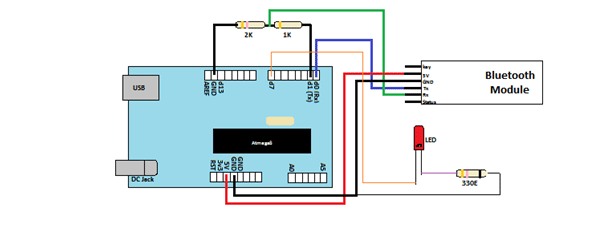
Some modules have VCC labelled for working voltages up to ~6 volts. These modules DO NOT like anything except 3.3 volts on the VCC line. We should use a level converter to 3.3V on the RXD line. Use two resistors, as a simple voltage divider to make the TTL level conversion. Wire one 2.2k ohm resistor to ground and another 1k ohm resistor to the TXD line on the MCU. Connect the RXD pin in between the two resistors for an output of approx 3.4 volts.
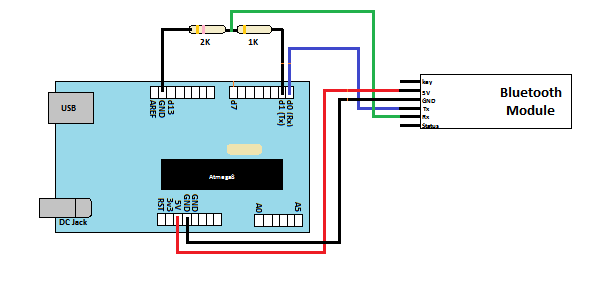
Fig. 3: Image showing circuit connections of Arduino Uno and HC-05 Bluetooth Module
Now connect TXD of module to RXD of Arduino (Digital Pin 0).
After making the above connections, you’ll see blinking led on the module. This just ensures your device is powered properly. After that pick your Android phone, and get the app- “Arduino Bluetooth Terminal” from the Google Play Store. This app is available for free, and is easy to use.
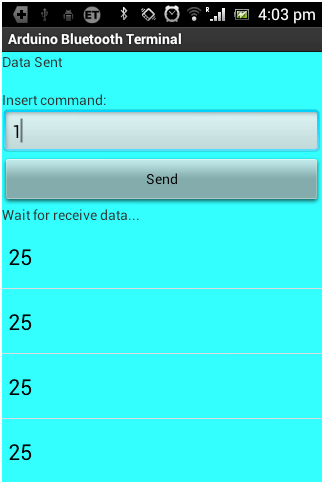
Fig. 4: Screenshot of Android App used to control LED
How Code Works:
When we send ‘1’ to the Arduino, the LED connected at Pin-7 turns ON and when ‘2’ is sent the LED turns OFF. The serial data is read by Arduino, through Serial.read() function and is stored in the integer type variable state declared in the program. After this in the loop(), we just compare state value with 1 or 2, and perform respective operation.
Project Source Code
###


int led = 7;                //led connected at digital Pin 7
int state;
int flag=0;
void setup()
{
    pinMode(led, OUTPUT);                      // LED declared as O/P
    Serial.begin(9600);                        // Baud rate set to 9600bps
}
void loop() {
    if(Serial.available() > 0)
    {
      state = Serial.read();
      flag=0;
   }
    if (state == '1')
    {
       digitalWrite(led1, HIGH);
       if(flag == 0){
       Serial.println("LED is ON");
       flag=1;
    }
    }
    else if (state == '2')
    {
       digitalWrite(led2, HIGH);
       if(flag == 0)
{
       Serial.println("LED is OFF");
       flag=1;
}
}
}           //loop() ends here

###
Circuit Diagrams
Filed Under: Electronic Projects


Questions related to this article?
👉Ask and discuss on EDAboard.com and Electro-Tech-Online.com forums.
Tell Us What You Think!!
You must be logged in to post a comment.