Engineers Garage

  • Electronic Projects & Tutorials
    • Electronic Projects
      • Arduino Projects
      • AVR
      • Raspberry pi
      • ESP8266
      • BeagleBone
      • 8051 Microcontroller
      • ARM
      • PIC Microcontroller
      • STM32
    • Tutorials
      • Complete Sensor Guide
      • Engineering Deep Dives
      • AI
      • ARDUINO Compatible Coding
      • Audio Electronics
      • Battery Management
      • Beginners Electronics Series
      • Brainwave
      • Digital electronics (DE)
      • Electric Vehicles
      • EMI/EMC/RFI
      • EVs
      • Hardware Filters
      • IoT tutorials
      • LoRa/LoRaWAN
      • Power Tutorials
      • Protocol
      • Python
      • RPI Python Programming
      • Sensors
      • USB
      • Thermal management
      • Verilog
      • VHDL
    • Circuit Design
    • Project Videos
    • Components
  • Articles
    • Tech Articles
    • Insight
    • Invention Stories
    • How to
    • What Is
  • News
    • Electronic Product News
    • Business News
    • Company/Start-up News
    • DIY Reviews
    • Guest Post
  • Forums
    • EDABoard.com
    • Electro-Tech-Online
    • EG Forum Archive
  • DigiKey Store
    • Cables, Wires
    • Connectors, Interconnect
    • Discrete
    • Electromechanical
    • Embedded Computers
    • Enclosures, Hardware, Office
    • Integrated Circuits (ICs)
    • Isolators
    • LED/Optoelectronics
    • Passive
    • Power, Circuit Protection
    • Programmers
    • RF, Wireless
    • Semiconductors
    • Sensors, Transducers
    • Test Products
    • Tools
  • Learn
    • Design Guides
    • Learning Center
    • Tech Toolboxes
    • Tech Terms
    • Webinars & Digital Events
  • Resources
    • EE Training Days
    • LEAP Awards
    • Podcasts
    • White Papers
  • Guest Post Guidelines
  • Advertise
  • Subscribe

How to use IoT-based D2D automation

By EG Projects March 30, 2025

In this tutorial, we’ll learn how to use device-to-device (D2D) communication to make daily life a little simpler. For example, you’ll be able to control household appliances, such as the coffee machine, a light switch, or the AC — and do so from inside your vehicle. So, if you’re arriving home one evening, the presence of your vehicle can signal the porch light to switch on before you get to the front door.

D2D communication typically refers to the technology that lets devices or appliances “communicate” without the use of network infrastructures.

In this case, the D2D detects the presence of your car by using an ultrasonic sensor and the MQ Telemetry Transport (MQTT) protocol for signaling. MQTT is a network protocol that transports messages between devices.

D2D communication is completely automated and does not rely on human interaction. This means that the use of a CCTV camera is unnecessary to detect your vehicle’s presence. (You can even get a notification if someone tries to tamper with your car.)
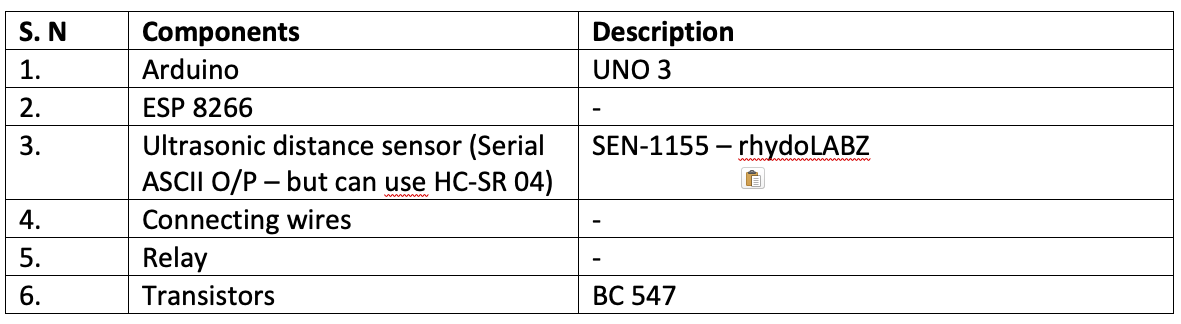
Circuit diagram

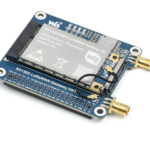
The switch board socket. You can also use the standard Arduino UNO3 and the ESP8266 WiFi microchip, separately. The key is to ensure everything fits inside the switchboard.
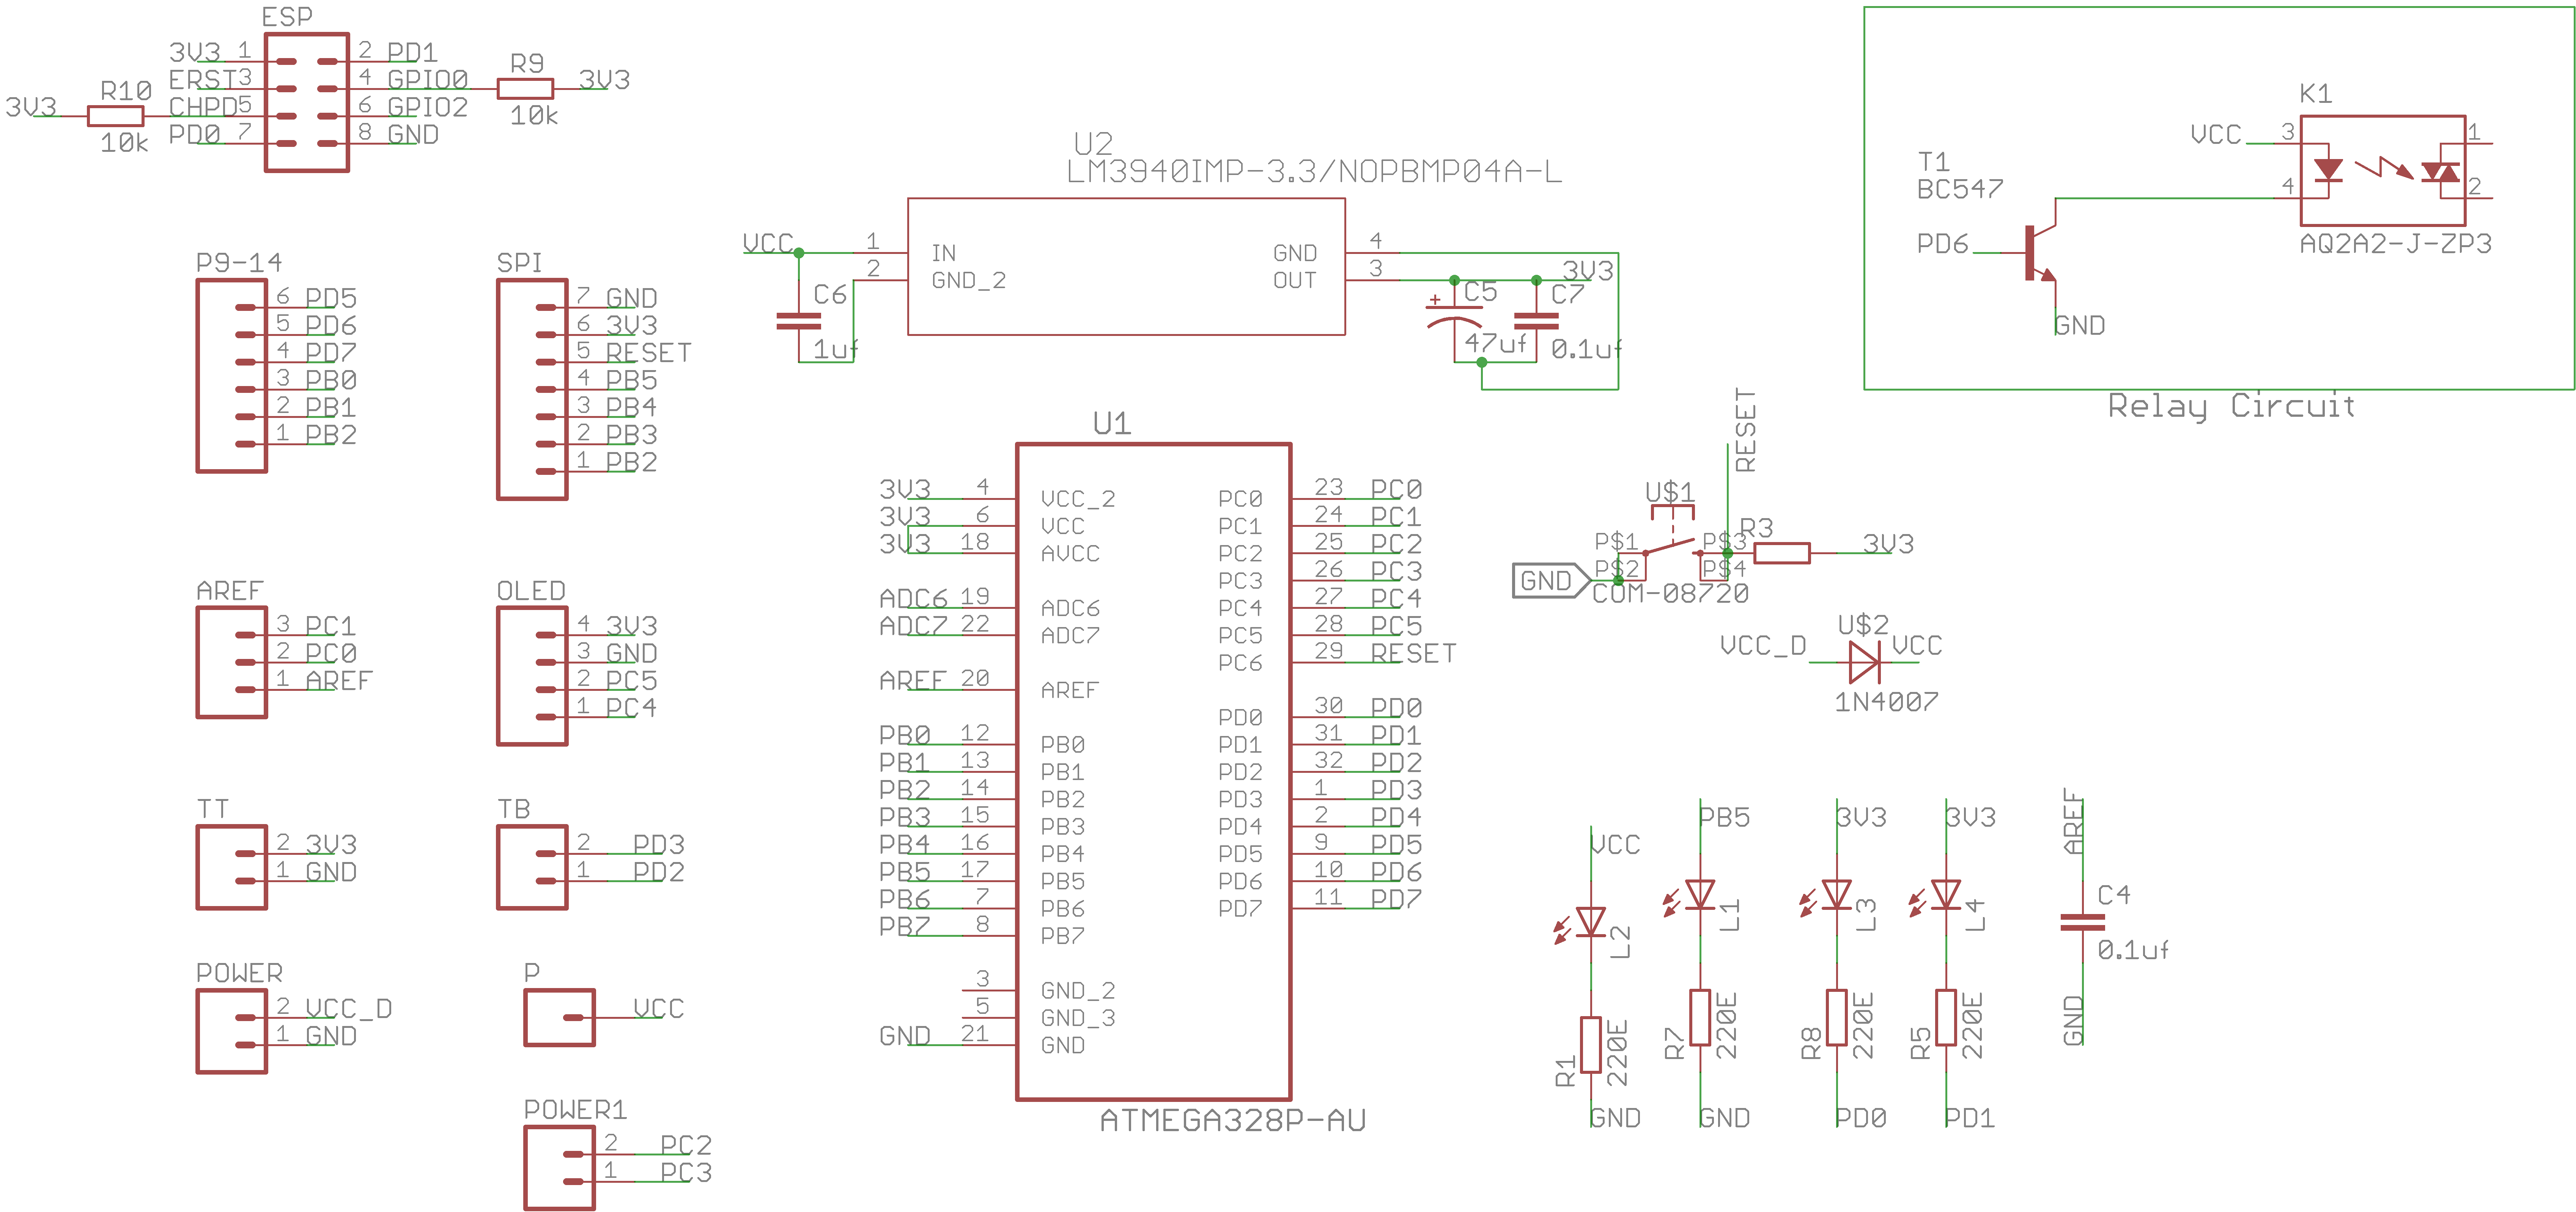
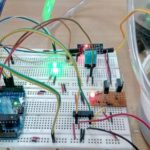
Customized Atmgea 328p board with an ESP8266 and a relay circuit.

Note: The rest of the circuit setup is the same if connecting with the ESP8266.

Technical insights
For this project we use Arduino UNO (Atmega 328p), ESP8266, and an ultrasonic distance-measuring sensor (to detect the presence of the vehicle), and the MQTT protocol for communication between devices.

To ensure a successful D2D communication, it’s first necessary to generate a control signal. This signal is sent between the smart sensor that detects the vehicle’s presence to the device that controls the home appliance (the lights, AC, coffee maker, etc.). The control device will require a pre-defined definition of what each control signal means.

For instance, if the vehicle is newly arriving or leaving the driveway, the sensor will send a different control signal message.

Since these signals are sent via the MQTT protocol, they can be accessed by multiple devices using their “topics.” This means that it’s possible to control multiple devices.

Block diagram | Algorithm
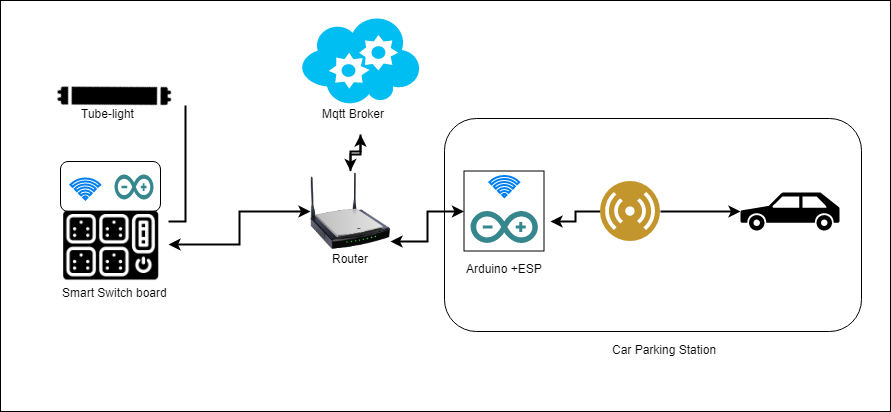
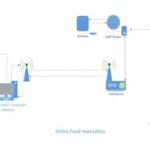
We’ll need to make two devices. One for detecting the vehicle’s presence in the driveway (we’ll call the detection device) and another for controlling the home appliance (the controlling device).

The controlling device uses a simple PCB board that connects the ESP8266 and Atmega328’s (or Arduino UNO’s) controller with a relay circuit. It “listens” (or subscribes) for a control signal, which is sent over the MQTT protocol on a specific topic. 

The detection device is an ultrasonic distance-measuring sensor, used with the Atmega 328p controller and the ESP8266 to communicate. This device sends a control signal on the topic, “ts/light.” Essentially, this device is continually sensing the presence or absence of the vehicle.

Now, let’s take a look at how these devices will communicate with one another.

How it works
There are three scenarios as described below of this device on how it can work. 

1. Absence of vehicle: If there’s no vehicle within the detection device’s sensor range, it will continually send an “OFF” signal to the appliance-controlling device. So, the appliance connected to this device will remain off.

2. Parked vehicle: When the car is parked in the driveway, the detection device sends an “ON” signal that’s on the “ts/light” topic. The home appliance is then turned on.

3. Vehicle departure: If the vehicle leaves the driveway, the detection device sends an “OFF” signal to the controlling device.

It’s possible to add more complicated control signals but, for this project, we’re keeping it simple.

Understanding the source code
There are two main parts of the code.

1. The detection device. The vehicle is monitored by the detection device’s ultrasonic sensor. If the distance in front of the sensor matches a set condition, it flags that car as detected.

if (int(sensor) < 100.00) {
    times1 = times1 + 1;
  }

To ensure it’s not a false detection, it repeats this five times to ensure the condition is true. If so, it sends an “ON” signal.

if(times1 == 5){
Serial.print(“ON”);
    times1 = 0;
delay(1200);}

2. Network communication
The common subscription is published to the ESP8266.

const char* topicSubscribe = “ts/light”;
const char* topicPublish = “ts/report”;

To access the network, both ESP8266 and Atmega328P are used. Anything from Atmega328p is directly published (“send”) as a control signal to the “ts/light” topic.

if (Serial.available()) {
String recivedData = Serial.readString();
temp_str = recivedData;
char temp[temp_str.length() + 2];
temp_str.toCharArray(temp, temp_str.length() + 1);
client.publish(topicPublish, temp);
}

Note: The ode snippet of the ESP8266.

Also, anything received over the MQTT is sent on the serial port from the ESP8266 to Atmega328p.

void Received_data(char* topic, byte* payload, unsigned int length) {
data_r_in_string = “”;
for (int i = 0; i < length; i++) {   

data_r_in_string = String(data_r_in_string + (char)payload[i]);

//Serial.print((char)payload[i]);
}

 Serial.print(data_r_in_string);
}

To provide a proper communication delay, the ESP function takes one second as a timeout. It will also consider anything received within that second as a single string.

Also, as one device is publishing on the “ts/light” topic, the other must be subscribed to the same topic if it’s to receive the message sent.

https://www.engineersgarage.com/wp-content/uploads/2021/08/VideoDemo.mp4

You may also like:


  • Raspberry Pi Server based Hotel/Restaurant Order Management System on IoT…

  • What are LoRa gateways and what types are available?

  • Arduino Based IoT Garden Monitoring System

  • TCP/IP Based IoT Communication with ThingSpeak Platform : IoT Part…

  • Introduction to Internet of Things: IOT Part 1

  • Transmission Control Protocol/Internet Protocol (TCP/IP) : IOT Part 28

Filed Under: Electronic Projects, PIC Microcontroller
Tagged With: Arduino, automation, circuit, communication, d2dcommunication, IoT, MQTT
 

Next Article

← Previous Article
Next Article →

Questions related to this article?
👉Ask and discuss on Electro-Tech-Online.com and EDAboard.com forums.


Tell Us What You Think!! Cancel reply

Log in to leave a comment:

Lost your password?

Don't have an account? Register here

Submit a Guest Post

submit a guest post

EE TECH TOOLBOX

“ee
Tech Toolbox: Wide Bandgap Semiconductors
Moving from silicon to GaN or SiC feels like a whole new ballgame, doesn’t it? It isn’t just about faster switching; it’s about managing the layout parasitics and thermal realities that come with that speed. This month’s Tech Toolbox features a curated eBook that tackles these design hurdles head-on.

EE Learning Center

EE Learning Center
“engineers
EXPAND YOUR KNOWLEDGE AND STAY CONNECTED
Get the latest info on technologies, tools and strategies for EE professionals.

HAVE A QUESTION?

Have a technical question about an article or other engineering questions? Check out our engineering forums EDABoard.com and Electro-Tech-Online.com where you can get those questions asked and answered by your peers!


RSS feed: EDABOARD.com Discussions. EDABOARD.com Discussions.

  • Trying to Understand Solid-State Transformers for AI Data Centers
  • Creating a Behavioral SPICE Model for a Custom VCXO/Oscillator
  • Microwave chamber monitoring
  • 3 stages ldo stability
  • How to Effectively Prevent Memory Leak & Fragmentation in RTOS-Based Embedded Systems

RSS feed: Electro-Tech-Online.com Discussions Electro-Tech-Online.com Discussions

  • Advice for an ESP32 Soil Tensiometer project with 5V sensors
  • Marantz SR4500 – CS49400 DSP reverse-engineering / custom active crossover
  • How does an air tag work?
  • Cheap ways to link 5 Keithley units and 4 BNC units?
  • Sony KV-29VL40 - 4 Blink error - IC001 Pin 17 high

Featured Tutorials

VHDL Series (1-24)

  • VHDL Tutorial 17: Design a JK flip-flop (with preset and clear) using VHDL
    VHDL Tutorial 17: Design a JK flip-flop (with preset and clear) using VHDL
  • VHDL Tutorial 18: Design a T flip-flop (with enable and an active high reset input) using VHDL
    VHDL Tutorial 18: Design a T flip-flop (with enable and an active high reset input) using VHDL
  • VHDL Tutorial – 19: Designing a 4-bit binary counter using VHDL
    VHDL Tutorial – 19: Designing a 4-bit binary counter using VHDL
  • VHDL Tutorial – 20: Designing 4-bit binary-to-gray & gray-to-binary code converters
    VHDL Tutorial – 20: Designing 4-bit binary-to-gray & gray-to-binary code converters
  • VHDL Tutorial – 21: Designing an 8-bit, full-adder circuit using VHDL
    VHDL Tutorial – 21: Designing an 8-bit, full-adder circuit using VHDL
  • VHDL Tutorial – 22: Designing a 1-bit & an 8-bit comparator by using VHDL
    VHDL Tutorial – 22: Designing a 1-bit & an 8-bit comparator by using VHDL
More Tutorials >

Recent Articles

  • AOS adds 600 V top-side-cooled MOSFETs
  • TDK adds 100 V, 10 μF MLCC
  • Teledyne e2v adds 1K and 8K sensors
  • Infineon PMIC supports high-voltage traction inverters
  • Infineon power stages support 300 A peak current

EE ENGINEERING TRAINING DAYS

engineering
Engineers Garage
  • Analog IC TIps
  • Connector Tips
  • Battery Power Tips
  • EDABoard Forums
  • EE World Online
  • Electro-Tech-Online Forums
  • EV Engineering
  • Microcontroller Tips
  • Power Electronic Tips
  • Sensor Tips
  • Test and Measurement Tips
  • 5G Technology World
  • Subscribe to our newsletter
  • About Us
  • Contact Us
  • Advertise

Copyright © 2026 Arrowfly LLC. All Rights Reserved. The material on this site may not be reproduced, distributed, transmitted, cached or otherwise used, except with the prior written permission of Arrowfly
Privacy Policy

Search Engineers Garage

  • Electronic Projects & Tutorials
    • Electronic Projects
      • Arduino Projects
      • AVR
      • Raspberry pi
      • ESP8266
      • BeagleBone
      • 8051 Microcontroller
      • ARM
      • PIC Microcontroller
      • STM32
    • Tutorials
      • Complete Sensor Guide
      • Engineering Deep Dives
      • AI
      • ARDUINO Compatible Coding
      • Audio Electronics
      • Battery Management
      • Beginners Electronics Series
      • Brainwave
      • Digital electronics (DE)
      • Electric Vehicles
      • EMI/EMC/RFI
      • EVs
      • Hardware Filters
      • IoT tutorials
      • LoRa/LoRaWAN
      • Power Tutorials
      • Protocol
      • Python
      • RPI Python Programming
      • Sensors
      • USB
      • Thermal management
      • Verilog
      • VHDL
    • Circuit Design
    • Project Videos
    • Components
  • Articles
    • Tech Articles
    • Insight
    • Invention Stories
    • How to
    • What Is
  • News
    • Electronic Product News
    • Business News
    • Company/Start-up News
    • DIY Reviews
    • Guest Post
  • Forums
    • EDABoard.com
    • Electro-Tech-Online
    • EG Forum Archive
  • DigiKey Store
    • Cables, Wires
    • Connectors, Interconnect
    • Discrete
    • Electromechanical
    • Embedded Computers
    • Enclosures, Hardware, Office
    • Integrated Circuits (ICs)
    • Isolators
    • LED/Optoelectronics
    • Passive
    • Power, Circuit Protection
    • Programmers
    • RF, Wireless
    • Semiconductors
    • Sensors, Transducers
    • Test Products
    • Tools
  • Learn
    • Design Guides
    • Learning Center
    • Tech Toolboxes
    • Tech Terms
    • Webinars & Digital Events
  • Resources
    • EE Training Days
    • LEAP Awards
    • Podcasts
    • White Papers
  • Guest Post Guidelines
  • Advertise
  • Subscribe