The voltage requirements for different circuits vary much like microcontroller-based circuits require 5 V, motor controller or relay driver circuit requires 12 V, and other digital circuits require 3.3 V.
If a circuit fails to receive its rated voltage and current, it will not work properly. So, it often makes sense to use a variable power supply.
In this circuit, we’ll design a lab power supply to provide voltage and current requirements for testing various circuits and devices.
Here are the lab’s essentials:
1. Must provide a regulated output
2. Must supply the required current to the circuit under test
3. Its output voltage must be adjustable to the required voltage
4. It should have a digital display for voltage and current
Several lab power supplies are available to meet all the above requirements, but they’re typically quite costly.
Other problems include:
- BIG in size
- Bulky and heavy
- Not portable
- Occupies a lot of space
Unfortunately, most electronics hobbyists, teachers, or students cannot afford such power supplies in their home or laboratory. But we have a solution.
Let’s build a compact, portable lab power supply with all of the essential features.
Specifications
1. Regulated output voltage with voltage regulator chips LM317 and LM7805
2. Adjustable output voltage: 1.25 to 23 V
3. Maximum output current 2 A
4. Linear and precise output voltage
5. Digital display for voltage and current
6. Dual supply (1) variable supply: 1.2 – 23V (2) fixed supply: 5 V
7. Compact and lightweight design
8. Portable and occupies little space
9. Total cost around 425 /- Rs
This power supply uses the popular voltage regulator IC LM317. It has a simple circuit and is easy to build. It also has a digital VA meter that displays the output voltage and current. Let’s get started.
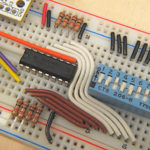
Circuit diagram

Circuit diagram of the lab power supply using IC LM317 and LM7805.
As shown in the above diagram, the circuit uses voltage regulator chips LM317 and LM7805, as well as a few additional components such as a bridge rectifier, capacitors, resistors, and potentiometer.
Circuit connections
- The primary of transformer T1 is connects with 230 V of AC input
- Its secondary connects with the AC input terminals of the bridge rectifier
- The bridge rectifier’s output is given as input to both ICs LM317 and LM7805
- One 5 K pot connects to the adjustment input of the LM317 IC
- LM7805’s 5 V output connects with the output socket and to the VCC supply of the digital VA meter
- The variable output of LM317 also connects to the output socket and provides a signal input of digital VA meter
Circuit operation
- T1 is 12-0-12 @ 2A transformer, which steps down the 230 V AC input to 24 V AC, providing it as input to the bridge rectifier D1
- The bridge rectifier gives rectified output that’s filtered to the pulsating DC via the capacitors C1 and C2 4. This output is provided as an input to both voltage regulator ICs
- The LM7805 generates regulated 5 V of output, which is used as supply voltage to the digital VA meter
- The 5 V output is also taken out from external connector so that it can be used for the external circuit
- The LM317 generates a variable output voltage from 1.2 to 23 V as the potentiometer varies
The equation for output voltage of LM317 is:
Vout = 1.25 (1 + R2/R1)
Here… R2 = 5 K pot and R1 = 220 ohm
So, when R2 = 0
Vout = 1.25 (1 + 0) = 1.25 V
And when R2 = 5000
Vout = 1.25 (1 + 5000/220) = 30 V*
*Note: the maximum output will be 23 – 24 V because the AC input is 24 V
This output is given as signal input (the yellow wire) to the digital VA meter. The varying output voltage is displayed on meter. Also, the variable output voltage is connected to external connector.
Circuit assembly and housing
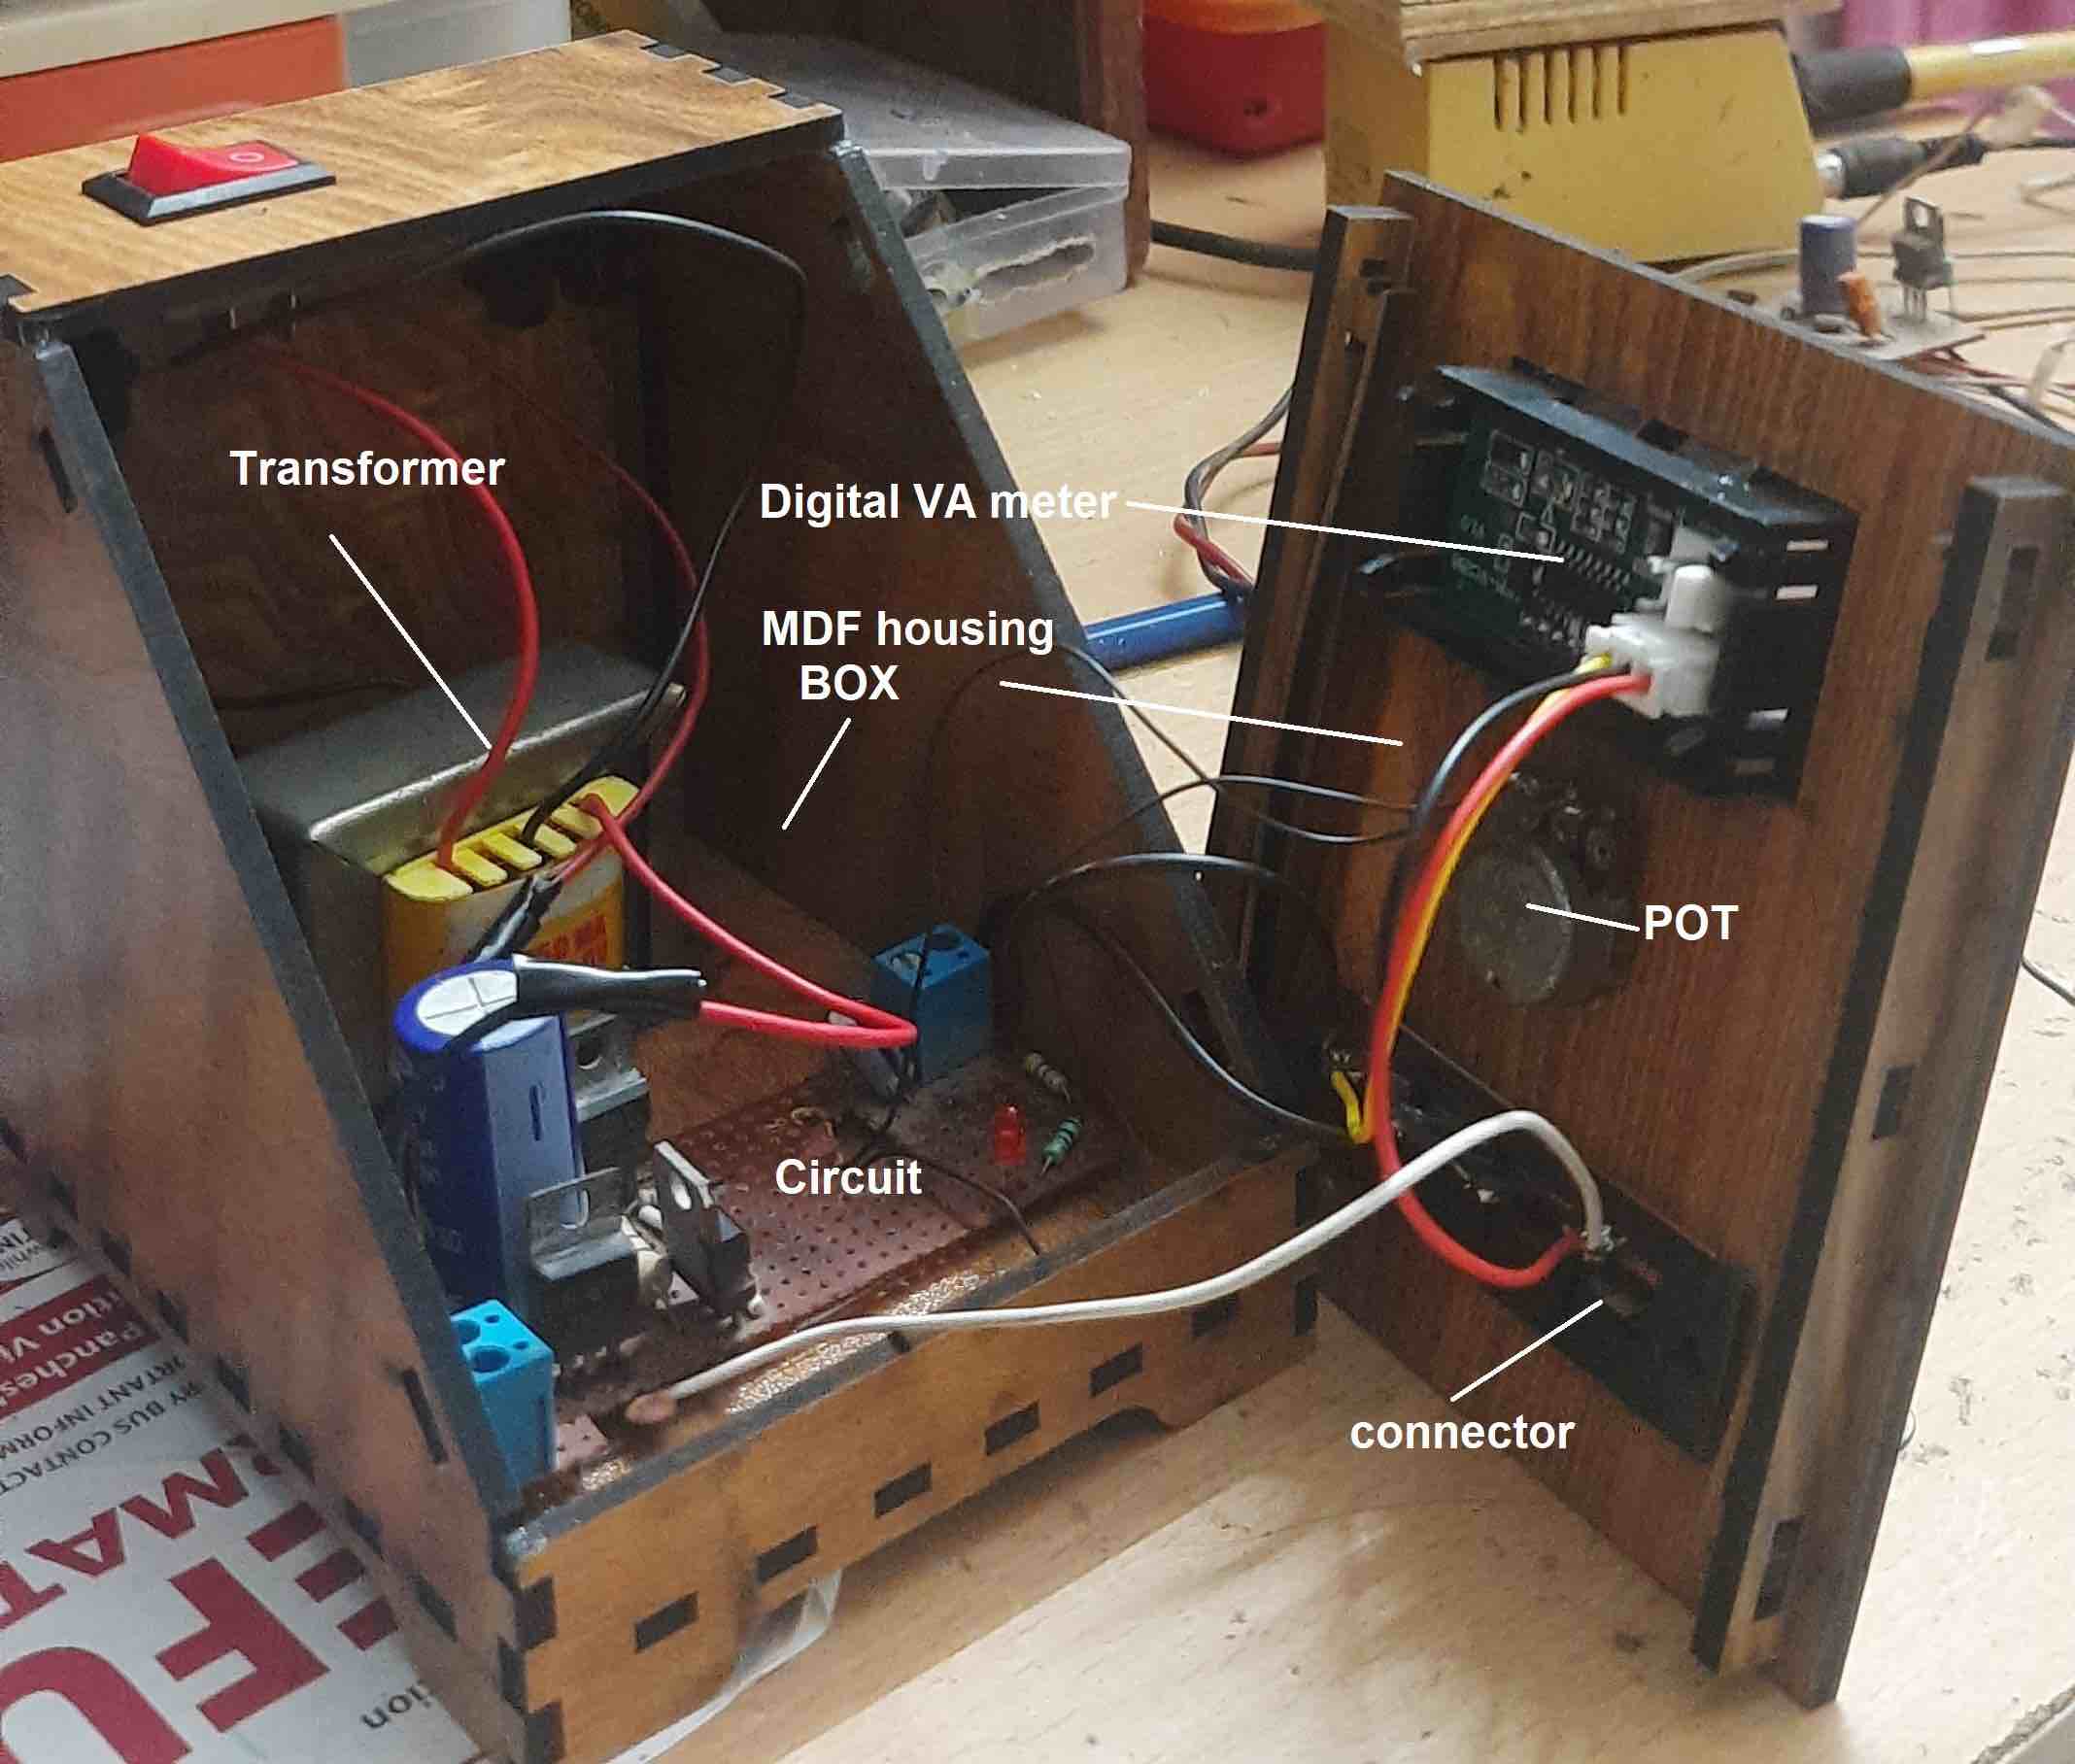
The complete circuit and a transformer are housed in a specially designed MDF box as shown below.
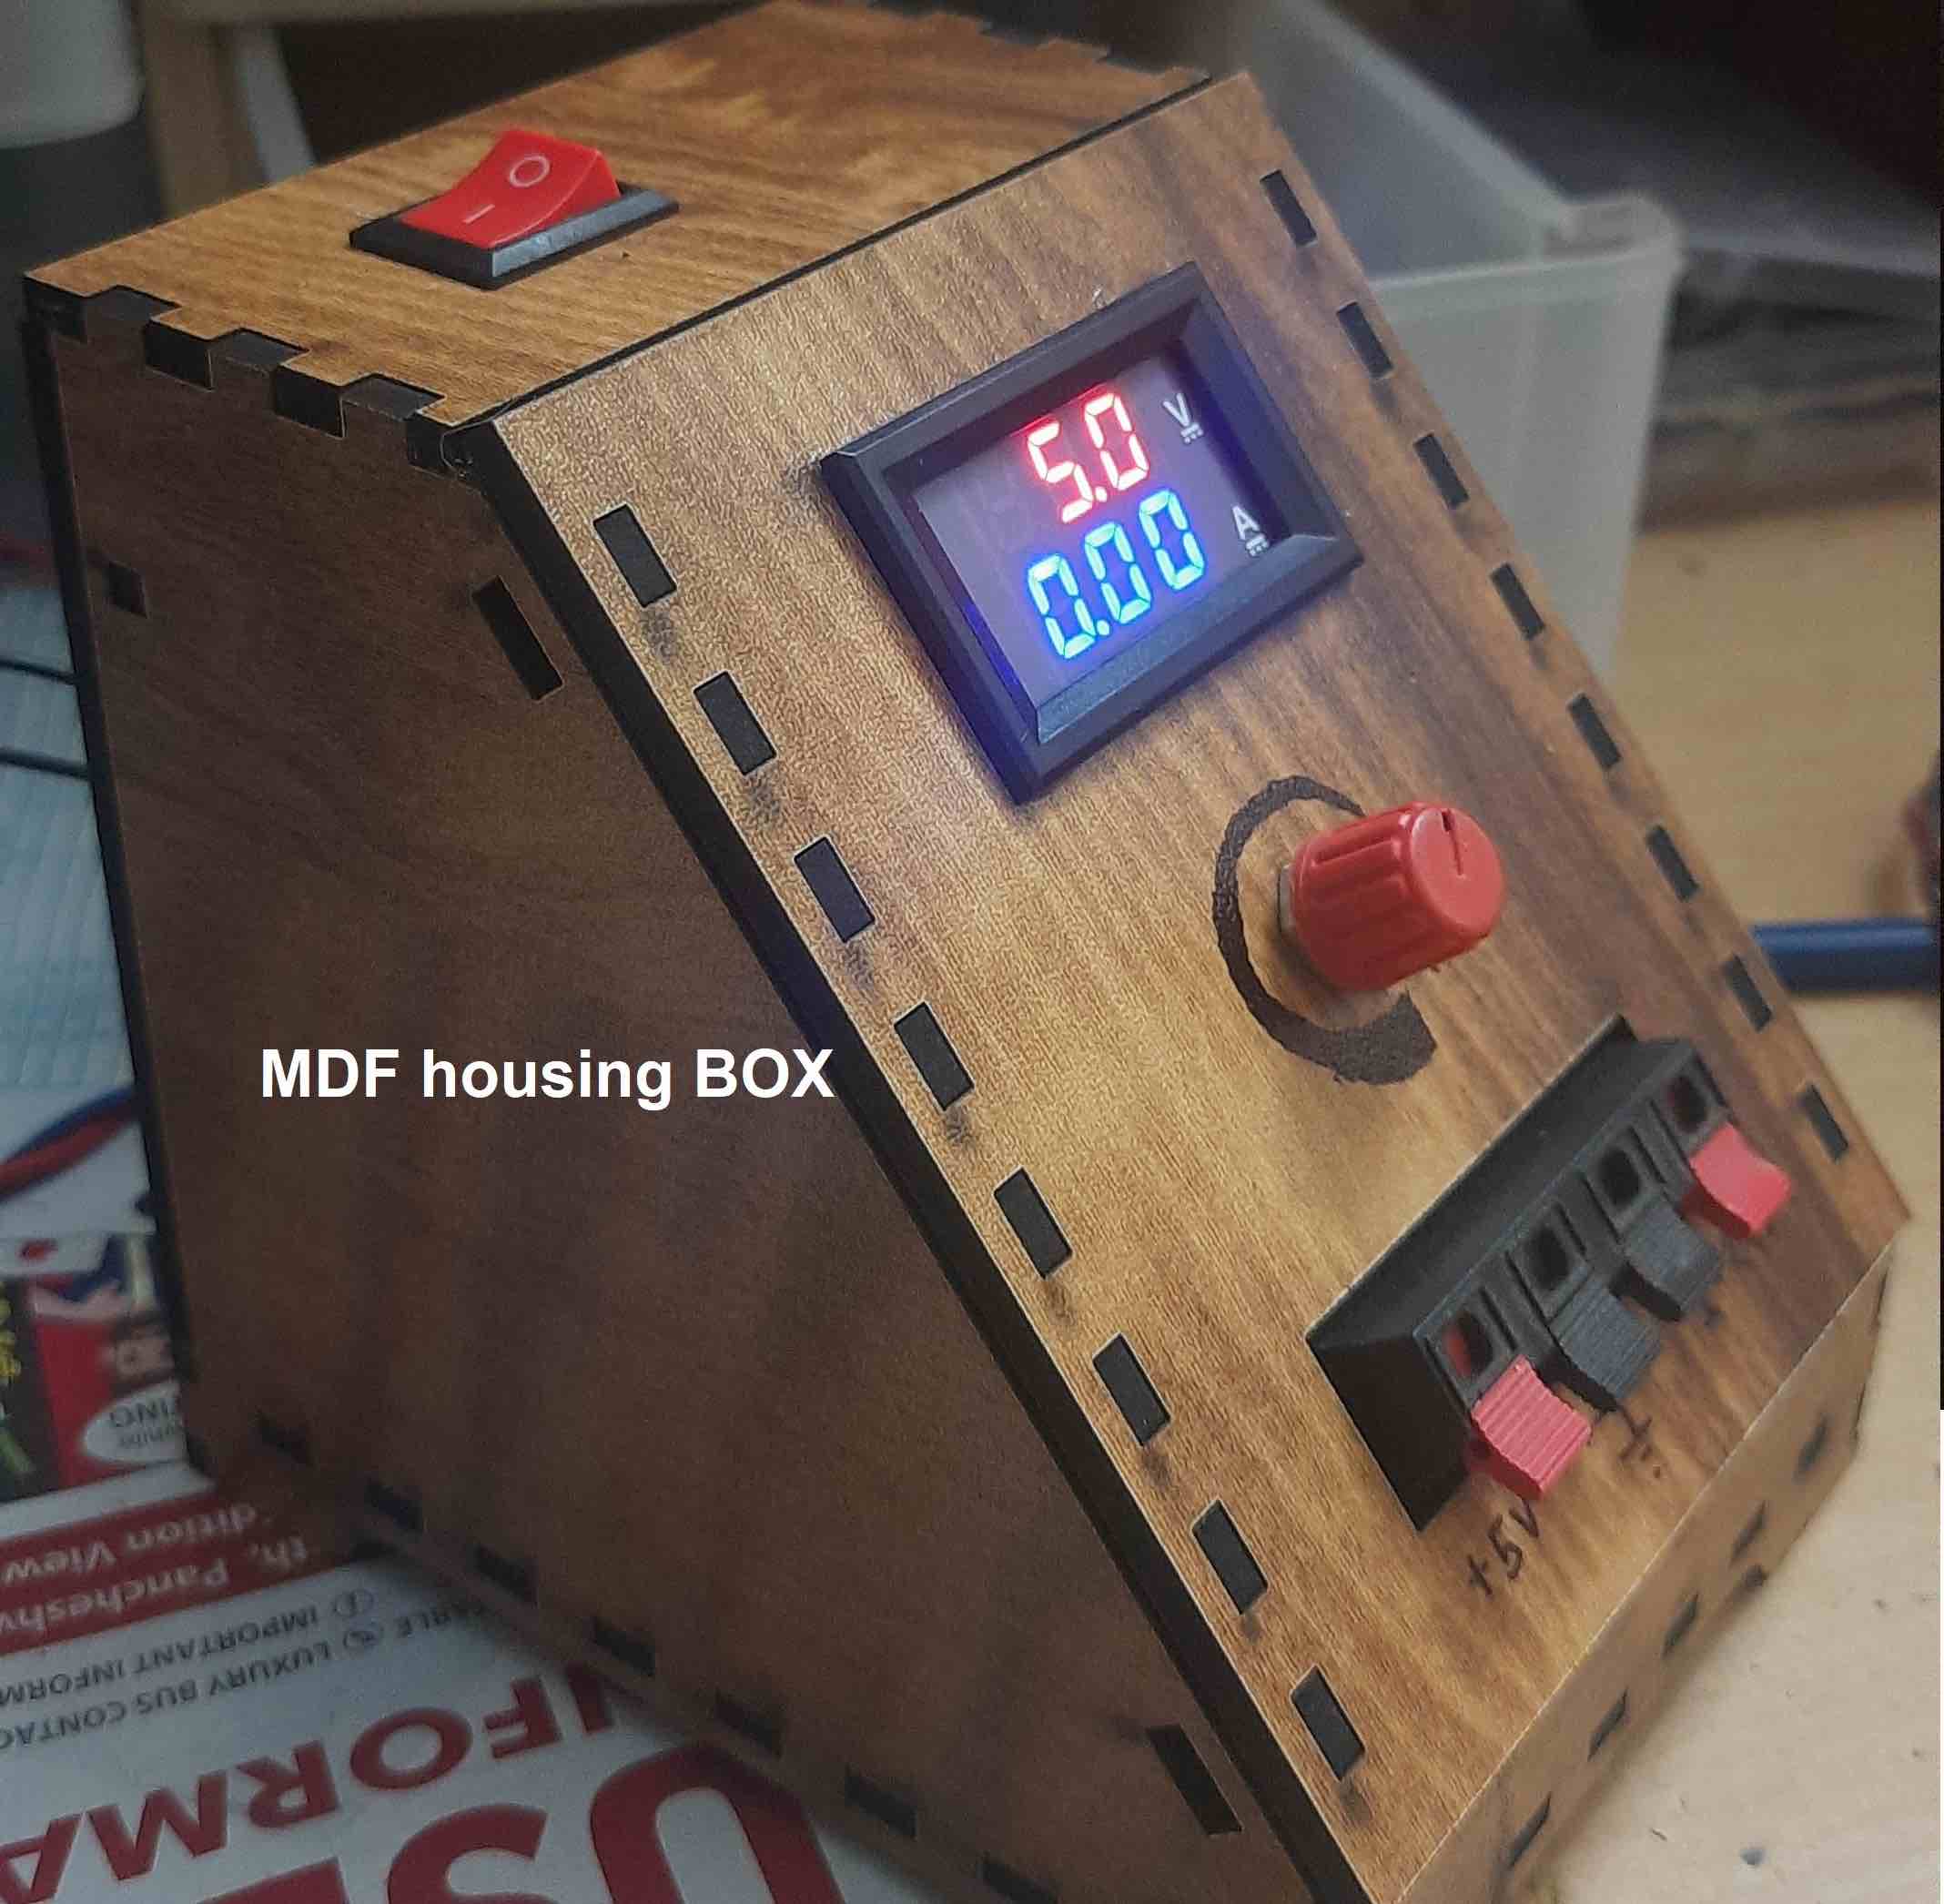
Prototype of the complete circuit and transformer designed in the MDF box.
The open MDF box with the different components.
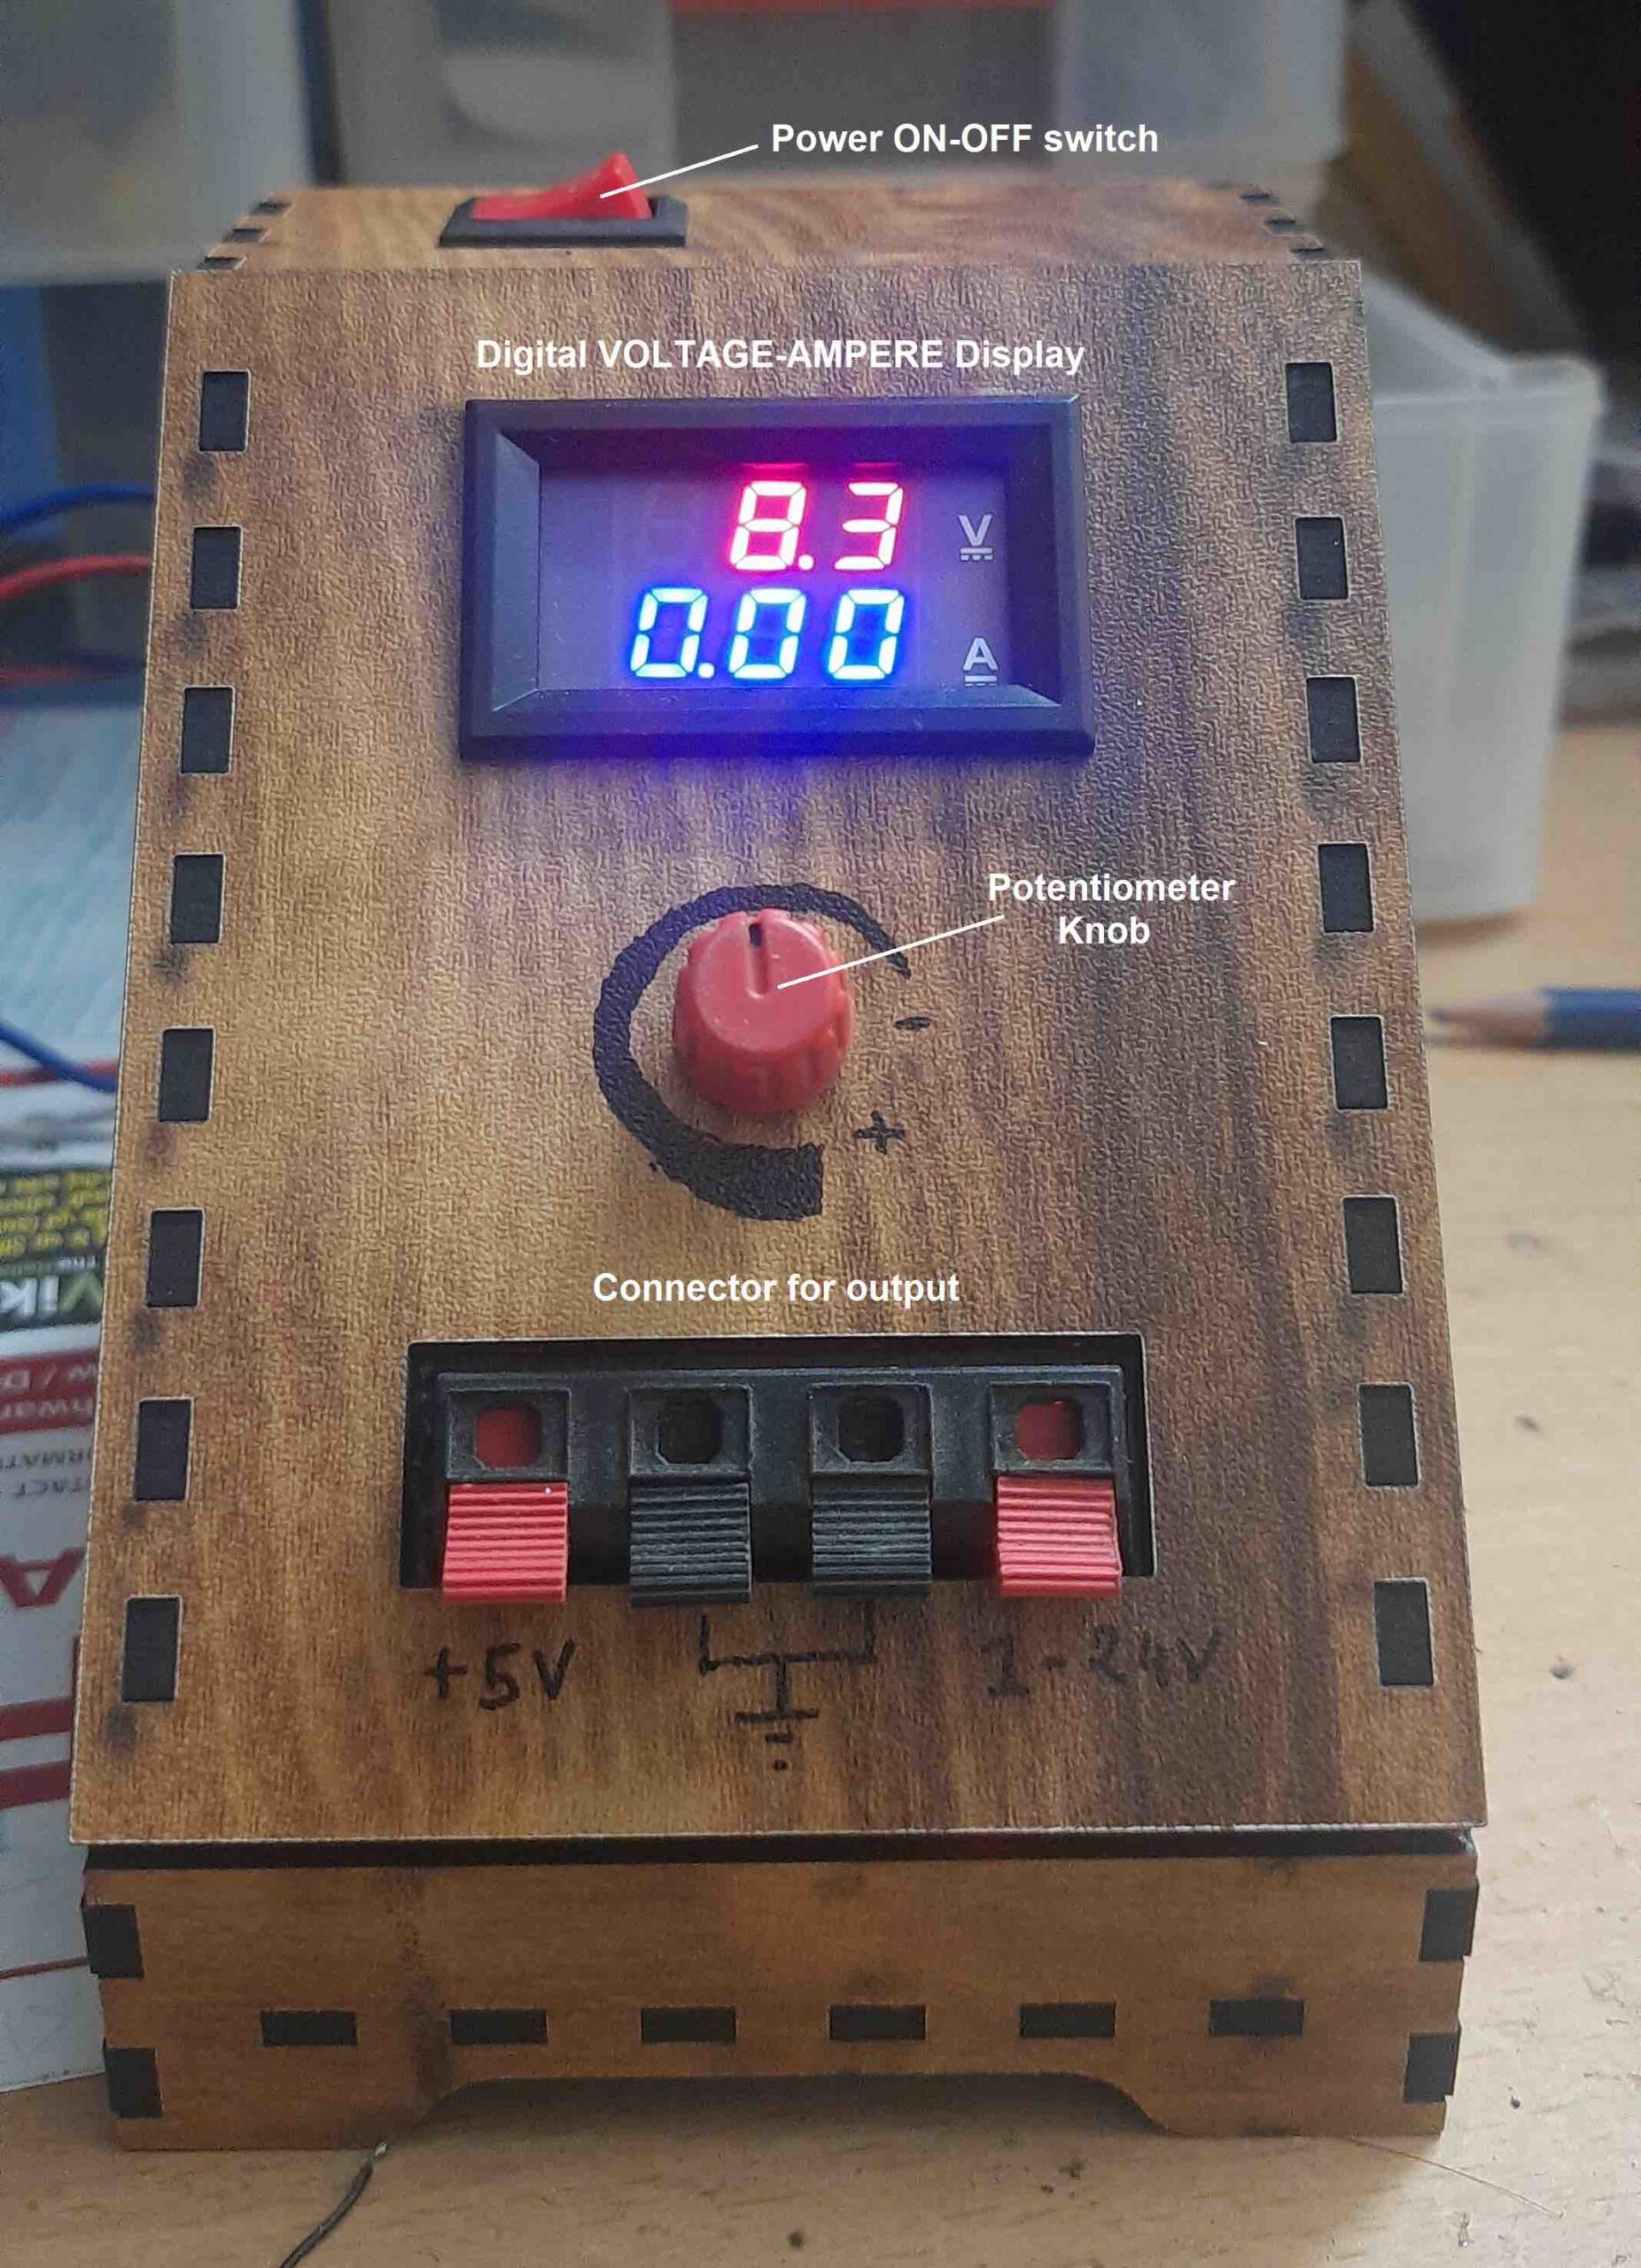
The digital display, potentiometer, and output connector are fixed in the front panel as shown in the below image. There’s also a power on-off switch on top.
The MDF box with the digital voltage ampere display, potentiometer knob, and switch.
Now, let’s break down the costs. Here is the BOM (bill of materials)…
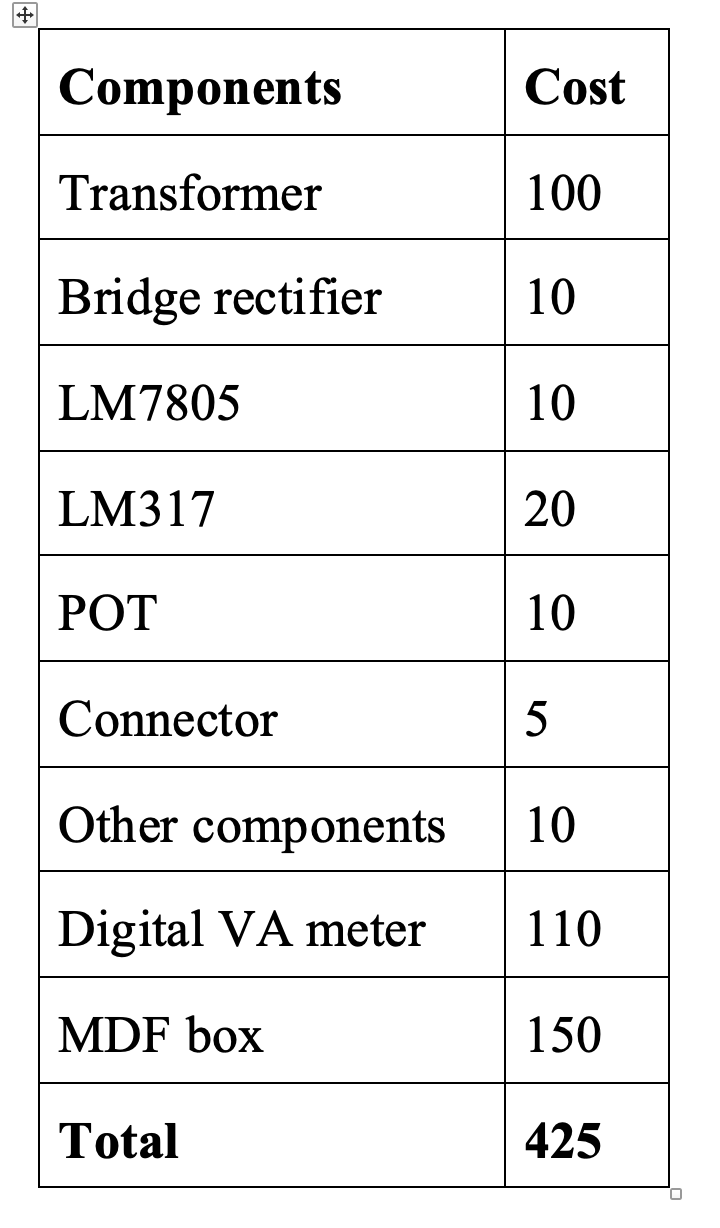
This simple lab power supply can be built at home for less than 500/- R. Now, it’s your turn!
Here is a YouTube video for a closer look at how to build this lab power supply at home:
You may also like:


Filed Under: Circuit Design

Questions related to this article?
👉Ask and discuss on Electro-Tech-Online.com and EDAboard.com forums.
Tell Us What You Think!!
You must be logged in to post a comment.