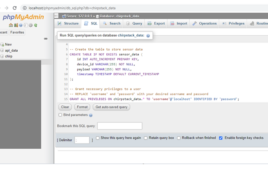
In this tutorial about LoRa technology, we’ll cover two methods for combining a gateway and server by sending data to a PHP script for storage in a database and redirecting data to an MQTT server. ChirpStack is a powerful LoRaWAN network server that offers versatile integration options for managing and visualizing data. Let’s delve into…
Part 1: Types of open-source LoRa gateways and servers
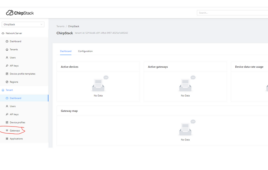
ChirpStack is an open-source LoRaWAN Network Server that provides a solution for managing and maintaining LoRaWAN networks. LoRaWAN is a low-power, wide-area networking protocol. This article offers a step-by-step guide to ChirpStack installation, allowing a stable Internet-of-Things (IoT) network foundation. To learn how to connect and set up the initial hardware, please refer to this article:…
How to control LEDs using the MIT App Inventor and Bluetooth
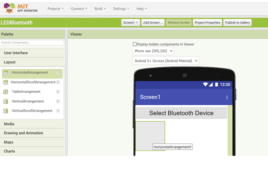
In a previous tutorial, we discussed the MIT App Inventor, a popular online platform for building mobile applications using visual programming. The platform is helpful for quickly prototyping Internet-of-Things (IoT) applications and simple embedded systems that interact with mobile devices. We already reviewed the platform’s architecture and user interface. Its visual programming platform is ideal for…
How to build a facial recognition system using ESP32-CAM
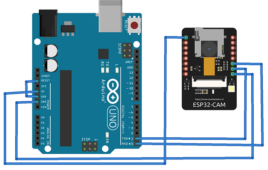
Facial recognition technology identifies individuals by analyzing and comparing their facial features. It uses biometric patterns and algorithms to map and distinguish a person’s unique characteristics. The technology has become an essential component of many security applications. Facial recognition is commonly used for access control, surveillance, biometric authentication, identity verification, criminal identification, attendance, emergency response,…
What temperature sensors are used for electronics and IoT devices?
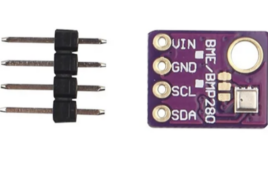
Temperature sensors are commonly used in embedded applications to monitor ambient temperature and prevent overheating. As a thermal management of the device, these sensors can issue a warning or trigger a cooling mechanism. However, the use of these sensors varies, depending on the application. For example, temperature sensors are used in: Industrial equipment for process…
How to design a rechargeable LED table lamp
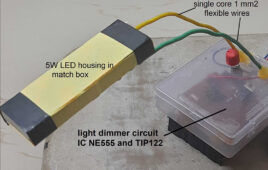
In this mini do-it-yourself (DIY) project, we’ll design an LED table lamp that’s battery-operated and rechargeable. It will also feature light dimming so you can adjust the lamp. There are two basic types of lamps available on the market. A typical one with a 3 to 5-W LED bulb that works on a 230 V…
How to design a lab power supply at home
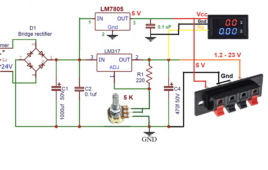
The voltage requirements for different circuits vary much like microcontroller-based circuits require 5 V, motor controller or relay driver circuit requires 12 V, and other digital circuits require 3.3 V. If a circuit fails to receive its rated voltage and current, it will not work properly. So, it often makes sense to use a variable…